What's inside
As an Amazon Associate I earn from qualifying purchases. This post may contain affiliate links at no extra cost to you.
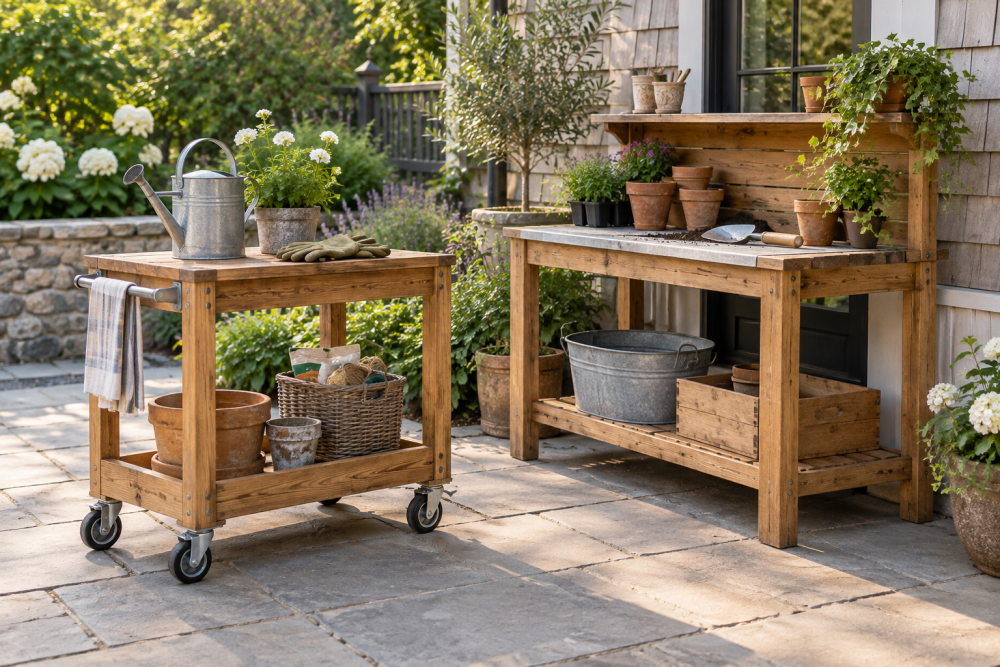
A wooden serving cart is a useful weekend project: it gives you extra surface area for meals, drinks, or gardening supplies, while the removable tray top can travel from the kitchen to the patio. This version uses common lumber, four wheels, and a tray that sits in a shallow frame rather than being permanently attached.
Contents
Project overview and skill level
This is an intermediate project because the cart must stay square, roll smoothly, and support a loaded tray without racking. Allow one full day for cutting and assembly, plus another day for glue and finish to cure. The finished cart is approximately 32 inches high, 24 inches wide, and 16 inches deep. Adjust those dimensions if you want a lower drinks cart or a wider outdoor serving surface.
| Material choice | Advantages | Drawbacks | Best use |
|---|---|---|---|
| Pine or common fir | Inexpensive, easy to cut | Soft, dents easily, may warp | Indoor cart or painted project |
| Poplar | Stable and paints well | More expensive, plain grain | Clean painted finish |
| Oak or maple | Hard, attractive, durable | Costs more and needs sharper tools | Furniture-quality indoor cart |
| Cedar | Light and handles occasional outdoor use | Soft and can split near screws | Covered patio use |
Materials and tools
Buy two 1×4 boards for the tray, two 1×3 boards for tray ends, four 2×2 legs, and enough 1×4 stock for the lower frame and side rails. Add a 24-by-16-inch panel for the tray bottom and a 24-by-16-inch panel or edge-glued boards for the cart’s fixed lower shelf. Actual 1x lumber measures about 3/4 inch thick, so check dimensions before cutting.
You will also need four 3-inch locking casters, wood glue, 1 1/4-inch and 2-inch screws, sandpaper, and a finish suited to the location. These 3-inch locking swivel casters are a better choice than small furniture wheels because they roll over grout lines and threshold edges more reliably. Use a drill, countersink bit, square, clamps, and a saw. A pocket-hole jig is convenient, but ordinary countersunk screws work just as well if you plug or fill the holes.
Cut list and preparation
Cut four legs to 30 inches. Cut the lower shelf panel to 22 1/2 by 14 1/2 inches so it fits between the legs and leaves room for a surrounding frame. Cut two long lower rails to 22 1/2 inches and two short rails to 14 1/2 inches. For the tray, cut two long sides to 24 inches, two ends to 16 inches, and a bottom panel to 22 1/2 by 14 1/2 inches.
Before assembly, inspect every board for twist. Lay each piece on a flat surface and reject boards that rock badly. Mark the best face of each board. Sand exposed faces with 120-grit paper, then 180-grit if you plan to use a clear finish. Do not round edges yet; square edges make layout and assembly easier.
Build the cart base
Assemble the lower shelf frame first. Apply glue to the rail ends, clamp the rectangle square, and drive two 2-inch screws through each joint. Measure both diagonals; they should match within 1/8 inch. If they do not, push the longer diagonal inward before the glue sets.
Position the frame 5 inches above the bottom of the legs. Clamp one leg at each corner, keeping the outside faces flush, and attach the frame with glue and 2-inch screws. Predrill holes in the legs; a screw driven into the end grain without a pilot hole can split the leg. Add the lower shelf panel inside the frame with glue and 1 1/4-inch screws spaced about 8 inches apart.
Add an upper support frame directly below the tray. Use the same 22 1/2-by-14 1/2-inch inside dimensions, or build a narrow ledge from 1×2 stock. The purpose is to keep the removable tray from sliding sideways. Leave no more than 1/8 inch of total clearance around the tray. Too much clearance makes the cart feel loose; too little causes binding after seasonal humidity changes.
Make the removable tray top
Set the tray sides and ends on a flat surface with their bottom edges aligned. Glue and screw the corners together, checking for square by matching the diagonals. Install the tray bottom from underneath so the fasteners are hidden. If using a solid panel, leave a small 1/16-inch gap around the edges for movement, especially with pine or outdoor lumber.
For easier carrying, drill two 1-inch finger holes in the long sides, centered about 5 inches from each end. Use a hole saw, then smooth the openings thoroughly. Alternatively, install two recessed handles. Avoid surface-mounted handles on the underside because they can prevent the tray from sitting flat on a table.
Test the tray on the cart before finishing. It should drop into place without force and lift out with both hands. If it sticks, find the tight spot with a pencil mark and remove small amounts with a plane or sanding block rather than widening the whole frame.
Install the casters and check stability
Turn the cart upside down and mount the casters at the leg ends. Keep each mounting plate at least 1/4 inch from the edges to reduce splitting. Use the screws supplied with the casters only if they are shorter than the wood thickness available; screws that break through the legs are a sharp hazard.
Put locking casters on at least two diagonal corners. Four locking casters stop the cart more securely, but they can make steering awkward on uneven floors. Roll the empty cart, then load the tray with roughly 40 pounds and test it again. If it sways, add a diagonal brace or a second rail near the back. A cart that feels stable empty may rack noticeably when loaded.
Finish for indoor or outdoor use
Ease all exposed edges with 180-grit sandpaper, paying special attention to the tray handles and corners. For a painted indoor cart, use a bonding primer followed by two coats of durable enamel. For visible wood, apply two or three thin coats of a hardwax oil or polyurethane, sanding lightly between coats as directed. These water-based polyurethane finishes dry faster and yellow less than many oil finishes.
For covered outdoor use, seal every face and especially the end grain before assembly if possible. Use exterior-rated glue and stainless or coated screws. Even then, do not leave the cart in standing water. Freeze-thaw cycles and trapped moisture under the tray will eventually cause swelling, cracked finish, or loose joints.
What to buy and how to maintain it
Spend money on straight lumber, good casters, and a square rather than decorative hardware. The combination square is especially useful for setting rails and checking leg alignment. A cheaper pine cart is perfectly adequate for occasional indoor serving; hardwood is worthwhile only if you want a furniture finish or expect frequent use.
Retighten caster screws after the first few loaded trips. Wipe spills promptly, lift the tray rather than dragging it, and inspect the tray clearance at the start of each season. If the cart begins to wobble, check caster mounting screws and measure the frame diagonals before assuming a leg has warped.