What's inside
As an Amazon Associate I earn from qualifying purchases. This post may contain affiliate links at no extra cost to you.
To use a hand planer, set its blade for a fine cut, secure the workpiece, plane with the grain in controlled strokes, and check your progress often. A manual bench plane is best for careful smoothing and small adjustments; an electric hand planer removes material faster but needs a lighter touch and more safety precautions.
As an Amazon Associate we earn from qualifying purchases at no extra cost to you.


Contents
Choose the right planer for the job
For smoothing a board, easing a sharp edge, or trimming a door a little at a time, a manual plane gives you control. An electric hand planer is useful for quickly shaving an edge or reducing a small high area, but it can leave grooves or hollows if you linger or tilt it. Neither tool is a substitute for a jointer or thickness planer when you need to flatten or size a large board precisely.
| Feature | Manual bench plane | Electric hand planer |
|---|---|---|
| Typical cutting width | About 1⅝–2⅜ in. (41–60 mm) | About 3¼ in. (82 mm) |
| Typical cut depth | Adjustable; start around 0.001–0.005 in. (0.03–0.13 mm) for smoothing | Often adjustable up to about ⅛ in. (3 mm) per pass; use a small setting for control |
| Power and weight | Hand-powered; commonly about 2–5 lb (0.9–2.3 kg) | Commonly 5–8 A corded; roughly 5–8 lb (2.3–3.6 kg) |
| Best suited to | Fine smoothing, small corrections, and quiet work | Fast stock removal on edges and limited surface areas |
| Common trade-off | Requires a sharp blade and practice to set it | Can leave step marks; produces chips and requires careful handling |
These are typical ranges, not specifications for every model. Check your tool’s manual for its actual capacity and adjustment method.
How to use a manual hand planer
1. Secure and inspect the board
Clamp the work so it cannot shift, with the area to be planed accessible and supported. Remove nails, screws, grit, or other debris that could damage the edge. Mark the target area with pencil lines; they make uneven removal easier to spot.
2. Set the blade for a fine cut
Retract the blade before making adjustments. On a typical bench plane, the iron should sit square across the mouth, with its edge projecting only slightly below the sole. A very fine shaving is a good starting point for smoothing. If the plane takes no shaving, advance the iron in tiny increments; if it digs in or feels hard to push, retract it.
Check that the blade is sharp and that the cap iron, if fitted, is seated securely. A dull edge crushes fibers and takes more force, while a crooked iron tends to cut more on one side. Make a test pass on scrap before working on the finished piece.
3. Find the grain direction
Look at the long grain lines and the way fibers rise across the surface. Plane in the direction that lets the fibers lie down rather than lifting and tearing them. Test a short stroke at each end of the board if the grain is difficult to read. Reversing direction may help where the grain changes, but keep cuts light around knots and figured grain; these areas can tear out even with a sharp plane.
4. Take even strokes and check the result
Stand with a stable stance, hold the front knob and rear handle, and keep the sole flat as the plane enters and leaves the cut. Apply pressure near the front at the start, then shift it toward the rear as the plane travels forward. Use a smooth stroke rather than pushing down hard. For an edge, keep the tool square to the face; for a small high spot, make short, controlled passes over the marked area and feather them outward.
Check with a straightedge or square after a few strokes. A plane removes material; it does not automatically make a surface flat. Avoid repeatedly cutting only the center of a broad area, which can create a hollow. On an edge, a few light passes followed by a check are safer than trying to reach the final fit in one cut.
How to use an electric hand planer safely
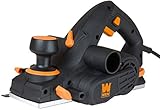
The basic approach is similar, but an electric planer removes material quickly. Read the manufacturer’s instructions, set a shallow depth, and keep both hands on the handles. Wear eye and hearing protection; connect dust extraction if the tool supports it. Keep the cord clear of the cutting path, and wait for the cutter to stop before setting the tool down or making adjustments.
- Rest the front shoe flat on the work before starting the motor.
- Let the cutter reach speed, then feed the tool steadily with light pressure.
- Keep the base level through the full pass. Tilting at the start or end can leave a dip or step.
- For a small high spot, take several shallow passes and check with a straightedge between them.
- Unplug the tool before changing blades, clearing a jam, or inspecting the cutter.
To smooth an edge, guide the planer along the board without stopping over one point. To flatten a small area, use the tool only for rough reduction, then check the surface and finish with a manual plane or sanding block if you need a more controlled result. For broad, accuracy-critical flattening, use an appropriate machine or ask an experienced woodworker to help.
Common problems and upkeep
- Tear-out: Try planing with the grain, reduce the cut, and sharpen the blade. On stubborn grain, take very light passes.
- Uneven edge: Recheck that the work is clamped and the plane is held square. A square helps reveal whether the edge is leaning.
- Chatter or rough shavings: Inspect the blade for dullness or looseness and check that the plane’s sole is clean.
- Grooves from an electric planer: Reduce the depth, keep the shoes flat, and maintain a steady feed. Don’t stop with the cutter running on the work.
After use, remove dust and chips, especially around the blade and sole. Keep metal parts dry to limit rust, and store the tool with the blade retracted or otherwise protected. Blades are the main wear item: they need sharpening or replacement when cuts become rough or require noticeably more effort. Electric models also have cutter blades and moving parts that need inspection according to the manual. Avoid forcing a dull tool; it makes inaccurate cuts more likely and can damage the work.
Quick answers
How do you use a hand planer on a narrow edge?
Clamp the board securely, set a fine cut, and guide the plane square to the face in smooth strokes with the grain. Check the edge often with a square.
Can an electric hand planer flatten a board?
It can reduce a small high spot, but keeping a broad surface flat and even is difficult with a handheld tool. Use shallow passes and a straightedge for limited corrections; choose a jointer, planer setup, or other suitable method for larger work.