What's inside
As an Amazon Associate I earn from qualifying purchases. This post may contain affiliate links at no extra cost to you.
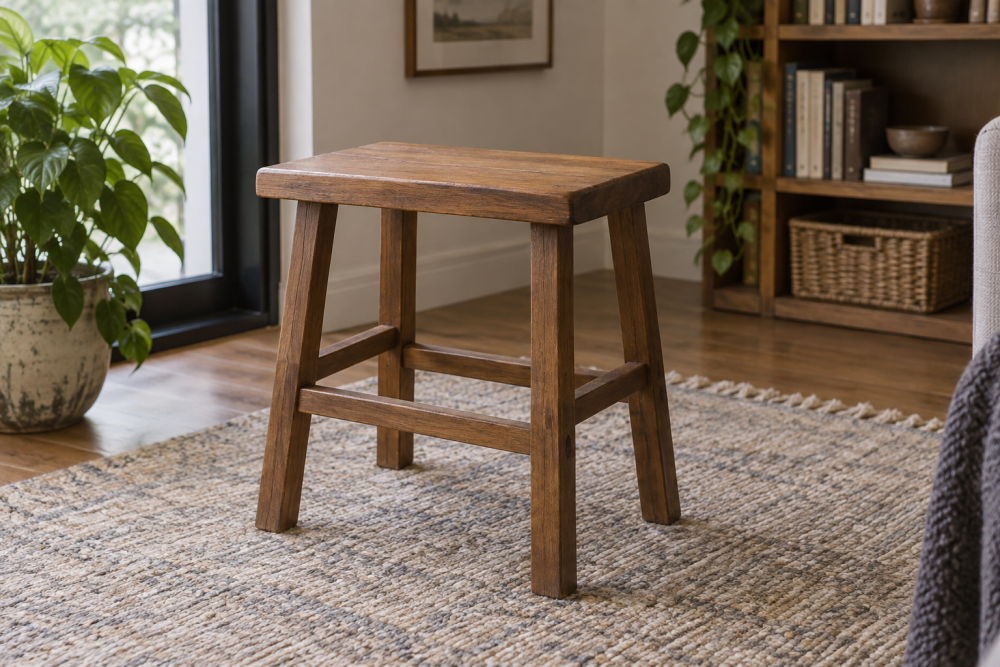
This hardwood stool is a good intermediate woodworking project: the seat involves careful shaping, while the splayed legs demand accurate layout. The finished stool is about 18 inches high, with a 14-by-10-inch seat and legs that spread roughly 2 inches farther than the seat footprint at the floor. Build it in a dry season if possible, when wood movement is easier to predict and glue cures reliably.
Contents
Materials and tools
Use straight, dry hardwood for the seat, such as maple, beech, ash, or white oak. A seat blank made from two or three boards is more stable and easier to find than a single wide board. Buy about 6 board feet of straight hardwood boards for the seat, legs, and rails.
- Seat blank: two or three pieces totaling 15 by 11 by 1-1/2 inches
- Four legs: 1-1/2-by-1-1/2-inch stock, each 18-1/2 inches long
- Four rails: 3/4-by-2-1/2-inch stock, cut oversize
- Eight 1/4-inch-diameter dowels, or supplies for mortise-and-tenon joints
- Wood glue, clamps, a flush-cut saw, and a random-orbit sander
- Compass, bevel gauge, marking knife, and a straightedge
A band saw makes the seat easier to shape, but a jigsaw with a sharp coarse blade also works. A block plane or spokeshave is better than relying entirely on sanding. For the concave seat, use a round-nose router bit only if you already have good control of a router; it removes material quickly but can leave gouges and chatter.
Design and cut list
The seat is a shallow saddle: lower through the middle from front to back, with the perimeter left higher and crisp. Mark a centerline down the 14-inch length. The deepest point should be about 3/8 inch below the original surface, located near the center of the seat rather than directly at either end.
| Part | Finished size | Purpose |
|---|---|---|
| Seat | 14 × 10 × 1-1/4 in. | Shaped sitting surface |
| Legs | 1-1/4 × 1-1/4 × 18 in. | Four splayed supports |
| Side rails | 3/4 × 2-1/4 × 8 in. | Connect front and rear legs |
| End rails | 3/4 × 2-1/4 × 5 in. | Connect the leg pairs |
Those dimensions assume a 1/4-inch shoulder or tenon at each rail end. Adjust the rail length to match your actual leg spacing. Dry-fit the parts before cutting all four rails; a small error repeated four times can make the frame twist.
Prepare and shape the seat
Joint the mating edges, spread glue evenly, and clamp the seat boards on a flat surface. Use moderate pressure—enough to close the seams, not enough to squeeze out nearly all the glue. After curing overnight, flatten both faces and mark the 14-by-10-inch outline.
Cut the outline, then round the corners to about a 1-1/2-inch radius. Leave the top surface flat for layout. Draw a second outline 1 inch inside the edge; this is your “do not remove” boundary for the saddle.
Remove material in shallow passes. With a plane or spokeshave, work from each end toward the center to reduce tear-out. Check with a flexible ruler or a cardboard template across the width every few minutes. The center should be approximately 3/8 inch lower than the perimeter, and the transition should be gradual. A sudden hollow creates pressure points and is difficult to repair.
Round the top edges to a comfortable 1/8-inch radius. Do not round the underside where the legs and rails attach. Sand through 120, 150, and 180 grit. Stop at 180 or 220 grit; finer sanding can make some finishes look uneven rather than smoother.
Lay out the splayed legs
Mark the underside of the seat with a centered leg position at each corner, leaving about 1-1/2 inches from the nearest edges. The legs should lean outward along the length and width of the stool. A practical target is 4 degrees of splay in each direction. On an 18-inch leg, that produces roughly 1-1/4 inches of outward movement per direction.
Use a bevel gauge to transfer the angles to the leg ends. Cut the bottom ends so they sit flat on the floor, then cut the top ends to match the underside of the seat. Mark every leg and its orientation. Reversing one leg during assembly is a common failure that leaves the stool rocking.
For a beginner-friendly joint, use two 1/4-inch dowels per leg into the underside of the seat, with the dowels angled to follow the leg. Mortise-and-tenon joints are stronger and cleaner, but they require more accurate angled layout.
| Joint | Difficulty | Strength and trade-off |
|---|---|---|
| Two dowels per leg | Moderate | Affordable and adequate if holes are accurately aligned |
| Loose tenon | Moderate to high | Strong and forgiving, but requires a dedicated cutter or careful mortising |
| Traditional mortise and tenon | High | Best mechanical joint, but the angled shoulders take time to fit |
Build and assemble the frame
Cut the rails, then dry-assemble the legs and rails on a flat bench. Keep the rail tops about 1/2 inch below the seat underside so the seat remains visually light. Check that the frame sits without rocking before drilling any holes.
Glue the side pairs first, using a square and diagonal measurements to keep them parallel. After those assemblies cure, connect them with the end rails. Clamp lightly and measure both diagonals; they should be within 1/8 inch of each other. If the frame is forced into square with excessive clamp pressure, it may spring back after the glue dries.
Attach the seat with the chosen dowels or tenons. Do not depend on screws alone in end grain. If you use screws, drill oversized clearance holes in the rails or use figure-eight fasteners so seasonal seat movement is not restrained. Hardwoods split easily, so drill pilot holes and keep fasteners at least 3/4 inch from an edge.
Finish and test
Ease every exposed corner, then sand the assembled stool by hand with 180 grit. Test it on a flat floor before finishing. If it rocks, identify the long leg with a straightedge and trim its foot in tiny increments—1/32 inch at a time. Removing too much material is the fastest way to create a new problem.
For a practical finish, apply two or three thin coats of water-based satin polyurethane. It dries quickly and keeps pale woods from ambering as much as oil varnish. Oil-based finish is cheaper and often gives oak or ash a warmer look, but it takes longer to cure and has stronger fumes. Lightly sand between coats with 320 grit, remove dust, and wait until the finish has fully hardened before regular use.