What's inside
As an Amazon Associate I earn from qualifying purchases. This post may contain affiliate links at no extra cost to you.
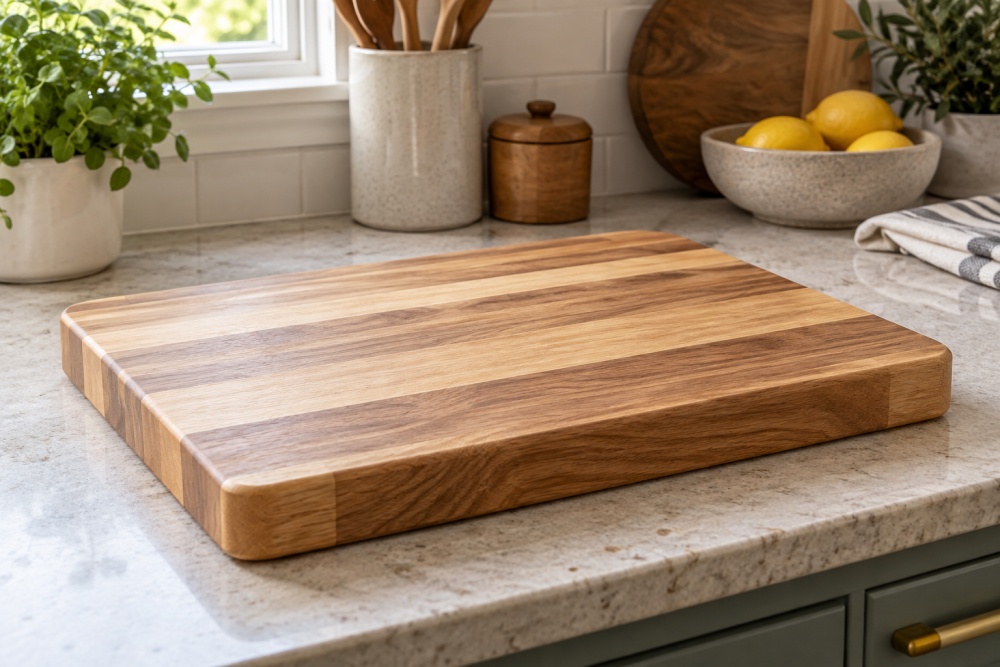
A countertop bread board with a crumb channel is one of the few cutting boards worth leaving out permanently. Unlike a standard flat board, the routed groove around the perimeter catches crumbs and keeps them from scattering across the counter, and the extra thickness keeps it stable when you’re sawing through a crusty boule. It’s a straightforward one-afternoon build, but the details – wood choice, groove placement, and finish – determine whether it stays flat and useful or warps and traps dough.
Contents
Choosing Wood That Stays Flat
For a bread board you want a closed-grain hardwood that resists splitting and doesn’t impart flavor. Hard maple is the workhorse. White oak and walnut work well too, cherry is softer but still usable. Avoid red oak (too porous for a crumb groove that will collect moisture) and avoid softwoods like pine or cedar – they score too easily and will dull quickly under a serrated bread knife.
Use kiln-dried stock at 6-8% moisture content and at least 1-1/4 inch thick. Thinner boards look fine at first but cup over time, especially if you only oil one side. If you are gluing up from narrower boards, rip and joint the edges so you get tight, gap-free joints. Alternate the growth rings (one board crown up, next crown down) to counteract movement. Edge-glued maple without proper clamping pressure is the most common failure here – starved joints open up after a few wash cycles.
| Wood | Janka Hardness | Workability | Cost | Best For |
|---|---|---|---|---|
| Hard Maple | 1,450 lbf | Moderate, blunts tools faster | $$ | Most durable, light color shows crumbs less |
| White Oak | 1,360 lbf | Good, distinct grain | $$ | Good strength, tolerates moisture well |
| Walnut | 1,010 lbf | Easy to rout and sand | $$$ | Dark, premium look, slightly softer |
| Cherry | 950 lbf | Very easy, burns if router dwells | $$ | Budget-friendly, will darken with age |
| Beech | 1,300 lbf | Good, similar to maple | $ | Cheaper alternative if you can find clear stock |
The cheaper option is fine here. Beech or soft maple will make a perfectly serviceable bread board for half the price of walnut. Save walnut for a display piece – for daily bread cutting, hardness and stability matter more than figure.
Tools and Materials
You don’t need a shop full of tools, but a router is non-negotiable for a clean crumb channel. A plunge router with edge guide gives you depth control and a straight offset from the edge. A palm router can work if it has a good edge guide, but it will take multiple shallow passes.
You will need: hardwood blank 16 to 18 inches wide x 22 to 24 inches long x 1-1/4 to 1-1/2 inches thick (glue-up or single slab), a 1/2-inch or 3/4-inch core box router bit (round-nose), an edge guide or template, 80/120/180/220-grit sandpaper, food-safe wood glue (Titebond III), clamps, and a random orbit sander. For finish, use a food-grade mineral oil and wax finish – not polyurethane or Danish oil.
Dimensions and Layout
Size it for the bread you actually bake. For standard sourdough boules and sandwich loaves, 16 x 22 inches is ideal. Smaller than 14 x 18 and a large loaf will hang over the groove; larger than 18 x 24 gets unwieldy to move and wash.
Mark the crumb channel 1 to 1-1/4 inches in from the edge on all four sides. The groove itself should be 5/8 to 3/4 inch wide and 5/16 to 3/8 inch deep with a rounded bottom. Any shallower and crumbs bounce out, any deeper and you weaken the rim – a 1/2-inch deep groove on a 1-1/4-inch board leaves only 3/4 inch of wood and the outer lip can chip if the board is dropped. Round the ends of the groove with the same radius as the bit width so the channel forms a continuous loop. Leave a 2-inch gap on one short side if you want a pour-spout to brush crumbs into the trash, or keep it closed for a cleaner look.
Build the Blank
If gluing up, mill your boards to the same thickness, joint the edges dead straight, and dry-fit first. Apply a thin, even bead of glue – too much glue causes squeeze-out that blocks finish if not scraped while soft. Clamp with even pressure, check for flat with a straightedge, and let cure 24 hours. Don’t rush this.
Once cured, scrape dried glue, flatten the blank with a drum sander or hand plane, then cut to final outer dimensions. Round over the top outer edge with a 1/8-inch roundover bit or ease it by hand with 120-grit. Leave the bottom edges crisp or add small 3/8-inch feet later – the board should not rock. If it does, a few passes on a flat surface with 80-grit adhered to a piece of MDF will level it.
Routing the Crumb Channel
This is where most mistakes happen. Set the router depth to 1/8 inch for the first pass; you will reach full depth in three passes. Test on scrap from the same species – maple burns if you move too slowly, cherry burns even faster.
Clamp the board to the bench so it cannot shift. Set the edge guide to your offset line (e.g., 1 inch from the edge to the center of the bit) and rout the long sides first, going counterclockwise around the board to cut against the bit rotation on the outside. Keep firm pressure against the guide the entire time; wandering even 1/16 inch is visible forever. Lift the router at the corners, reposition, and overlap the start/stop points by about an inch to avoid a visible divot.
For the rounded corners, you can freehand the curve if your guide allows it, or stop the straight grooves 3/4 inch short and finish the corners with the router pivoted on its base. Alternatively, make a simple MDF template 1 inch smaller than the board and use a template guide bushing. The template method is slower to set up but gives a perfect continuous channel, especially for beginners. Vacuum out dust between passes and check depth with calipers.
Sanding and Finishing
Sand the flat field to 220-grit before you sand the groove. The groove itself is best smoothed with a folded piece of 180-grit wrapped around a 1/2-inch dowel, followed by 220. Don’t use a Dremel sanding drum inside the groove – it leaves chatter marks that trap flour.
Remove all dust with a vacuum and tack cloth. Flood the entire board – top, bottom, sides, and groove – with food-grade mineral oil. Let it soak 15 minutes, wipe off the excess, and repeat twice. After 24 hours, apply a board wax (mineral oil + beeswax) and buff with a cotton rag. That wax layer is what keeps the groove from getting gummy with wet crumbs.
Failure mode to avoid: using olive oil, coconut oil, or any cooking oil. They go rancid. And don’t use film finishes like polyurethane or varnish on the cutting surface – they will be sliced through by the bread knife within weeks and flake into food.
Care and Use
Brush the groove out after each use with a stiff bench brush or pastry brush – don’t let wet dough sit in it. Wash by hand with warm soapy water, rinse, and dry upright immediately. Never soak it or put it in the dishwasher; that guarantees warping and glue-line failure on an edge-glued blank. Re-oil the top and groove once a month with a light coat of mineral oil if the board sees daily use, and re-wax every two to three months.
If the board develops a slight cup, place it concave-side down on a flat surface with a damp towel underneath overnight, then re-oil both sides equally to balance moisture. Add adhesive cork or rubber feet to the bottom if you use it directly on stone countertops – it prevents sliding and allows air circulation so the bottom doesn’t stay damp.