What's inside
As an Amazon Associate I earn from qualifying purchases. This post may contain affiliate links at no extra cost to you.
Contents
25 Laser Etching Projects You Can Finish This Weekend
These 25 laser etching projects are realistic weekend builds, from quick coasters to layered signs, with material, estimated engraving time, and difficulty listed for each. Times are approximate machine-on time for a typical hobby diode laser; they exclude design, setup, masking, sanding, and finishing, which can take as long as the engraving itself.
For wood, use clean, flat, laser-safe stock and confirm its species and finish before cutting or engraving. Power, lens, focus, air assist, artwork, and machine speed all affect results, so run a small test on offcuts first. Never leave a laser unattended, and use suitable ventilation and materials approved for your machine.
As an Amazon Associate we earn from qualifying purchases at no extra cost to you.


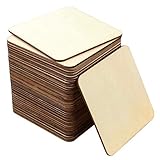
Quick projects: coasters, tags, and small gifts
| # | Project | Material and approximate size | Engrave time | Difficulty |
|---|---|---|---|---|
| 1 | Monogram coaster | 3 mm birch plywood, 100 × 100 mm | 5–10 min | Beginner |
| 2 | Geometric coaster set | 3 mm birch plywood, four at 100 × 100 mm | 20–35 min | Beginner |
| 3 | Plant marker set | 3 mm plywood, six markers about 150 × 25 mm | 15–25 min | Beginner |
| 4 | Keychain with name or initials | 3 mm plywood, 60 × 35 mm | 3–8 min | Beginner |
| 5 | Pet tag for a collar | Laser-compatible anodized aluminum blank, 30 mm | 2–5 min | Beginner |
| 6 | Bookmark with a repeating pattern | 1.5–3 mm basswood, 150 × 35 mm | 5–12 min | Beginner |
| 7 | Recipe card divider | 3 mm plywood, 150 × 100 mm | 8–15 min | Beginner |
| 8 | Custom luggage tag | 3 mm plywood, 90 × 55 mm | 5–10 min | Beginner |
| 9 | Small desk nameplate | 3 mm plywood, 180 × 50 mm | 8–15 min | Beginner |
| 10 | Engraved jar label set | 3 mm plywood, four at 60 × 25 mm | 10–20 min | Beginner |
Start with a coaster or tag if this is your first laser job: both expose focus and contrast problems on a small, inexpensive blank. For drink coasters, seal the finished surface with a coating suitable for its intended use and allow it to cure fully. A deep engraved recess can collect moisture, so favor a clear, readable design over a very dark, heavily burned fill.
Useful home and workshop projects
| # | Project | Material and approximate size | Engrave time | Difficulty |
|---|---|---|---|---|
| 11 | Workshop drawer labels | 3 mm plywood, eight at 75 × 25 mm | 15–25 min | Beginner |
| 12 | Tool-outline wall plaque | 3 mm plywood, 250 × 180 mm | 20–40 min | Beginner |
| 13 | Desk cable labels | 3 mm plywood, six at 40 × 20 mm | 8–15 min | Beginner |
| 14 | Personalized notebook cover | Laser-compatible wood veneer, 220 × 160 mm | 15–30 min | Intermediate |
| 15 | Geometric wall clock face | 3 mm plywood, 250 mm diameter | 25–45 min | Intermediate |
| 16 | Fretwork-style tea-light holder | 3 mm plywood, four panels about 100 × 70 mm | 25–45 min | Intermediate |
| 17 | Recipe board with engraved guide | Laser-safe hardwood board, 300 × 200 mm | 20–40 min | Intermediate |
| 18 | Small inlay-look table sign | Two 3 mm plywood layers, 180 × 100 mm | 30–55 min | Intermediate |
| 19 | Wall-mounted key rack backplate | 6 mm plywood, 250 × 120 mm | 20–40 min | Intermediate |
For a clock or key rack, treat the laser as a way to make the face or backplate—not as a substitute for accurate mechanical hardware. Check the clock movement’s shaft length against the finished panel thickness, and drill or cut mounting holes to match the actual hardware. For a tea-light holder, use an LED candle; an open flame near wood is a fire risk.
Weekend showpieces: boxes and layered signs
| # | Project | Material and approximate size | Engrave time | Difficulty |
|---|---|---|---|---|
| 20 | Sliding-lid keepsake box | 3 mm plywood, box about 150 × 100 × 60 mm | 35–60 min | Intermediate |
| 21 | Address plaque | 6 mm plywood, 300 × 120 mm | 25–50 min | Intermediate |
| 22 | Layered mountain landscape | Three 3 mm plywood layers, 250 × 180 mm | 40–75 min | Intermediate |
| 23 | Layered family name sign | Three 3 mm plywood layers, 300 × 200 mm | 45–80 min | Intermediate |
| 24 | Shadow-box map | Four 3 mm plywood layers, 250 × 200 mm | 60–100 min | Advanced |
| 25 | Layered nursery or cabin sign | Four 3 mm plywood layers, 300 × 200 mm | 60–110 min | Advanced |
Layered designs take longer to finish than their engraving time suggests. Each layer needs its own cutting or engraving setup, careful alignment, and adhesive curing. Add registration holes outside the visible design or use a simple corner jig to keep layers aligned. Dry-fit the stack before gluing; even a small shift can leave a visibly uneven border.
How to choose a project for your weekend
- New to laser engraving: Pick one coaster, bookmark, or drawer-label set. These need little assembly and make useful test pieces for contrast and focus.
- Working with limited machine space: Choose projects under 150 mm long, such as tags, markers, or a small nameplate. Confirm the usable work area, not just the machine’s advertised frame size.
- Wanting a practical shop upgrade: Make drawer labels or a tool-outline plaque. Simple text and outlines are quick to revise if a measurement is wrong.
- Looking for a gift: A keepsake box or layered sign has more visual impact, but reserve time for assembly and finishing—not only the laser run.
A simple planning estimate helps avoid overbooking the weekend. If a four-coaster design takes 30 minutes to engrave, allow another 15 minutes for a test, 20 minutes for sanding and edge cleanup, and at least 30 minutes for finishing and handling. That is about 95 minutes of active work, plus any finish curing time. The machine time is only one part of the project.
Material, cleanup, and finish: the details that save time
Laser results vary across plywood because glue lines, voids, grain, and surface veneers are inconsistent. Keep an offcut from the same sheet and use it to test the actual artwork. If the mark is too dark, adjust speed or power in small increments rather than making several changes at once. For photographs or shaded artwork, test a small crop first; a result that looks good on a screen may lose detail at a small engraving size.
Masking tape can reduce surface soot on some woods, but it does not eliminate the need for cleanup or ventilation. Remove residue with a method that will not smear soot into the grain, and avoid aggressive sanding that can erase fine details. Inspect cut edges before assembly, and keep lenses and the work surface clean according to the machine manufacturer’s instructions. A dirty lens can reduce performance, while accumulated debris can increase fire risk.
For a satisfying weekend result, choose a design that suits your machine, stock, and available finishing time. Coasters and tags offer the fastest path from blank to finished piece; layered signs reward careful alignment and patient assembly. In every case, a small material test is usually faster than remaking the project.