What's inside
As an Amazon Associate I earn from qualifying purchases. This post may contain affiliate links at no extra cost to you.
The safest cutting board engraving ideas keep every permanent mark on the handle, rim, or non-cutting back face, while the food-contact surface remains smooth and easy to wash.
That placement rule matters more than the artwork. A monogram, recipe, or logo can look beautiful on a board, but deep lettering on the chopping face creates grooves that collect moisture, food residue, and odors. For a board used regularly, treat the working face as a tool surface and the engraved area as a decorative surface.
As an Amazon Associate we earn from qualifying purchases at no extra cost to you.


Contents
17 cutting board engraving ideas that work well
- Family monogram: Engrave one or two initials inside a simple circular border on the front handle or back face.
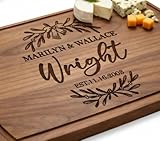
- Last name and established date: Use “The Morgan Family • Est. 2026” on a serving board’s rear face.
- Handwritten family recipe: Reproduce a short recipe card, such as a pie filling or bread recipe, on the back of a display board.
- Grandparent’s handwriting: Scan a signature, note, or favorite cooking instruction and engrave it without “cleaning up” every irregularity.
- Wedding or anniversary message: Keep the wording short: “For Mia & Alex — 10.10.2026.”
- New-home gift: Add the homeowners’ surname and move-in year to a board intended for occasional serving.
- Restaurant logo: Place the logo on the handle or underside so it does not interfere with food preparation or repeated washing.
- Farm or garden emblem: A wheat stalk, herb sprig, citrus branch, or vegetable illustration suits a kitchen-themed gift.
- Coordinates: Engrave the latitude and longitude of a wedding venue, first home, or family gathering place.
- Short cooking motto: Phrases such as “Gather Around” or “Made With Love” are readable at small sizes.
- Holiday serving board: Add “Christmas 2026” or a seasonal illustration to a board used for appetizers and desserts.
- Charcuterie label set: Use separate boards marked “Cheese,” “Bread,” or “Dessert,” preferably on the handle or reverse.
- Initial plus botanical border: A single large initial with leaves is more legible than a crowded full name on a narrow handle.
- Pet or hobby illustration: A line-art dog, cat, bicycle, boat, or musical instrument makes a personal gift without requiring much text.
- Cooking class or team name: Engrave a class year, club name, or barbecue team emblem on a board used for serving.
- Memorial keepsake: Use a name, date, and a scanned handwritten phrase on the back face rather than making the board a daily chopping tool.
- Custom business branding: Add a small logo and website-free contact line to a board given to clients; keep the mark away from the cutting area.
Where should the engraving go?
The handle is usually the best location for a working board. It stays away from knives, provides a predictable rectangular area, and can carry a small monogram or logo. Leave enough clearance around the hanging hole and any juice groove.
The back face is best for longer designs. It can hold a handwritten recipe, full logo, coordinates, or memorial message while the opposite side remains a practical food-preparation surface. Mark the decorative side clearly if there is any chance the owner may use it for chopping.
The rim is suitable for small personalization. A name along the long edge looks refined, but the available width is limited. Avoid engraving across the bottom edge if the board will rest on a damp counter.
Avoid the main cutting face. Even a shallow decorative mark becomes harder to clean as knife cuts accumulate around it. A maker may call an engraving food-safe because the wood finish is food-contact rated, but that does not make a deeply grooved cutting surface ideal for sanitation or maintenance.
Size, depth, and font rules
| Design element | Recommended size | Suitable placement | Why it works |
|---|---|---|---|
| Single initial | 35–60 mm tall | Handle or back face | Readable without filling the board |
| Full name | 8–14 mm letter height | Back face or wide rim | Balances legibility and visual space |
| Short message | 10–16 mm letter height | Back face | Allows comfortable spacing between words |
| Handwritten recipe | At least 12 mm stroke height | Back face only | Preserves thin strokes after sanding and finishing |
| Small logo | 50–90 mm wide | Handle or lower back face | Visible but less likely to crowd the design |
| Engraving depth | About 0.5–1.5 mm | Decorative faces | Provides contrast without making an unnecessarily deep dirt trap |
Choose bold sans-serif, slab-serif, or uncomplicated serif fonts for small text. Thin scripts often lose their hairline strokes, especially on end grain or strongly figured wood. For handwritten recipes, preserve the original character but enlarge tiny letters and simplify flourishes before engraving.
Leave a margin of at least 20–30 mm from the board edge. On a handle, keep the artwork away from corners, screw holes, hanging holes, and areas likely to be gripped. A design that looks centered on a computer screen can appear off-center once the handle narrows or the wood grain becomes visible.
Laser engraving versus router engraving
Laser engraving is usually the most practical choice for handwriting, photographs converted to line art, and detailed logos. It produces consistent fine lines and makes it easier to position a design on a thin handle. The color contrast varies with species: maple and beech commonly produce a light-to-medium brown mark, while walnut gives a darker, subtler result.
Router engraving creates wider, more tactile lettering and suits bold initials or traditional signs. It removes more material, so it generally needs a larger font and a flatter, less detailed design. It also creates more dust and may require careful hand sanding around the engraved area.
For either method, confirm that the board is unfinished or that the maker has approved the process. Engraving through an unknown coating can produce poor contrast and unwanted fumes. Afterward, remove dust thoroughly and apply a finish explicitly intended for food-contact woodenware, following its curing instructions.
Choosing the right idea for your situation
| Your situation | Best choice | Recommended board and design |
|---|---|---|
| Budget gift under roughly $50 | Simple monogram | Maple or beech board, 30–50 mm initial on the handle |
| First personalization project | Bold name or date | Flat face, high-contrast wood, sans-serif lettering |
| Frequent chopping | Back-face logo | Keep the working face completely unengraved |
| Large kitchen or serving island | Recipe or family message | Board at least 400 × 300 mm with a spacious back face |
| Small kitchen or apartment | Handle emblem | Board around 300 × 200 mm with compact artwork |
| Premium wedding or memorial gift | Handwriting reproduction | Hard maple, walnut, or cherry serving board; engrave the reverse |
Buying and ownership details people often miss
Board construction affects both the design and its useful life. Edge-grain boards offer a stable, relatively smooth surface and are often easier to engrave than heavily textured end-grain boards. End-grain boards are excellent cutting tools, but their checkerboard pattern can compete with fine lettering. Bamboo is durable and affordable, though its strip pattern and adhesive lines can make delicate artwork less uniform.
Expect the cutting surface to show knife marks before the engraved back does. Regular use can also dry a board, causing raised grain or small cracks if it is washed aggressively or left submerged. Clean with mild dish soap and water, dry upright or on edge, and apply a suitable board conditioner when the wood looks pale or feels rough. Do not put a wooden engraved board in a dishwasher unless the manufacturer specifically permits it.
For a useful cost calculation, suppose a $45 personalized board is used twice a week for three years: 2 × 52 × 3 equals 312 uses, or about $0.14 per use before maintenance. A $90 larger board used once a week for five years equals 260 uses, or about $0.35 per use. The cheaper board is not automatically better value if its small cutting area forces food onto the counter or it cannot be refinished.
Gifts to engrave on a cutting board
The most dependable gifts to engrave cutting board designs onto are wedding boards, housewarming boards, retirement keepsakes, family recipe boards, restaurant opening gifts, and holiday serving boards. Match the design to how the recipient will use it: a busy home cook benefits from an unmarked cutting face and a handle monogram, while someone displaying the board may appreciate a full recipe or detailed illustration on the back.
Before ordering, verify the board’s actual engraving area, wood species, finish, intended side for food preparation, and cleaning instructions. Ask for a proof when the design includes handwriting, small text, or a logo. A five-minute proof check can prevent misspelled names, reversed artwork, and a beautiful design placed exactly where a knife will eventually wear it away.