What's inside
As an Amazon Associate I earn from qualifying purchases. This post may contain affiliate links at no extra cost to you.
The best quick grip clamps for beginners are a small set of 6- and 12-inch bar clamps with comfortable triggers, reversible jaws, and non-marring pads; add a longer clamp only when your projects need the reach. For most first projects, four clamps—two of each size—are more useful than buying a large assortment of identical short clamps.
As an Amazon Associate we earn from qualifying purchases at no extra cost to you.


Contents
What to buy first
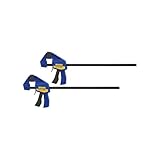
Quick-grip clamps are one-handed bar clamps: squeeze a trigger to move the sliding jaw and build pressure, then release a catch to reposition it. They are handy for holding a workpiece while you drill, glue, or assemble it. Their main beginner advantage is speed, but they are not a substitute for a heavy-duty screw clamp when a joint needs substantial, precisely controlled force.
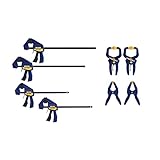
A practical starter set is two clamps with roughly 6 inches of opening capacity and two with roughly 12 inches. Check the product’s listed capacity rather than assuming its nominal size is exact. The 6-inch pair handles small boxes, trim, and temporary positioning; the 12-inch pair fits many shelves, panels, and cabinet parts. If you expect to assemble wider furniture, swap one or both 6-inch clamps for 18-inch models.
Compare sizes before choosing a set
The figures below are useful buying targets, not promises about every brand or model. Manufacturers vary in jaw depth, bar design, materials, and rated clamping force. Weight is approximate because a clamp’s bar and handle can make a notable difference.
| Clamp size (approx. opening) | Typical weight per clamp | Useful workpiece range | Best beginner use | Common limitation |
|---|---|---|---|---|
| 6 inches | 0.4–0.8 lb | Small parts and narrow assemblies | Boxes, jigs, trim, and holding pieces in place | Too short for most panels and wide cabinet parts |
| 12 inches | 0.7–1.3 lb | Small-to-medium furniture components | Shelves, frames, and general glue-ups | May not reach across a broad tabletop or cabinet |
| 18 inches | 1.0–1.8 lb | Medium-to-wide assemblies | Cabinet sides, larger frames, and wider panels | More awkward to store and handle on small work |
| 24 inches | 1.4–2.5 lb | Wide panels and furniture assemblies | Occasional large glue-ups | Longer bars can flex; size alone does not mean high force |
Opening capacity is only one part of fit. Jaw depth—the distance from the bar to the pad—determines how far the clamp can reach over an edge. For a thick tabletop or recessed joint, a clamp may have enough opening but still not reach the spot you need. Compare jaw depth when the workpiece is unusually thick or the pressure point is far from its edge.
Choose by project, budget, and storage
| Your situation | Good starting choice | Why |
|---|---|---|
| Occasional repairs or small shop projects | Two 6-inch and two 12-inch clamps | Covers common small and medium tasks without filling a drawer with one size |
| Mostly boxes, frames, and trim | Four 6- to 12-inch clamps | Shorter clamps are easier to position around small work |
| Cabinet or furniture projects | Two 12-inch and two 18-inch clamps, then add as needed | Provides useful reach for larger assemblies while keeping the starter set manageable |
| Limited storage or a tight budget | Two 12-inch clamps, followed by a second pair in the size your projects require | Lets you identify the real capacity gap before spending on extra clamps |
| Frequent panel glue-ups | Longer clamps plus dedicated panel-clamping options as appropriate | Long quick-grip clamps may flex under sustained force and may not keep a panel flat |
For a budget-conscious first purchase, prioritize two matching clamps that work smoothly over a mixed bundle with awkward sizes or inconsistent mechanisms. Then buy a second pair. Glue-ups often need several clamps, and having two of the same length makes it easier to apply pressure in a balanced arrangement.
Features that make clamps easier to use
- Controlled trigger action: The trigger should advance the jaw predictably. If each squeeze jumps too far, it is harder to position delicate parts without shifting them.
- Easy release: Look for a release lever or button that is reachable while the clamp is supporting the work. A release that is stiff or poorly placed can make repositioning frustrating.
- Reversible jaws: Some models let the sliding jaw be repositioned for spreading rather than clamping. This is useful for separating parts or holding a frame apart, but check the instructions for how to change modes.
- Protective pads: Broad, secure pads help prevent dents and scratches. They are not a guarantee against marks: soft wood can compress under pressure, and dust trapped beneath a pad can scratch a finish.
- Comfortable handle: A handle that fits your hand helps you apply pressure gradually. Heavier clamping force is not automatically better, especially on small or delicate assemblies.
- Stiff bar and stable jaw: A bar that bends noticeably or a jaw that twists under moderate pressure makes accurate clamping harder. Longer clamps are particularly susceptible to flex.
How much pressure should a beginner apply?
Use enough pressure to close the joint and keep the parts from moving; do not keep squeezing just because the trigger allows it. Excess force can bow a panel, squeeze most of the glue out of a joint, or leave dents in soft wood. For a basic edge glue-up, first align the boards and place clamps at intervals along the length, alternating some above and below where practical. Tighten each clamp gradually, checking that the faces remain level and the joint stays closed.
For glue-ups, use the adhesive maker’s instructions for clamping time and cleanup. Quick-grip clamps are useful for holding parts, but their bars can bow under load. If a panel is long or the joint needs more force, use clamps designed for that work and check the panel for flatness as pressure is applied. A caul—a straight, protected strip placed across a panel—can help distribute pressure and reduce unevenness.
Care and common ownership issues
The pads are often the first parts to wear, loosen, or collect glue. Inspect them before clamping finished surfaces, and replace damaged pads if the manufacturer offers replacements. Dried glue can make pads uneven or slippery; remove it carefully without cutting or gouging the pad. Wipe the bar clean after dusty or glue-heavy work, and keep the moving jaw and trigger area free of chips. Avoid oiling a mechanism unless the instructions call for it, since lubricant can transfer to wood and interfere with finishing or glue.
Common beginner mistakes are buying only short clamps, treating maximum opening as jaw reach, and overtightening. Another is expecting a quick-grip clamp to correct badly aligned parts. Dry-fit the assembly first, confirm that each clamp can reach its intended position, and place scrap wood beneath pads when working with easily marked surfaces.
Bottom line
For a first purchase, choose two 6-inch and two 12-inch quick-grip clamps with smooth trigger movement, easy release, reversible jaws if useful, and secure protective pads. If your main projects are cabinets or furniture, start with 12- and 18-inch sizes instead. Add longer or heavier-duty clamps only after a project shows you where your current set falls short.