Key takeaways
- A step-by-step guide to building hidden-cleat floating shelves that hold real weight, with exact dimensions, drilling depths, and stud-anchoring details.
What's inside
- Pick Your Shelf Depth and Load Before You Cut Anything
- Step 1: Find and Mark the Studs, Then Draw Your Layout Line
- Step 2: Build the Hidden Cleat
- Step 3: Cut the Shelf Box Parts
- Step 4: Glue and Assemble the Box
- Step 5: Sand and Finish Before Installation
- Step 6: Install, and Add Steel Rods If You Want Real Capacity
- Common Mistakes That Make Floating Shelves Sag
- Frequently Asked Questions
- Pick Your Shelf Depth and Load Before You Cut Anything
- Step 1: Find and Mark the Studs, Then Draw Your Layout Line
- Step 2: Build the Hidden Cleat
- Step 3: Cut the Shelf Box Parts
- Step 4: Glue and Assemble the Box
- Step 5: Sand and Finish Before Installation
- Step 6: Install, and Add Steel Rods If You Want Real Capacity
- Common Mistakes That Make Floating Shelves Sag
- Frequently Asked Questions
As an Amazon Associate I earn from qualifying purchases. This post may contain affiliate links at no extra cost to you.
Most floating shelves fail in the same place: the connection between the shelf and the wall. A pair of decorative brackets screwed into drywall will hold a picture frame and a candle. It will not hold forty pounds of hardcover books, a cast iron pan collection, or a row of full mason jars. This guide on how to build floating shelves uses a hidden cleat that lands in the studs and a torsion-box style shelf that grips the cleat along its whole length, which is the difference between a shelf that sags in six months and one that outlives the paint job.
The build below assumes a modest home shop: a circular saw or table saw, a drill/driver, a stud finder, a level, and a random orbit sander. No domino machine, no CNC, no shop-built jigs beyond a straight scrap of plywood. Plan on one afternoon for the joinery and a second short session for finishing. If you want more capacity than a cleat alone provides, there is a steel rod variation in step 6 that pushes a 10-inch shelf comfortably past 75 pounds of evenly distributed load.
As an Amazon Associate we earn from qualifying purchases at no extra cost to you. Product prices and availability are accurate as of the date shown and are subject to change.



Pick Your Shelf Depth and Load Before You Cut Anything
Depth is the single biggest factor in how strong a floating shelf feels. Every inch you push the load away from the wall multiplies the leverage trying to rotate the shelf downward. That is why a 6-inch shelf built from scrap can feel rock solid while a 14-inch shelf built the same way flexes when you lean on it. Match your depth to the actual job.
| Shelf depth | Typical use | Cleat stock | Realistic capacity |
|---|
| Shelf depth | Typical use | Cleat stock | Realistic capacity | ||
|---|---|---|---|---|---|
| 6 in | Picture frames, plants, small decor | 2× | 3 or ripped 2× | 4 | Light, 20-30 lb range |
| 8 in | Paperbacks, glassware, speakers | Ripped 2× | 4 | Moderate, 40-50 lb range | |
| 10 in | Hardcovers, dishes, cookware | Full 2× | 4 plus rods | Heavy, 75 lb and up | |
| 12-14 in | Records, appliances, styled shelves | 2× | 4 plus rods, 2 studs minimum | Heavy but design carefully |
Length matters too, but differently. A shelf that spans two studs at 16 inches on center gives you roughly 32 inches of shelf with an anchor at each end, and that is the sweet spot for a first build. Anything over 48 inches wants a third stud in the middle, because the cleat itself starts to flex between fasteners even if the fasteners hold fine.
Step 1: Find and Mark the Studs, Then Draw Your Layout Line
Run a stud finder across the wall at the shelf height and mark each edge of every stud you find, then mark the center between those two lines. Confirm with a small finish nail pushed through the drywall inside your future cleat footprint, since the hole will be hidden. Studs are usually 16 inches on center, occasionally 24 in newer construction or garages, and you need at least two for a shelf that carries weight.
Draw a level line where the top of the cleat will sit, not where the top of the shelf will sit. Keeping the reference at the cleat means you are measuring to the surface you actually fasten. Standard heights that read well: 54 to 60 inches above the floor for a living room display shelf, 18 inches above a countertop for kitchen open shelving, and 12 to 14 inches of clearance between stacked shelves so a hardcover fits with room to lift it out.
Step 2: Build the Hidden Cleat
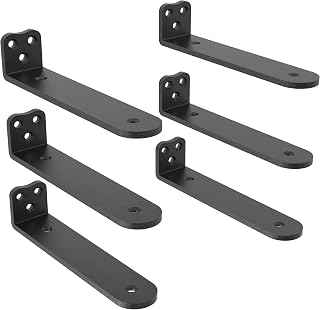
Rip a 2×4 to 3 inches wide and cut it 1/4 inch shorter than your finished shelf length on each end, so the shelf overhangs and hides the cleat entirely. If you are building an 8-inch shelf and want to save weight, a 2×3 works, but keep the cleat at least 2 1/2 inches tall so the shelf has real surface to grip.
Drill pilot holes through the cleat at each stud center. For 3-inch structural screws, a 5/32-inch pilot through the cleat and a 1/8-inch pilot into the stud prevents the cleat from splitting and stops the screw from pushing the cleat away from the wall as it drives. Countersink each hole about 1/8 inch deep so the screw head pulls flush and does not interfere with the shelf sliding on.
Use structural screws rated for framing, not drywall screws. Drywall screws are brittle and hardened, and they snap under shear load, which is exactly the load a floating shelf applies. Two 3-inch structural screws per stud, spaced vertically about 1 1/2 inches apart, gives the cleat resistance to rotating forward.
Structural Wood Screws for Cleat Mounting
The entire shelf hangs on these fasteners, so this is not the place to use whatever is in the coffee can. Look for 3-inch structural or ledger screws with a hex or star drive and a published shear rating on the packaging. A single small box covers several shelves, and the flat washer head seats better against a countersink than a bugle head does.
Step 3: Cut the Shelf Box Parts
The shelf is a shallow open-backed box that slips over the cleat. For a 10-inch deep, 32-inch long shelf using 3/4-inch material, cut a top and bottom at 10 inches by 32 inches, a front face at 32 inches by your finished shelf thickness, and two end caps to fill the sides. Finished thickness of 2 1/2 to 3 inches looks intentional and gives the cleat room; anything thinner than 2 inches starts to look flimsy on a deep shelf.
Plywood with a hardwood face is the practical choice here because it stays flat, and the front face and end caps hide the plies. If you use solid wood, remember it moves seasonally across the grain, so glue only the front edge of the top and bottom panels and let the rear float against the cleat rather than gluing the box to the wall member.
Check that the internal cavity height equals your cleat thickness plus about 1/32 inch of slop. Too tight and you will be beating the shelf onto the wall with a mallet. Too loose and the shelf rocks. Dry-fit the box over an offcut of the cleat before any glue goes on.
Step 4: Glue and Assemble the Box
Glue and pin the front face to the top and bottom panels first, keeping the assembly square against a known-flat surface. Use 1 1/4-inch 18-gauge brads or, if you have no nailer, 1 1/4-inch trim screws in counterbored holes filled with plugs. Add glue blocks or a strip of 3/4-inch stock inside each end where the end caps land, because the end caps do most of the work resisting racking.
Clamp across the front face rather than top to bottom. Clamping vertically squeezes the cavity and can pinch the opening narrower than your cleat. Let the glue cure a full hour before handling and a full day before loading the shelf.
- ✔ Cleat lands directly in framing, so capacity comes from structure not anchors
- ✔ Box construction hides all hardware for a genuinely floating look
- ✔ Uses common 2×4 and 3/4-inch sheet goods
- ✔ Scales up in depth and length with predictable results
- ✘ Locked to stud locations unless you open the wall
- ✘ Harder to relocate later than a bracket shelf
- ✘ Requires accurate cavity height or the fit fights you
- ✘ Deep shelves need the steel rod upgrade to feel solid
Step 5: Sand and Finish Before Installation
Finish the shelf off the wall. Reaching the underside of an installed floating shelf with a sander is miserable and you will do a worse job. Work through 120, then 150, then 180 grit with a random orbit sander, moving at roughly an inch per second and letting the tool do the cutting without leaning on it. Stop at 180 for stain and at 220 for a clear finish only; sanding finer than that on softwood burnishes the surface and causes blotchy absorption.
Break every exposed edge with a sanding block held at about 45 degrees, two or three passes. Sharp plywood edges chip during installation and again every time something slides across them. If you are painting, prime the end grain and plywood edges first because they drink finish and will look starved after one coat.
Random Orbit Sander, 5-Inch
A 5-inch random orbit sander is the tool that makes shelf faces look store-bought rather than homemade. Variable speed helps when you drop down to 180 grit and want to avoid swirl marks, and hook-and-loop pads let you switch grits in seconds. Corded models are cheaper for stationary shop work, while cordless platforms like DeWalt XR, Milwaukee FUEL, and Makita LXT make sense if you already own batteries.
Step 6: Install, and Add Steel Rods If You Want Real Capacity
Drive the cleat to the wall on your level line, checking level again after the first screw and before the last. Slide the shelf box over the cleat, then secure it with two 1 1/4-inch trim screws driven up through the bottom panel into the cleat, positioned where a book spine will hide them, or angled brads from below. That anchoring stops the shelf from being lifted off accidentally.
For heavy loads, add steel rods. Drill 1/2-inch holes 3 1/2 inches deep into the stud centers using a brad point or auger bit, keeping the drill dead level so the rods do not angle downward. Epoxy 1/2-inch steel rod or threaded rod into each hole with 4 to 5 inches protruding, then bore matching 9/16-inch holes into the back of a solid shelf blank so it slides on. This variation works best with a solid glued-up slab rather than a hollow box, and it is the version that handles cast iron cookware without complaint.
Common Mistakes That Make Floating Shelves Sag
Anchoring to drywall alone. Toggle anchors are rated in tension, not in the rotational load a shelf applies. Even good anchors crush the drywall face over time and the shelf tips forward. Find studs or move the shelf.
Using drywall screws. They shear. This is the most common failure in shelves that were otherwise built well.
Making the cleat too short. A cleat that reaches only one stud puts all the load on a single point and the shelf will pivot. Span two studs minimum.
Skipping the end caps or internal blocking. Without them the box racks, the front face pulls away from the top panel, and the glue line opens up.
Loading the shelf the day you glue it. Wood glue reaches handling strength in an hour but full strength in 24. Wait.
Measuring shelf height instead of cleat height. You will end up with the shelf sitting 3/4 inch off your intended line, which is obvious next to a window casing or backsplash.
Frequently Asked Questions
How much weight can a floating shelf actually hold? With a cleat fastened into two studs with structural screws, a well-built 8 to 10-inch shelf handles a heavy load of books or dishes without visible deflection. The limit is rarely the fasteners; it is the cleat flexing between studs on long spans and the shelf box racking if it lacks internal blocking. The steel rod version increases capacity further because the load transfers directly into the framing.
Can I build floating shelves without hitting studs? Not for anything that carries real weight. If your intended location has no usable studs, options are to add horizontal blocking behind the drywall while the wall is open, run a full-length cleat to reach the nearest studs on both sides, or accept a bracket shelf sized for light decor only.
What thickness should a floating shelf be? Somewhere between 2 and 3 inches of finished thickness looks proportional and leaves room for a 2 1/2-inch cleat inside. Thinner shelves read as delicate and limit how much cleat you can hide, while shelves over about 3 1/2 inches start to look heavy in a small room unless the span is long.
Build one shelf first, load it, and live with it for a week before you cut parts for the rest. You will learn whether your depth choice was right and whether the finish holds up to whatever actually ends up sitting on it. Then repeat the process with confidence, because the second one always goes faster.
Check prices on Amazon →