Key takeaways
- Skip the decorative trinkets. These five projects each teach a skill you will use forever.
What's inside
- How to judge a beginner project before you build it
- 1. A cutting board — teaches glue-ups and flattening
- 2. Floating shelves — teaches accurate layout and installation
- 3. A workbench — teaches structure
- 4. A simple side table — teaches joinery
- 5. Storage boxes or drawers — teaches precision
- Skills these five projects cover
- Practical advice for a first build
- FAQ
- How to judge a beginner project before you build it
- 1. A cutting board — teaches glue-ups and flattening
- 2. Floating shelves — teaches accurate layout and installation
- 3. A workbench — teaches structure
- 4. A simple side table — teaches joinery
- 5. Storage boxes or drawers — teaches precision
- Skills these five projects cover
- Practical advice for a first build
- FAQ
As an Amazon Associate I earn from qualifying purchases. This post may contain affiliate links at no extra cost to you.
Beginner project lists are usually full of things nobody wants: pallet signs, decorative crates, novelty shelves. They exist because they photograph well and finish in an afternoon, not because they teach anything, and a project that teaches nothing leaves you exactly as intimidated by the next one. The five beginner woodworking projects below are chosen on a different basis: each one hands you one specific, transferable skill and produces something you will actually keep.
They also stack. The glue-up you learn on a cutting board is the same glue-up that makes a table top; the squaring you learn on a workbench is what decides whether a drawer slides or binds. Build them roughly in this order and the fifth will feel easier than the first, even though it is harder.
As an Amazon Associate we earn from qualifying purchases at no extra cost to you. Product prices and availability are accurate as of the date shown and are subject to change.




How to judge a beginner project before you build it
You will eventually choose your own projects, so it helps to know what makes a good one. Four criteria matter, and they pull against each other:
- One clear skill. If you cannot name what it teaches in a sentence, it is decoration, not practice.
- Tolerance for error. Good first projects fail cosmetically, not structurally.
- Cheap failure. Softwood and short parts, so a botched cut costs an afternoon and you actually experiment.
- A result you use. Objects handled daily show you what your own work looks like after six months of humidity swings.
Weighing them is the trick. Maximum forgiveness plus maximum usefulness gets you a screwed-together plywood box that teaches nothing; maximum skill gets you a hand-cut dovetail box you abandon halfway. Pick projects where the difficulty sits in exactly one place.
1. A cutting board — teaches glue-ups and flattening
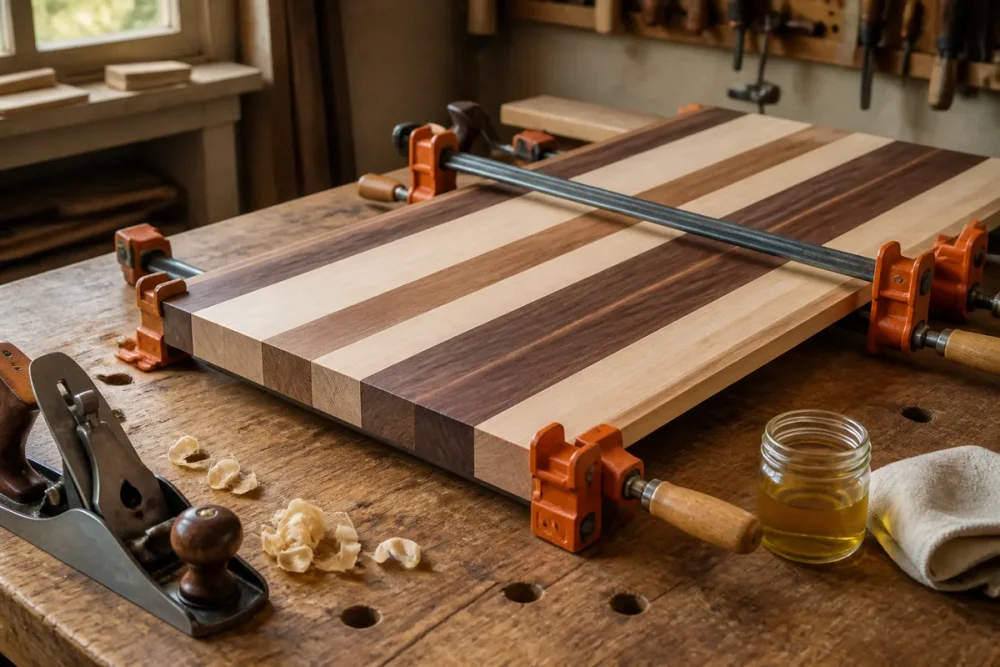
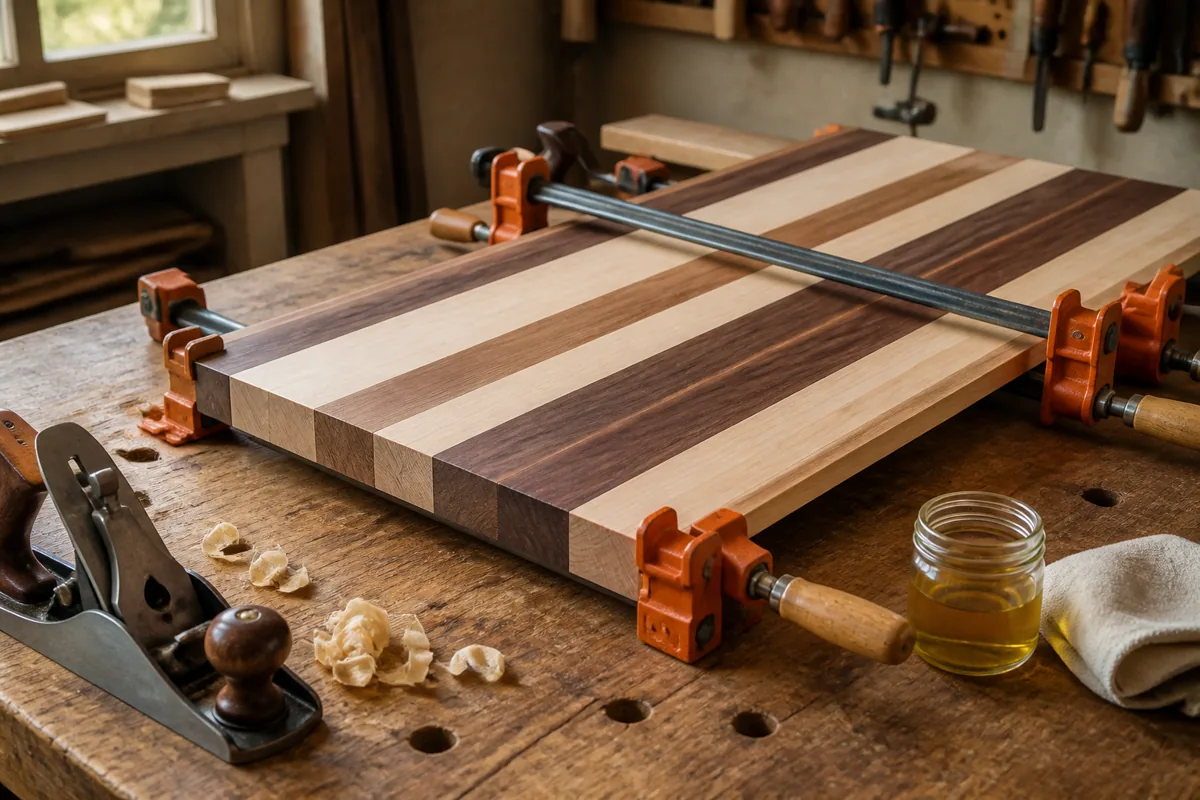
Strips of hardwood glued edge to edge. Simple, cheap, and it teaches the single most fundamental skill in woodworking: getting a flat, tight, well-clamped glue joint.
What you learn: clamping pressure, glue squeeze-out management, flattening a panel, finishing with a food-safe oil.
The part that transfers is the dry fit. Clamp the strips with no glue and look along each seam against a light wall: a gap you can see is a gap that clamp pressure will close by bending the wood, and that stored tension is what opens the joint a year later. Fix the edge, not the clamp.
Buy clamps by quantity before quality — four stiff mid-range F-style clamps do more for a panel than two premium ones, and the cheapest light-duty bars flex enough to twist the glue-up as you tighten them. Where it goes wrong: too little glue, which starves the joint, squeeze-out left to cure hard instead of scraped off while rubbery, and finishing one face only, which is how a board cups. Skip end grain for now; checkerboard boards need machine flattening and fail hard when the glue-up is off.
Woodworking glue and clamps
Titebond-style PVA and four bar clamps. Glue joints fail from insufficient clamping far more often than from bad glue.
2. Floating shelves — teaches accurate layout and installation
A simple box shelf sliding over a hidden cleat. Teaches you to measure and mark accurately, find studs, work to a level line, and think about how things attach to walls.
What you learn: layout, levelling, hidden fastening, and the fact that houses are never square.
The real buying decision here is the cleat and the fasteners, not the shelf. A cleat screwed into at least two studs will carry anything you sensibly put on a shelf of that depth; drywall anchors alone will not, whatever the package claims. Weigh depth against load honestly, because the deeper the shelf, the more leverage a stack of books applies to the top screws.
Where it goes wrong: marking a level line off the floor or ceiling instead of a level, trusting a stud finder without confirming with a small test hole, and building the box so tight on the cleat that paint or humidity locks it in place. Leave a hair of clearance and one screw underneath to lock it down. Skip this project if you rent and cannot patch holes.
3. A workbench — teaches structure
The most useful project a beginner can build, and it teaches frame construction, squaring an assembly, and building something that must not rack under load. You end up with the thing every other project needs.
Size and height decide whether you use it. Somewhere around wrist height with your arms hanging suits general assembly and power tool work, and a flat top with real mass matters far more than the exact number. Two laminated layers of plywood or MDF give you a flatter, cheaper top than solid stock, and you can replace the sacrificial layer once it is chewed up.
Where it goes wrong: building it too tall, too light, or too big for the space; skipping the diagonal or sheet-good bracing that stops racking; and fitting casters that do not lock, so the bench walks away under a hand plane. If you already own a solid bench, or you work in an apartment, build a knockdown top over sawhorses instead.
Structural screws and bench hardware
Structural screws, a front vise and a few hold-fasts turn a plywood box into a real workbench.
4. A simple side table — teaches joinery
Four legs, four aprons, a top. Whether you use pocket screws, dowels or mortise and tenon, this is the project where you learn how furniture holds together — and how much difference square assembly makes.
What you learn: joinery, squaring a frame in three dimensions, attaching a top that allows for wood movement.
Choose the joinery by what it costs you to be wrong. Pocket screws are the most forgiving and pull a joint tight without clamps; dowels demand accurate drilling but leave nothing visible; mortise and tenon is the strongest and the least tolerant of sloppy layout. A first table with pocket screws that stays square beats a mortised one that racks.
Where it goes wrong: cutting aprons one at a time instead of in matched pairs off a stop block, gluing all four joints at once instead of two L-shaped ends first, and screwing the top down hard across the grain. Use buttons, figure-8 fasteners or elongated screw slots so the top can move, and check the assembly with diagonal measurements rather than by eye.
Pocket hole jigs
Not traditional, entirely effective. A pocket hole jig lets a beginner build sound furniture immediately while learning better joinery later.
5. Storage boxes or drawers — teaches precision
Boxes are unforgiving: if the sides are not identical, nothing squares up. Build a set of three, and by the third one you will understand repeatable cuts, stop blocks and why measuring each piece separately is a mistake.
What you learn: repeatability, stop blocks, box joints or rabbets, fitting a bottom panel.
The whole project is one habit: cut all matching parts in a single setup. Set a stop block, cut every left side, then move the stop once and cut every right side. Measuring piece by piece stacks pencil-line and kerf error until the last corner is out and nothing closes.
Where it goes wrong: cutting to a line rather than to a stop, ignoring blade kerf when breaking down a sheet, and gluing a plywood bottom into its groove all the way round on a solid-wood box, which forces a crack when the sides move. Drawers need clearance on purpose — a snug test fit in a humid month becomes a stuck drawer in the next one.
Skills these five projects cover
- ✔ Flat, tight glue-ups
- ✔ Accurate crosscuts and repeatable parts
- ✔ Square assembly under clamping pressure
- ✔ Basic joinery and fastening choices
- ✔ Surface preparation and finishing
- ✔ Wood movement and how to allow for it
That list is the foundation. Casework, doors, drawers and hand-cut joinery are all variations on those six.
Practical advice for a first build
Sequence matters more than most lists admit: board first for the glue-up, shelves for layout, then the bench, the table, and the boxes. Buy tools as a project demands them rather than up front, and buy consumables generously — glue, sandpaper and a sharp blade are what actually stall a build.
- ✘ Do not start with expensive hardwood — build the first version in pine
- ✘ Do not skip the test cuts on scrap
- ✘ Do not sand past 180 grit for a first finish; you will not see the difference
- ✘ Do not build to a deadline — rushed glue-ups fail
FAQ
What wood should a beginner use? Pine or poplar. Cheap, forgiving, widely available, and mistakes cost almost nothing. Poplar takes paint better; pine dents more easily but is simpler to find in usable widths. Save hardwood for the second version of anything.
How long does each project take? A weekend each, realistically, including finishing time. Glue and finish set the schedule, not the cutting, so plan an evening of work followed by overnight waiting rather than one long push.
What finish should I start with? A wipe-on oil or oil-blend. Nearly impossible to get wrong and easy to repair. Use a food-safe oil or oil-and-wax on the cutting board, and a wipe-on varnish or oil-varnish blend where you want water resistance.
Do I need a table saw? No. A circular saw with a straightedge and a stop block will cut everything here accurately, and a miter saw helps with repeat crosscuts. Buy a saw when repeatability is the thing slowing you down, not before.
Build all five and you come away with a flat panel, a level line, a rigid frame, a square box and a set of habits that make the next project a question of scale rather than nerve.
Get project supplies →