What's inside
As an Amazon Associate I earn from qualifying purchases. This post may contain affiliate links at no extra cost to you.
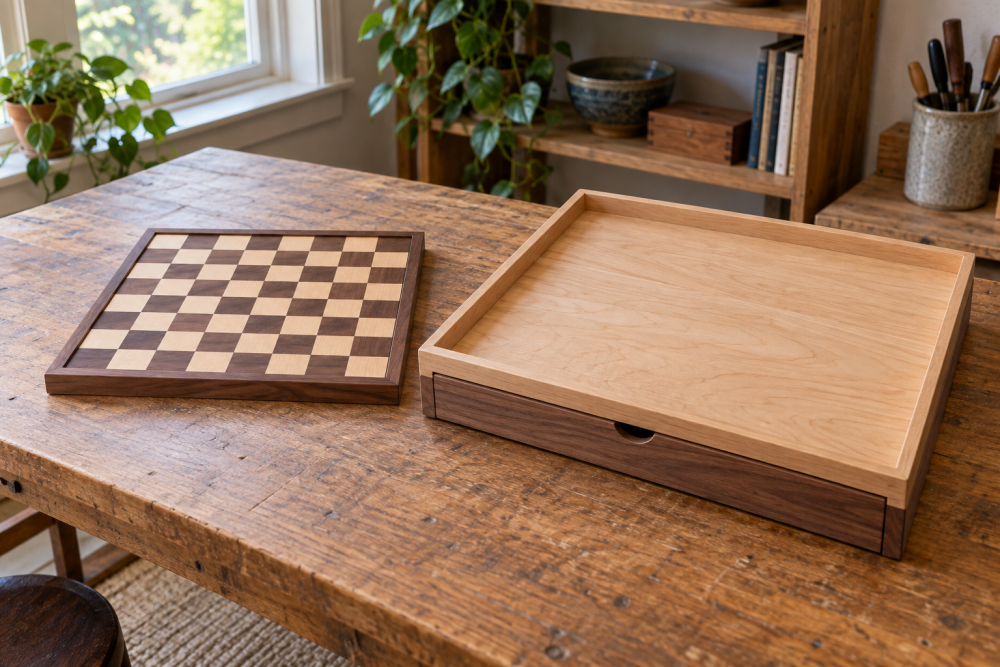
A veneer chessboard is a good first project in precise layout and glue-up. It uses small amounts of attractive wood, but the thin squares leave little room for sloppy cuts: a tiny gap or a wandering glue line stands out across the whole board. The method below uses a stable plywood core, two contrasting veneers, and a simple cutting jig.
Contents
Dimensions and materials
A regulation chessboard has 8 squares per side. This plan makes a board about 16 inches square, with 2-inch squares and a narrow border. Use a flat, void-free plywood panel for the core; 1/2-inch Baltic birch or comparable veneer-core plywood is a practical choice. A cheaper, flat cabinet-grade panel is fine if its faces are sound and it has no soft spots or voids near the edges.
Buy enough light and dark veneer to cut at least nine strips of each color, each a little over 16 inches long and 2 inches wide. Extra material lets you reject chipped or mismatched pieces. Cherry and walnut make a clear contrast, but any stable, similarly thick veneers work. Keep the veneer thickness consistent, ideally around 1/16 inch, so sanding does not cut through one color first.
Choosing a veneer-cutting approach
The key decision is how to make a checkerboard panel before attaching it to the core. Cutting strips and flipping every other one is fast, but the seams can open if the strips are not straight. A shop-made cutting guide improves repeatability; a commercial veneer saw is optional, not essential.
| Approach | Best for | Trade-off |
|---|---|---|
| Utility knife and straightedge | One board and a tight budget | Works well with several light passes, but needs a secure guide and sharp blade. |
| Veneer saw | Repeated veneer work | More control on long cuts, but does not replace careful measuring or clamping. |
| Table saw with a fine blade | Experienced users with a safe jig | Fast, but thin veneer can splinter or lift; use a zero-clearance support and proper guarding. |
For occasional work, a veneer saw is a convenience rather than a requirement. A sharp utility knife with fresh blades is inexpensive and adequate for most straight cuts.
Prepare and cut the veneer
Let the veneer acclimate in the shop for a day or two, flat and weighted. Mark the light and dark sheets on the back, then cut strips slightly wider than 2 inches. A cutting jig is useful: attach a straight fence to a flat scrap board and clamp it so each pass keeps the knife on the same line. Cut with several shallow strokes instead of forcing the blade through in one pass. A hard push can split the veneer or pull up its grain.
Lay out eight light and eight dark strips, alternating colors. Make the first panel slightly oversize, roughly 16 1/4 inches square. Apply veneer tape or low-tack tape across the seams on the face, keeping the strip edges tight. Flip the panel, remove the tape on the back if needed, and tape the seams there as well. The tape should hold alignment without pulling the veneer out of square.
Make the checkerboard
Mark 2-inch divisions across the panel. Cut across the strips at those marks to create eight rows, each made of alternating light and dark squares. Keep the rows in order. Shift every other row by one square so the colors alternate both across and down the board. Use a flat surface and a sharp blade; check the first row against a square before cutting the rest.
Join the rows with veneer tape on the face, butting the edges together without overlap. A gap larger than about 1/32 inch is hard to hide and will show more after finish. If a seam opens, separate the row while the tape is still accessible and recut or replace the square rather than filling the gap with sanding dust.
Glue the panel to the core
Cut the plywood core to about 16 1/2 inches square, leaving room to trim the veneer panel flush later. Apply an even coat of veneer adhesive or a suitable woodworking glue to the core, following the product’s spread and open-time instructions. Avoid puddles: excess glue can make the veneer slide or create a dark, uneven patch.
Center the taped checkerboard on the core, veneer side up. Use a flat caul covered with wax paper and clamp from the center outward, spacing clamps about 4 to 6 inches apart. A vacuum press gives even pressure, but a caul and enough clamps can work for a single board. A set of woodworking clamps is useful only if the cauls stay flat and pressure reaches the full panel. Let the adhesive cure for its full stated time before removing clamps; early removal can cause bubbles or edge lift.
Trim, add the border, and finish
Remove the face tape carefully, pulling back at a low angle. Trim the veneer flush with a sharp knife or a router and flush-trim bit, taking light cuts. A router is faster but can tear veneer at the corners; test the direction of cut on scrap first. Ease the sharp edges with a sanding block, using 180- then 220-grit paper. Do not sand aggressively: thin veneer can be breached in seconds, especially at the corners.
Add a solid-wood border if you want a framed look, mitering or butt-joining strips around the panel. Border wood should be close to the core thickness; clamp it without crushing the veneer edge. Seal both faces and all edges to limit moisture imbalance and warping. A wipe-on polyurethane or hard-wax oil is manageable for a small project. Apply thin coats, sand lightly between coats as directed, and test on an offcut because finish can deepen the contrast or alter the lighter wood’s color.
Check the board before use
Measure both diagonals; they should match within about 1/8 inch on a 16-inch board. Check that the panel lies flat, seams are closed, and no veneer edges lift when rubbed lightly. If a small bubble appears after curing, a slit along the grain and a tiny amount of adhesive may repair it, but a large bubble usually means the glue-up needs more even pressure. Let the finish cure fully before setting pieces on the board, since chessmen can mark a surface that feels dry but is not hardened.