What's inside
As an Amazon Associate I earn from qualifying purchases. This post may contain affiliate links at no extra cost to you.
A wooden enclosure can hide two or three outdoor bins, keep lids from blowing open, and make a side yard look tidier. It won’t stop determined wildlife or replace secure, lidded containers. Before buying lumber, measure the bins you actually use and check your local rules for storing waste and placing structures near property lines.
Contents
1. Plan the size and layout
Measure each bin at its widest point, including handles and wheels, and note its height with the lid open. Leave about 2 inches of clearance on each side and at least 3 inches behind the bins. For bins that need to roll out, make the opening wide enough to pass them without scraping the frame.
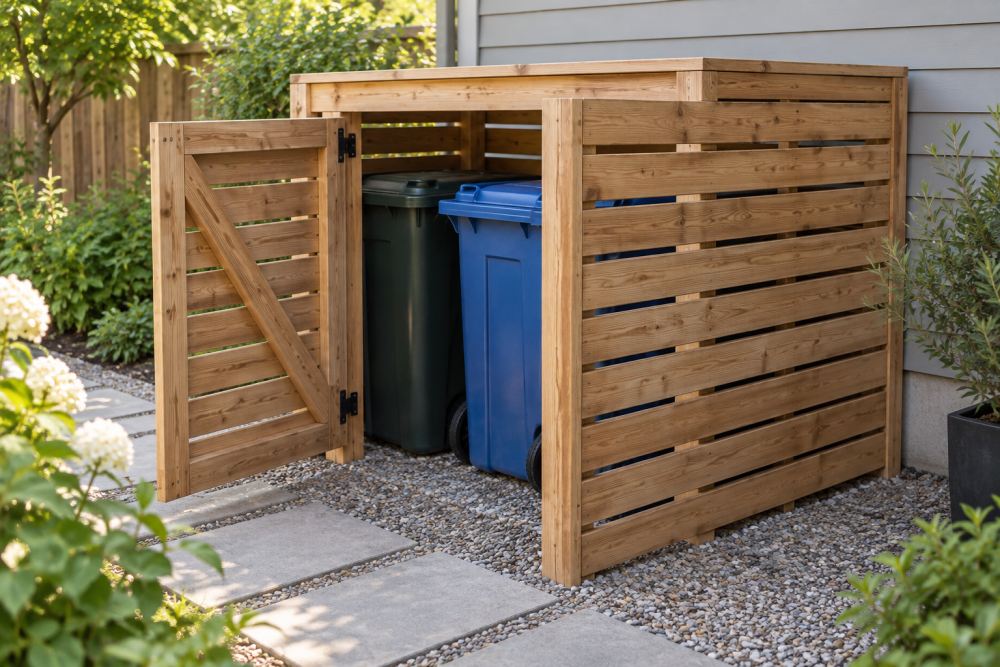
A practical enclosure has a fixed back and sides, an open bottom, and a hinged front gate. For three bins each about 24 inches wide, a useful interior width is roughly 78 inches: three bin widths plus room to maneuver. Set the depth to the bin’s front-to-back measurement plus about 5 inches. Make the gate tall enough to hide the bins without interfering with their lids.
Decide whether you need access to the bin lids while they’re inside. A simple enclosure usually has a gate that opens for both loading and removal. Adding hinged top panels is convenient, but adds hardware and creates another place for water to collect.
2. Choose materials and hardware
Pressure-treated lumber is a sensible choice for posts and framing that sit close to the ground. Cedar or another rot-resistant species can look better, but costs more and still benefits from good drainage. For inexpensive slats, untreated lumber can work if it stays well above soil and is sealed, though it may need replacement sooner.
Use exterior-rated screws, not drywall screws, which can rust or snap outdoors. For most framing, 3-inch structural or exterior screws are suitable; 1⅝-inch exterior screws work for attaching 1-by slats. A box of exterior deck screws is usually enough for a small enclosure. For a gate, choose outdoor hinges sized for its weight and a latch that can be opened from outside.
| Material | Best for | Trade-off |
|---|---|---|
| Pressure-treated lumber | Ground-adjacent frame and posts | Durable and affordable; can be damp or slightly warped when purchased |
| Cedar | Visible slats and trim | Light and naturally rot-resistant; costs more and can split near screw ends |
| Untreated pine | Low-cost, replaceable slats above ground | Cheaper upfront, but needs a finish and may decay sooner |
3. Gather tools and prepare the site
You’ll need a tape measure, level, square, saw, drill/driver, and safety glasses. A circular saw is convenient for cutting framing and slats; a hand saw is adequate for a small build if you take time to cut square. A circular saw is worth buying only if you have other projects for it. For one enclosure, borrowing or renting one may make more sense.
Choose firm, level ground with enough clearance to open the gate and roll bins out. Remove grass and loose soil. Add a compacted layer of gravel or set the frame on concrete pavers so wood isn’t sitting in wet soil. Check for buried utilities before driving stakes or digging post holes.
4. Build the frame
Cut four corner posts to the planned height. For a freestanding enclosure, 4-by-4 posts are sturdy; smaller 2-by framing can work for a short, sheltered structure if the sides are braced. Assemble a rectangular top and bottom frame from 2-by-4s, using the interior measurements you planned. Check both diagonals: if they match, the frame is square.
Fasten the posts to the frame with two exterior screws at each joint. Add a middle rail across the back and sides if the enclosure is wide, or if you plan to attach closely spaced slats. If the structure wobbles, add diagonal bracing at the rear corners. Don’t rely on thin slats to hold a poorly braced frame upright.
5. Attach the slats
Cut slats to the height of the sides and back. One-by-four boards are common, but narrower boards leave more gaps and use less material. Leave about ½ to 1 inch between slats for airflow and to let rain drain. Use a spacer block to keep gaps consistent, and predrill near board ends to reduce splitting, especially in cedar.
Fasten each slat to the top and bottom rails. Keep the lower slat at least 2 inches above the ground; a small gap reduces rot and makes it easier to sweep out leaves. A solid panel hides bins better, but traps moisture and is heavier. Widely spaced slats ventilate well but offer less screening.
6. Hang and adjust the gate
Build the gate flat from a rectangular frame with one diagonal brace running from the lower hinge side toward the upper latch side. That brace helps prevent sagging. Attach slats with the same spacing as the enclosure. Before hanging it, verify that the gate frame is square and that it clears the ground.
Mount two or three exterior hinges to a sturdy post, leaving a small, even gap at the latch side. Use through-bolts or long screws that bite well into the post. Fit the latch after testing the swing. If the gate drags, check that the frame is level and the hinge screws are tight; adding a diagonal brace can help, but a twisted frame may need to be rebuilt.
7. Finish and maintain the enclosure
Ease sharp corners with sandpaper, then apply an exterior stain or water-repellent finish if the lumber is dry enough for the product. Follow the label rather than coating damp pressure-treated boards; trapping moisture under a finish can cause peeling. Keep finish off the bin contact points if it remains tacky.
Check the gate and fasteners after the first few weeks, then once or twice a year. Tighten loose screws, clear debris from the base, and touch up worn finish. If bins are hard to roll out, widen the opening or remove a low threshold rather than forcing them past the frame. A simple enclosure lasts longer when it drains, stays square, and leaves enough room for the bins it was built to hold.