What's inside
As an Amazon Associate I earn from qualifying purchases. This post may contain affiliate links at no extra cost to you.
Contents
What a wooden garden obelisk does
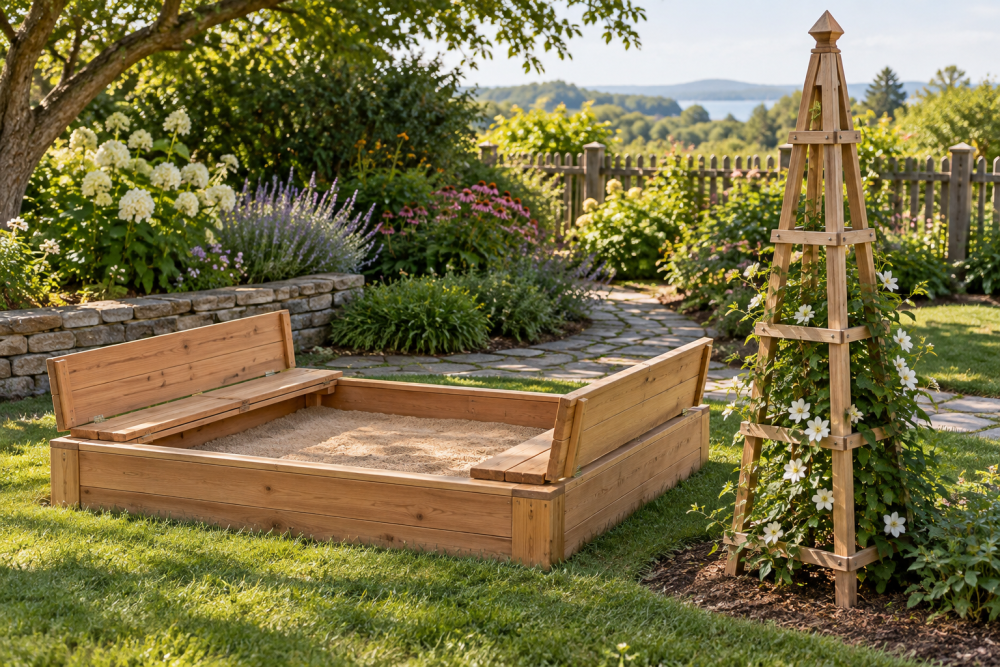
A garden obelisk is a freestanding, tapered frame that gives climbing plants somewhere to grow. It can support sweet peas, pole beans, clematis, or a young climbing rose, while taking up less ground space than a trellis. This beginner project uses four legs and horizontal crosspieces; it needs basic measuring, drilling, and sawing, but no complex joinery.
Plan on an obelisk about 6 feet tall, with a 20-inch square footprint. That size is manageable to build and move, but still tall enough for most garden climbers. If your site is windy or the plant will become heavy, make the footprint wider or anchor the legs securely.
Choose materials for the garden
Use rot-resistant wood that is suitable for outdoor exposure. Cedar is light and easy to cut, but costs more and can split near the ends. Pressure-treated lumber is often cheaper and durable, though it is heavier and may be less pleasant to handle. Wear gloves and eye protection when cutting treated wood, and follow its label for safe use. For a simple untreated frame, naturally durable cedar is a straightforward choice.
Buy straight, dry stock rather than the first pieces on the rack. Look down each board for twists and bows; warped legs make the top hard to align. For the four legs, use 1-by-2-inch stock. For crosspieces, use 1-by-2-inch or 1-by-3-inch stock. A wider crosspiece gives plants more to grip but adds weight and catches more wind.
You will also need exterior-rated screws, about 1¼ to 1½ inches long, and a drill with a bit for pilot holes. A box of exterior wood screws is a better choice than indoor drywall screws, which can corrode and snap outdoors. A handsaw is adequate for this project; a circular saw makes repeated cuts faster but is not necessary.
Plan the shape and cuts
For a 6-foot finished frame, cut four legs to 72 inches. Lay them on a flat surface in two pairs, with each pair crossing near the top to form an A shape. Set the bottoms 20 inches apart and adjust the crossing point until the top ends meet or overlap neatly. Mark the crossing point, then repeat the layout for the other pair. A helper makes it easier to keep the pairs matching.
Use this guide for a basic build. Actual crosspiece lengths depend on how far apart your legs sit at each level, so measure the assembled frame before cutting those pieces.
| Part | Quantity | Starting size | Notes |
|---|---|---|---|
| Legs | 4 | 1 × 2 × 72 in. | Trim the tops after fitting if needed |
| Crosspieces | 8–12 | 1 × 2 in. | Measure between legs at each level |
| Top tie | 1 | 1 × 2 in. | Optional; joins the leg pairs near the top |
Two or three crosspieces on each of the four faces usually provide enough climbing points. More rails make the structure busier and take longer to fit; fewer can leave broad gaps where young vines cannot reach the next support.
Build the frame
First, mark the leg crossing points and drill pilot holes. Fasten each pair with two screws, keeping the legs aligned and the bottoms evenly spaced. Pilot holes matter: narrow stock can split when a screw is driven close to an edge. If a screw starts to wander, back it out and drill a straighter pilot hole rather than forcing it.
Stand the two A-shaped pairs upright and spread them to the planned footprint. Temporarily brace them with clamps or a helper, then measure the distance between legs at the bottom, middle, and upper levels. Cut crosspieces to fit those gaps. Because the frame tapers, do not assume every rail on a face will be the same length.
Attach one rail at a time, checking that it is level and that the footprint stays square. Drill pilot holes at both ends and use one screw per end for a light frame; use two where the rail is wide enough to avoid splitting. Work on opposite faces in turn so one side does not pull the structure out of shape. Add the optional top tie or a short cap block if the leg pairs need help staying together.
Before setting the obelisk in the garden, press gently on each side. If it racks—that is, leans into a diamond shape—add a rail or diagonal brace. A tall frame with no bracing can wobble in wind even when its screws feel tight.
Set it in place and protect it
Push the leg ends several inches into firm soil, or attach stakes to the lower legs if the ground is loose. Do not rely on a shallow placement in a windy bed: a climbing plant acts like a sail. If you want to move the obelisk seasonally, keep it light and use separate ground stakes rather than burying the legs deeply.
Leave the wood unfinished if you prefer the natural weathered look; cedar will gray outdoors. An exterior oil or stain can slow water absorption, but it needs maintenance and may change the wood’s color. Avoid finishes that are not labeled for exterior use. Let any finish cure fully before planting against the frame.
Choose tools without overspending
A drill and handsaw are enough for a one-off obelisk. A wood drill-bit set is useful if you do not already have a suitable pilot bit, but you do not need a large specialty kit. A pair of bar clamps can hold the leg pairs steady, though a second person can do the job for free. Spend first on straight lumber and outdoor-rated fasteners; those have a greater effect on the result than buying a more powerful saw.