What's inside
As an Amazon Associate I earn from qualifying purchases. This post may contain affiliate links at no extra cost to you.
Frame-and-panel construction is the point where woodworking moves beyond simple boxes. A door, cabinet side, drawer front, or wainscot panel must stay flat while its surrounding frame handles seasonal movement. The best intermediate plans give you enough repetition to learn the method without burying you in difficult joinery.
For most woodworkers, a small cabinet door or a pair of raised-panel doors is the right first project. It uses the same rails, stiles, panel, and joinery found in larger furniture, but mistakes are affordable to remake. These plans also work well as winter shop projects, when indoor humidity is low and you can take time to mill stock accurately.
As an Amazon Associate we earn from qualifying purchases at no extra cost to you.


Contents
Choosing a Frame-and-Panel Project
Start with a project that has four frame members and one panel. A door between 18 and 30 inches wide is large enough to expose problems but still manageable on a router table or table saw. Avoid a full cabinet carcass as your first attempt; it adds case squareness, hinge layout, and a greater cost if the joinery fails.
| Project | Typical size | What it teaches | Main risk |
|---|---|---|---|
| Raised-panel cabinet door | 18 × 24 inches | Stub tenons, grooves, panel shaping | Panel rattling or splitting |
| Flat-panel drawer front | 6 × 24 inches | Accurate rails and stiles | Visible gaps at the joints |
| Small wall cabinet | 24 × 30 inches | Repeated doors and case alignment | Out-of-square installation |
| Wainscot panel | 24 × 36 inches | Panel layout and seasonal movement | Wide panel cupping |
A flat-panel door is the cheaper practice project because the center panel can be plywood. A raised panel requires more setup and usually a router bit or shaper cutter, but it teaches the traditional profile used in higher-end furniture.
The Best Joinery for Intermediate Builders
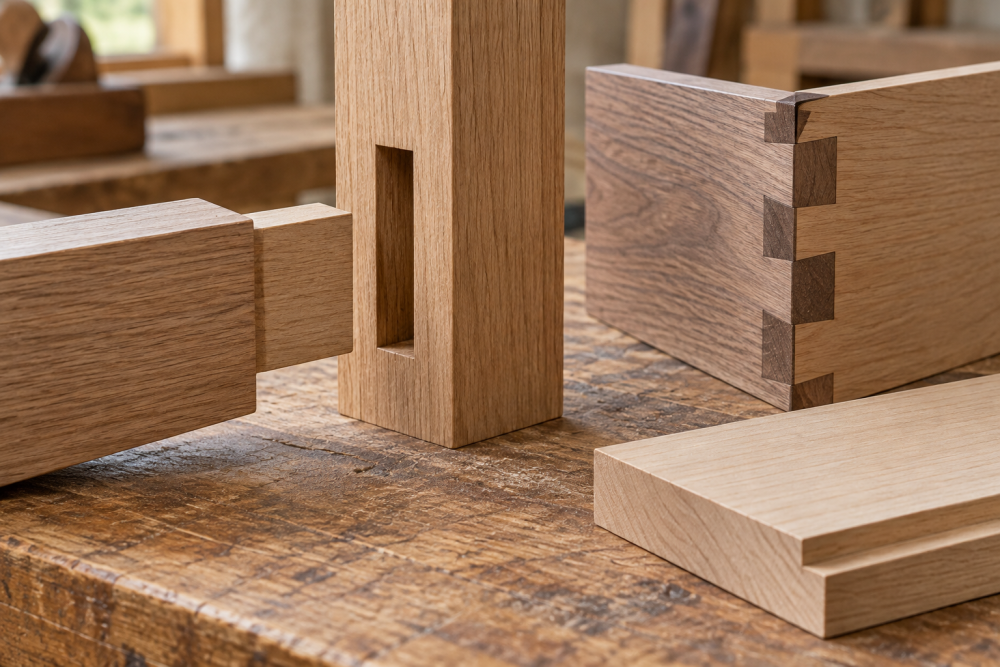
Use stub tenons and grooves for a practical first plan. A 1/4-inch-deep groove, cut about 3/8 inch wide, is suitable for a 3/4-inch-thick frame. The tenon should fit the groove without force. If you have to hammer the dry assembly together, the joint is too tight and may split the rail or stile.
Loose tenons are another good choice when you have a mortising setup. They are forgiving because you can cut all the mortises after the parts are milled, but they require a reliable alignment method. Dowels can work, too, though they are less forgiving of a hole that is slightly off-center.
Traditional full mortise-and-tenon joints are worthwhile on a heavy exterior door, but they are unnecessary for most cabinet projects. They add layout time without making a small indoor door meaningfully better. For an intermediate plan, repeatability matters more than historical accuracy.
Materials and Tools to Buy
Choose straight-grained stock with at least 1 inch of extra length for each part. Mill the boards to roughly 13/16 inch, then let them rest for a day before bringing them to a final 3/4 inch. This reduces the chance that a board moves after you cut the joinery.
A router table is useful for cutting consistent grooves and panel profiles, but it is not mandatory. A table saw with a dado blade can cut the grooves, and a bevel blade or hand plane can shape a simple bevel on a flat panel. The cheaper setup is fine for one or two doors; a router table pays off when you plan to build a kitchen or several matching cabinets.
Use a sharp combination blade, a reliable square, and a flat assembly surface. A parallel clamp set makes door assembly easier, but ordinary bar clamps work if you place them carefully and use cauls to protect the frame.
Step-by-Step Building Sequence
1. Mill and mark the parts. Make the two stiles identical and cut the rails from the same board when possible. Mark the inside faces and keep the grain direction consistent. This prevents accidentally routing a groove on the wrong face.
2. Cut the grooves. Test the setup on scrap from the same stock. The panel should slide into the groove with about 1/16 inch of clearance in depth. Do not glue the panel. Wood expands across its grain, and a trapped panel can push the frame apart.
3. Cut the tenons or loose-tenon mortises. Make test joints before cutting the actual parts. A shoulder gap greater than about 1/32 inch will remain visible after finishing. If the tenon is loose, do not compensate with extra glue; remake the joint or add a correctly sized veneer shim.
4. Fit the panel. A solid-wood panel should be 1/8 inch smaller than the frame opening in total width and height, with space left for movement. For a 24-inch-wide panel, 1/8 to 3/16 inch of total side-to-side clearance is a sensible starting point. Plywood can be fitted more closely because its cross-grain movement is minimal.
5. Dry-assemble and measure diagonals. Clamp the door lightly and compare both diagonals. They should be within 1/16 inch on a cabinet door. If one diagonal is longer, tap the opposite corners before tightening the clamps. Never rely on clamps to force a badly cut joint square.
6. Glue only the frame joints. Apply glue to the tenon faces and shoulders, not inside the panel grooves. Remove squeeze-out with a damp cloth before it dries, especially on porous woods where glue can interfere with stain.
Common Failures and Seasonal Timing
The most common failure is a panel that cracks during the dry season. The cause is usually glue in the groove or insufficient clearance. A second problem is a cupped panel installed with the curve facing the wrong way. Sight down the panel before assembly and orient the center so the finished face is stable and attractive.
Build and finish doors in the environment where they will live when possible. A door made in a damp summer garage may shrink after installation in a heated winter house. Store finished parts flat with stickers between them, and let them acclimate for at least several days before final fitting.
A wood moisture meter is useful when stock has been stored in an unheated shop. For indoor furniture, aim for wood near the moisture level of the finished room, commonly around 6% to 8%. The exact number varies by climate, but a large difference between the lumber and the room is a warning to wait.
Finishing and Buying Advice
Sand the assembled frame to 150 or 180 grit before applying finish. Ease sharp outside edges with one or two light sanding passes; a crisp edge is attractive, but a knife edge chips easily. Test the finish on the panel and frame together because end grain on the rails often absorbs stain darker than the stiles.
If you are buying one specialty accessory, choose the item that removes your biggest source of error. A frame-and-panel router bit set is worthwhile for repeated raised-panel doors, but it is poor value for a single flat-panel project. For occasional work, a straight bit, table-saw groove, plywood panel, and careful dry fitting can produce a clean result at much lower cost.