What's inside
As an Amazon Associate I earn from qualifying purchases. This post may contain affiliate links at no extra cost to you.
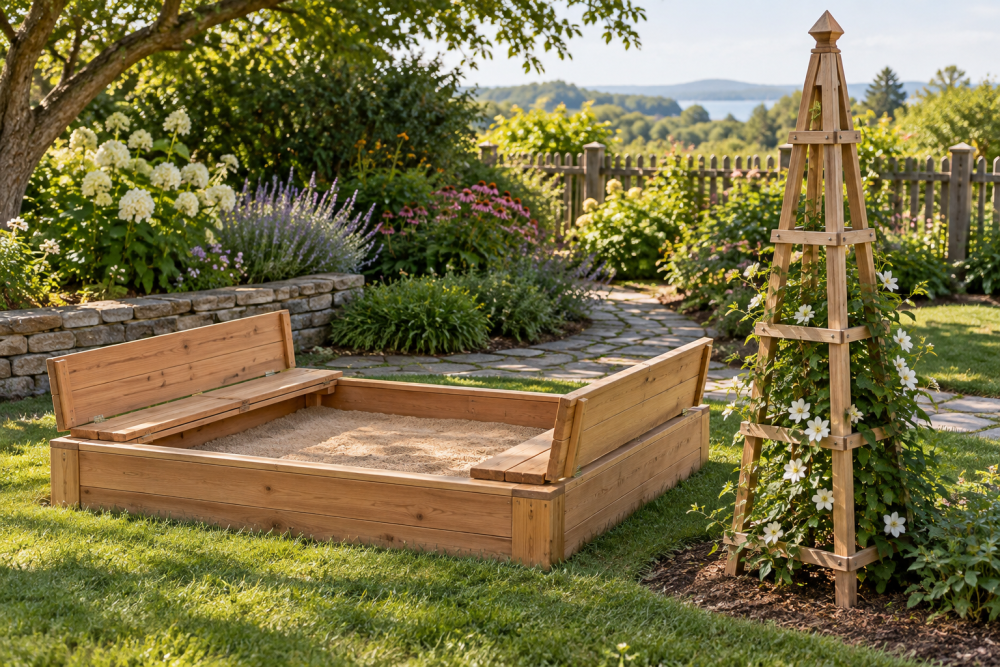
A fold-over cover keeps leaves, rain, and neighborhood cats out of a sandbox, then opens into two seats for play. This design makes a 4-by-4-foot box from pressure-treated lumber, with a two-panel lid hinged at the center and back. It suits a beginner who can make straight cuts and drive screws. Plan on a weekend, including time for the lumber to dry after cutting and for the finish to cure.
Contents
Plan the size and gather materials
A 4-by-4-foot interior gives young children room to dig without taking over a small yard. Use ground-contact-rated pressure-treated lumber for the box, since its bottom edges sit close to soil and may get wet. For the lid, use treated lumber too, or rot-resistant cedar if you prefer lighter boards and accept the added cost. Avoid old salvaged lumber with unknown coatings.
Buy four 2-by-8-by-8-foot boards for the box and lid framing, plus about ten 1-by-6-inch boards, 8 feet long, for the lid slats. Actual board sizes are smaller than nominal sizes; a 2-by-8 is typically about 1½ by 7¼ inches. You’ll also need exterior-rated screws, two continuous hinges, two lid supports, landscape fabric, and play sand. A bagged play sand is convenient for a small build; check the label rather than substituting coarse construction sand.
| Choice | Best for | Trade-off |
|---|---|---|
| Pressure-treated lumber | Lower cost and long-term contact with damp ground | Heavier; wear gloves and follow the label for handling and cleanup |
| Cedar | A lighter, naturally rot-resistant lid or box | Costs more and still needs sound drainage and upkeep |
| Bagged play sand | Clean, manageable quantities | Costs more per pound than bulk delivery |
| Bulk play sand | Filling a larger box | Delivery minimums and site access can make it impractical |
Tools and safety
Use a circular saw or handsaw, drill/driver, tape measure, square, clamps, and a sanding block. A box of exterior-rated deck screws is a better buy than general-purpose interior screws, which can corrode outdoors. Choose screws long enough to pass through one board and bite at least an inch into the adjoining piece.
Wear eye protection and a dust mask when cutting or sanding treated wood. Keep sawdust off the ground, and wash hands after handling. Sand every exposed edge; splinters are particularly likely at lid corners and cut board ends.
Build the sandbox box
Cut four 2-by-8 boards to make a square with a 48-inch inside dimension. If the boards are 1½ inches thick, cut two pieces to 51 inches and two to 48 inches. Put the longer pieces outside the shorter ones, forming a box with a 48-inch opening. Check the corners with a square before driving three screws through each outside board into its neighbor. Predrill near the ends to reduce splitting.
Set the box on a level, well-drained patch of ground. Remove sod and sharp stones, then spread landscape fabric over the soil inside the box. It helps limit weeds while allowing water through; a solid plastic liner can trap water and leave the sand soggy. If the site stays wet after rain, improve drainage or choose another spot before filling.
Make the fold-over cover
The cover is two framed panels, each about 24 inches wide and 48 inches long. Build each frame from two 2-by-4 rails cut to 48 inches and two end pieces cut to fit between them. Screw the end pieces between the rails, keeping each frame square. Attach 1-by-6 slats across each frame, leaving roughly ⅛ inch between slats so rain can drain. The two panels together should span the box; trim to fit if your actual lumber dimensions differ.
Fasten one panel to the back rim with a continuous hinge. Fasten the second panel to the first along their adjoining long edges with another continuous hinge. This joint lets the lid fold back on itself. Test the motion before installing hardware permanently: the panels should open without binding on the box corners. A pair of lid supports can help control the opening, but choose hardware rated for the panel’s weight and intended outdoor use.
Do not rely on small toy-box hinges or a loose prop stick. A falling panel can injure fingers, and wind can catch an open lid. Install supports according to their instructions, keep the hinge line clear of pinch points as much as possible, and show children how to open and close the cover with an adult nearby. If the lid is too heavy to handle comfortably, use lighter cedar slats or build smaller sections.
Finish, fill, and check
Round sharp corners and sand rough spots. Apply an exterior finish only if its label says it is suitable for the intended use; let it cure fully before children use the sandbox. Untreated cedar can weather naturally, though it will gray. Keep any finish off the sand-contacting interior if its suitability is unclear.
Four cubic feet of sand fills this box to a depth of about 3 inches; 8 cubic feet gives about 6 inches. That is roughly 400 to 800 pounds, depending on moisture and sand density. Add sand gradually rather than assuming one bag or one delivery quantity is exact. Keep the fill below the rim so it does not spill onto the hinges or seats. Check for standing water, loose screws, splinters, and hinge movement each season. Close the cover when the sandbox is not in use, and replace sand that becomes contaminated or persistently damp.