What's inside
As an Amazon Associate I earn from qualifying purchases. This post may contain affiliate links at no extra cost to you.
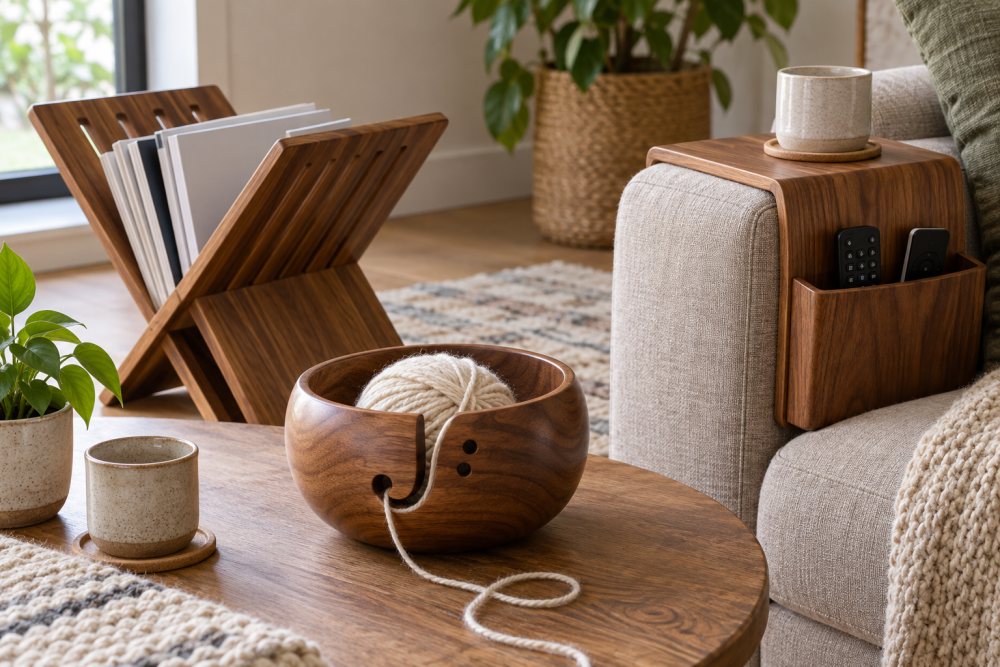
This rack uses two plywood panels with matching slots, so the pieces lock together without screws or glue. It holds magazines upright in a small footprint and comes apart for storage. The key is to size the slots to the actual plywood thickness: nominal 1/2-inch plywood is often thinner than 1/2 inch, and a slot cut to the label can leave the rack loose.
Contents
Plan and dimensions
The plan below makes a rack about 12 inches wide, 10 inches tall, and 8 inches deep. It suits most standard magazines and thin catalogs. If you mainly store large-format magazines, increase the panel height to 11 or 12 inches; check the largest item you own before cutting.
You’ll need two pieces of 1/2-inch plywood, each 12 by 10 inches. One panel forms the sides; the other forms the dividers. Each panel gets a centered slot that runs halfway through its height. When assembled, the panels cross at right angles, creating four compartments.
For the slots, measure the plywood with calipers or a ruler. If it measures 15/32 inch, make the slot about 15/32 inch wide, then test the fit on scraps. A snug slip fit is the goal: the parts should push together by hand without wobbling or requiring a mallet.
Materials and tools
Use flat, void-free plywood for the cleanest slot edges. Baltic birch or cabinet-grade birch is a good choice, but sound sanded plywood from a home center is adequate for a utility rack. Avoid bowed panels and sheets with large internal voids near the slot area. For a small project, a 1/2-inch birch plywood project panel saves you from buying a full sheet.
Tools: circular saw or table saw, jigsaw or handsaw, drill, square, tape measure, clamps, and sandpaper. A router with a straight bit can make a cleaner slot, but it is not necessary. A digital caliper helps measure the sheet accurately; a careful ruler measurement and scrap test work too.
Wear eye protection and support the plywood securely while cutting. Small panels can shift or pinch a blade if held only by hand.
Lay out the slots
On each 12-by-10-inch panel, mark the centerline across the 12-inch width, at 6 inches from either end. The slot is centered on this line and 5 inches long, beginning at one long edge and ending at the panel’s midpoint. On the first panel, cut the slot inward from the bottom edge; on the second, cut inward from the top edge. This opposite orientation lets the panels interlock.
Mark the slot width using your measured plywood thickness. Keep the sides parallel and square to the edge. A slot that is too wide makes the rack rock; one that is too narrow can split a panel during assembly. If the material varies in thickness, size the slot to the thickest area and plan to sand the mating edges lightly.
Cut and fit the panels
Cut both panels to final size, checking that opposite edges are square. Drill a small starter hole at the closed end of each slot, staying inside the layout lines. Cut from the open edge to the hole with a jigsaw, or make careful parallel cuts and remove the waste with a chisel. Keep the blade just inside the line; you can widen a slot gradually, but you cannot put plywood back.
Test the parts on a flat surface. They should meet at the center, with the outer edges of the panels aligned. If the fit is tight, sand the slot walls with a narrow strip of 120-grit paper. Remove a little at a time and retest. If the fit is loose, thin plywood shims or a dab of wood glue can steady a permanent assembly, but a badly oversized slot is best recut in a new panel.
Choose a cutting method
| Method | Best for | Trade-off |
|---|---|---|
| Jigsaw | One-off build with basic tools | Quick, but the cut can wander; use a sharp blade and stay inside the line. |
| Router and straight bit | Cleaner, repeatable slot walls | Needs a guide or template and careful control at the slot’s closed end. |
| Table saw | Shop with a crosscut sled and safe setup | Accurate for repeated cuts, but a short, enclosed slot needs a plan for stopping safely. |
For a single rack, a jigsaw is usually the sensible choice. A router setup is worth the extra effort if you are making several racks or want especially clean edges. Do not plunge a handheld circular saw into the panel to finish a blind slot; the limited visibility and exposed blade make that a poor shortcut.
Sand and finish
Ease the outside corners and edges with 120-grit sandpaper, then smooth with 180 grit. Sand the slot edges by hand; power sanding can enlarge them unevenly. Dry-fit the rack again before applying finish, since a coating inside the slots can make a close fit too tight.
For a simple indoor finish, use clear water-based polyurethane or a hardwax oil, following the product’s label for drying and ventilation. Finish both sides of each panel to reduce uneven moisture movement. If the rack will sit on a desk, add thin felt pads underneath. Paint is fine too, but prime the plywood edges first because exposed plies absorb paint unevenly.
Assemble and adjust
Slide the panels together from their open slot ends until they meet at the center. Stand the rack on a flat surface and check that it does not rock. If it does, first check for a panel that is not fully seated or an edge that is out of square. For a removable rack, keep the joint friction-fit. For a permanent one, add a small amount of wood glue inside the joint and clamp the panels square while it dries.
Load magazines evenly rather than stacking heavy books on one side. If the rack feels top-heavy, widen the panels to 13 or 14 inches or increase their depth; the trade-off is a larger footprint and more plywood. This simple cross-lap design is best for light reading material, not a shelf for heavy binders.