What's inside
As an Amazon Associate I earn from qualifying purchases. This post may contain affiliate links at no extra cost to you.
Contents
What This Rail Is and Why It Works
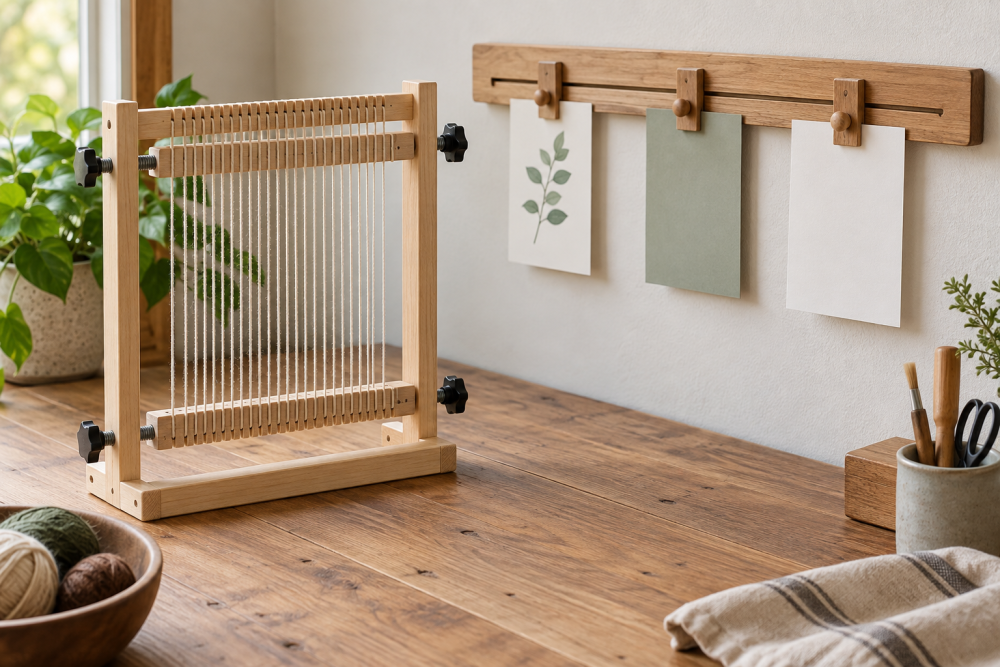
A picture display rail is a simple wooden molding with a continuous groove that holds sliding clips. You mount it once, then you can add, slide, or swap photos, postcards, and small prints without putting new holes in the wall. Unlike picture ledges that need depth for frames to lean, this rail holds paper prints and lightweight mounted photos vertically, so it works in hallways, above desks, and in rentals where you want flexibility.
The basic build is a 36 to 48-inch hardwood rail, about 3/4 inch thick by 1-1/2 to 2 inches tall, with a 1/4-inch wide groove down the front face. Clips with a T-shaped back slide in from the end. Total weight is low, but the groove has to be straight and consistent or the clips will bind. This is a one-afternoon project if you have a router or table saw, plus an hour for finish to dry.
Materials and Tools
For a 48-inch rail you need one straight board, 50 inches long to allow for trimming. Choose hardwood if you can. Pine works and is cheap, but its soft grain dents when you tighten clips and it tends to fuzz inside the groove. Poplar paints well and is harder than pine. Oak and walnut cost more but hold a crisp groove and resist sag over a 48-inch span.
You will need a router with a 1/4-inch straight bit or a table saw with a flat-top blade, a roundover bit set for easing edges, sandpaper in 120 and 180 grit, a drill and level, and wall anchors rated for your wall type. For clips, you can buy bulk sliding picture rail clips with a T-back, or make your own from 1/8-inch plywood and small bulldog clips. Buy at least 10 clips for a 48-inch rail; you will use 2 to 3 per 4×6 print if you want it to hang flat without curling.
Wood Choice Comparison
All four options below will work. The difference is how clean the groove stays and how much the rail will sag if you load it with 15 to 20 prints.
| Wood | Cost for 48″ Rail | Groove Quality | Best For | Downside |
|---|---|---|---|---|
| Pine (select) | $6 – $10 | Acceptable, can tear | Painted rail, budget build | Dents easily, may need wood hardener in groove |
| Poplar | $12 – $18 | Clean, paints well | Painted or stained, best value | Greenish streaks if you want clear finish |
| Red Oak | $18 – $25 | Very clean | Clear finish, high traffic areas | Open grain shows, heavier |
| Walnut | $30 – $45 | Excellent | Display piece, dark decor | Expensive, harder to find straight stock |
If you are painting, poplar is the honest sweet spot. Do not pay for walnut if you are going to cover it with white paint. If you want a natural look and plan to keep the rail up for years, oak will outlast pine without the price of walnut.
Sizing and Layout
Standard height for a display rail is 57 to 60 inches from the floor to the center of the rail, which puts prints at eye level. In a kids room or above a low desk, 44 to 48 inches works better. Keep at least 2 inches of clearance above the rail if you are sliding clips in from the end.
Mark stud locations first. A 48-inch rail should hit at least two studs. If you cannot hit two studs, use hollow-wall anchors rated for 25 lbs each in shear, not just drywall screws. The rail itself weighs about 1.5 lbs, but a full load of 20 photos, clips, and occasional bumping adds leverage that pulls the top edge away from the wall. Two screws into studs 32 inches apart will prevent sag. Three mounting points is better for spans over 48 inches.
For the groove, plan a single centered slot: 1/4 inch wide, 3/8 inch deep, with the top edge of the groove about 5/8 inch down from the top of the rail. This leaves enough wood above and below the slot so it does not break out. If you are using store-bought T-clips, measure the T-back thickness first. Many are 0.85 to 1.0 mm thick and need a 1/4-inch slot with 3/16 inch of undercut on each side if you rout a T-slot. The simpler method, and the one that fails less, is a straight 1/4-inch slot with clips that have a flat 1/4-inch stem and a cross bar behind it. No undercut needed.
Cutting the Rail and Routing the Groove
Start with a board that is already S4S (surfaced four sides) if you do not have a jointer and planer. Check for bow by sighting down the length. More than 1/16 inch of bow over 48 inches will show as a gap against the wall.
Cut to final length plus 1/32 inch, then trim after routing. Set your router fence to center the 1/4-inch straight bit. Make the groove in two passes: first at 3/16 inch depth, second at full 3/8 inch. Taking the full depth in one pass scorches the groove and increases the chance the bit wanders, especially in pine. Feed rate matters. Move at about 1 inch per second and listen. A high-pitched whine means you are feeding too slow and burning; chatter means too fast.
After the groove, ease the top and bottom front edges with a 1/8-inch roundover bit. Do not round over the back face; you want it flat to the wall. Sand the groove lightly with 180 grit folded over a piece of 1/4-inch hardboard. Do not over-sand or you will widen the slot and clips will wobble. Vacuum the dust out; any grit left in the groove will make clips stick later.
Making or Fitting the Sliding Clips
If you bought T-back clips, test fit before finishing. The clip should slide with light finger pressure and not fall out when tilted 15 degrees. If it is too tight, rub the stem with paraffin wax, not silicone spray, which contaminates finish. If it is too loose, a single layer of clear tape on the back of the T will tighten it, or switch to a clip with a slightly thicker stem.
To make your own, cut 1-1/4 inch squares of 1/8-inch plywood, glue a 1-inch mini bulldog clip to the front, and glue a 1/4-inch wide by 3/4-inch long plywood tab centered on the back. The tab thickness should be just under 1/4 inch so it slides in the groove. Sand the tab edges round. This DIY version costs cents per clip and lets you match wood tone, but it holds less weight. Test it with your heaviest print. If the print pulls the clip forward and the tab pops out, your groove is too shallow or the tab is too short. Increase tab length to 1 inch.
Common failure: clips that tilt and jam when you slide a loaded print. This happens when the groove is too wide or the clip stem is too narrow, allowing the clip to rotate. Fix it by keeping the groove at exactly 1/4 inch and using clips with a flat stem that is 0.9 to 1.0 inch wide. They resist rotation far better than round wire stems.
Finishing and Mounting
Finish before mounting. For a natural rail, apply one coat of Danish oil or two coats of wipe-on poly, sanding with 320 grit between coats. Do not flood finish into the groove; it will build up and narrow the slot. Wipe the groove with a dry rag while the finish is still wet. For a painted rail, prime, then two coats of acrylic enamel in satin. Satin shows fewer finger marks than gloss and slides better than matte.
Drill countersunk mounting holes 3/8 inch from the top and bottom edges to avoid splitting. Two holes every 16 inches that line up with studs is ideal, but at minimum drill three holes: both ends inset 3 inches and one center. If you want no visible screws, rout a 3/8-inch deep French cleat on the back or use a French cleat hanger rated for 30 lbs. A cleat makes leveling easier and lets you remove the rail to add clips without fighting the wall, but it adds 1/2 inch of standoff and needs precise leveling or the rail will look crooked.
Mount with a level and a second pair of hands. Drive screws into studs first, then add anchors. Check slide action again after mounting. Walls are rarely flat, and tightening screws can bow the rail and pinch the groove. If a section binds after mounting, loosen the nearest screw 1/4 turn and add a paper shim behind the rail at that point.
Using and Maintaining the Rail
Load prints from one end and slide them into place. Do not force clips past a tight spot; you will gouge the groove and create a permanent catch point. If you change photos often, leave 1 inch of empty rail at one end as a loading zone.
Keep total load under about 3 lbs for a 48-inch rail on two studs. That is roughly 20 to 25 standard photo prints or 10 to 12 matted 5x7s. Heavier frames will sag the rail and pull clips out. This system is for paper and light card, not for glass frames.
Dust the groove every few months with a dry brush. If clips start to drag in humid summer months, wood swelling is the cause. A light rub of paraffin inside the slot solves it. Avoid hanging the rail in direct sun; UV will fade prints quickly and heat will cause the rail to move and loosen screws.