What's inside
As an Amazon Associate I earn from qualifying purchases. This post may contain affiliate links at no extra cost to you.
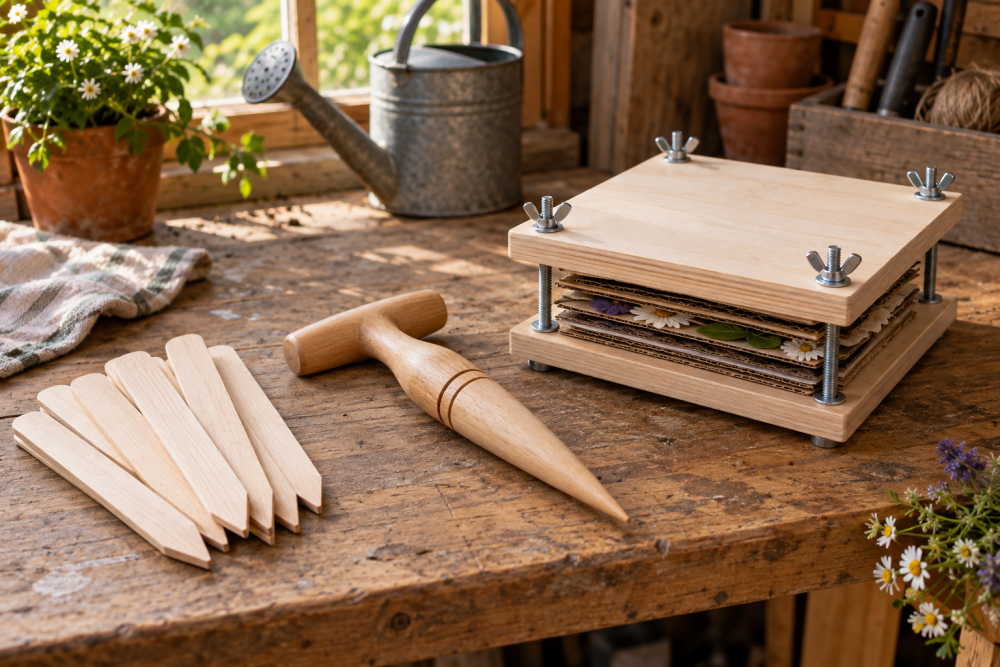
A wooden flower press is a straightforward weekend project: two flat boards, a stack of absorbent sheets and four bolts tightened with wing nuts. The even pressure dries flowers and leaves while keeping them flat, and the hardware can be loosened to add or remove paper without tools.
Contents
Materials and sizing
This plan makes a press with boards about 9 by 12 inches—large enough for many garden flowers and common craft-paper sheets. If you mostly press small leaves, you can scale the boards down to 6 by 8 inches. Keep the boards the same size, and leave enough margin around the paper stack for the bolts.
Use two pieces of 3/4-inch plywood or solid wood. Plywood is usually the simpler choice because it stays flatter across its width and is less prone to seasonal movement. A flat, knot-free board is fine if that is what you have; avoid warped stock, which can put uneven pressure on the contents. For a basic build, gather:
- Two boards, each about 9 by 12 inches and 3/4 inch thick
- Four 1/4-inch-diameter carriage bolts, about 3 inches long
- Four matching flat washers and four 1/4-inch wing nuts
- Absorbent paper and corrugated cardboard cut just smaller than the boards
- Sandpaper, wood finish if desired, and a drill with a 1/4-inch bit
Three-inch bolts suit a modest stack of paper and cardboard. If you want to press thicker flowers or add more layers, measure the full stack first and choose bolts at least 1 inch longer than that measurement. A carriage bolt and wing-nut hardware set is convenient, but buying the parts separately is fine if you can match the diameters.
Choose your board
Both plywood and solid wood can work. The key is a pair of boards that are flat and thick enough to resist bending when the nuts are tightened. Plywood costs less in many places and is often more stable; solid wood offers a finished look but needs careful stock selection.
| Board option | Advantages | Trade-offs |
|---|---|---|
| 3/4-inch plywood | Usually stable and readily available; easy to cut | Exposed plies need sanding; low-grade sheets may have voids |
| 3/4-inch solid wood | Attractive edges and a traditional look | Can cup or warp; flat, dry stock matters |
There is no need to buy premium hardwood for a press. A clean piece of construction plywood is adequate if it is flat, its edges are not crumbling and the press will be stored indoors. Sand the faces smooth so splinters do not catch on paper.
Cut and drill the boards
Cut both boards to the same dimensions. If you do not own a saw, a lumberyard or hardware store may make straight cuts for you. Check the pair by stacking them: their edges should line up, and neither should rock on a flat surface.
Mark a bolt hole near each corner of both boards. Place the centers about 1 inch in from each edge. This gives the holes enough distance from the corners to reduce splitting while leaving room for a broad paper stack. Clamp the boards together, align their edges and drill through both at once with a 1/4-inch bit. Drilling the pair together helps the holes match. Keep the drill square to the face; angled holes make the bolts bind.
Unclamp the boards and sand the faces and edges. Ease sharp corners with a few passes of sandpaper. If using plywood, inspect the holes for torn veneer. A light sanding is usually enough; large chips around a hole can weaken the corner.
Assemble the press
Push one carriage bolt through each hole in the lower board, with the smooth head on the underside and the threaded end pointing up. The square shoulder beneath the head should grip the wood. If it spins when you turn a wing nut, seat the shoulder by tapping the bolt gently into the hole with a mallet. Add a washer and wing nut to each bolt.
Layer the press with a piece of corrugated cardboard, absorbent paper, the flowers, another sheet of paper and another piece of cardboard. Repeat as needed, then place the upper board on top. Tighten each wing nut a little at a time, moving diagonally between corners. Stop when the stack is held firmly and the boards sit level. Cranking one nut down fully before the others can tilt the top board and squeeze material unevenly.
For easier tightening, choose larger 1/4-inch wing nuts. Small ones work, but can be uncomfortable if the stack is tight. Washers spread pressure and help keep the nuts from digging into the wood; they are inexpensive and worth including.
Pressing and drying
Arrange flowers so petals do not overlap unless you want them to dry together. Thick centers and fleshy leaves take longer than thin petals. Change damp paper after the first day, then check it daily for the next few days. Drying time varies: thin flowers may be ready in about a week, while thicker material can take two weeks or longer.
If a flower turns brown or feels damp when removed, it likely needs more time or more frequent paper changes. Too much pressure can flatten delicate petals into an indistinct shape; too little can leave stems curled. Tighten evenly, and use fresh, dry absorbent paper rather than compensating by crushing the stack.
Paper and storage
Plain, uncoated paper is a reliable choice. Blotting paper absorbs moisture well and is reusable when fully dried, while ordinary printer paper is cheaper and often adequate for thin flowers. Corrugated cardboard keeps air channels between layers, but clean, dry cereal-box card can work for a small press. Avoid glossy or coated paper, which absorbs poorly and may transfer ink or finish.
A pack of blotting paper sheets is useful if you press often; for occasional garden finds, start with clean plain paper and replace it when it stays damp. Store the press dry and loosen the nuts between sessions. If the boards develop a slight bow, stop tightening harder—the fix is flatter stock, not more force.