What's inside
As an Amazon Associate I earn from qualifying purchases. This post may contain affiliate links at no extra cost to you.
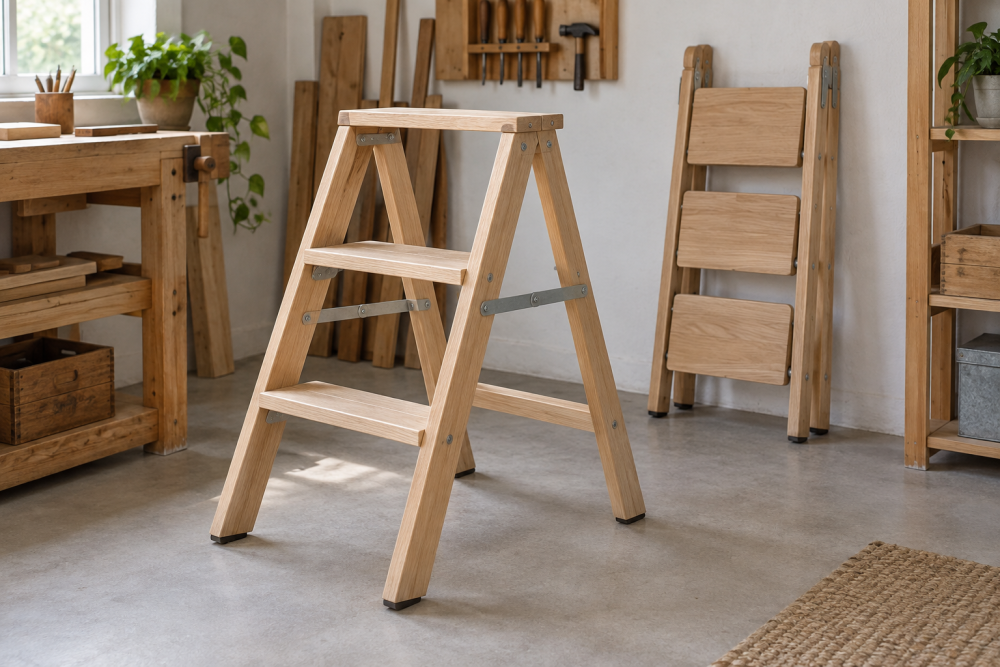
A wooden folding step ladder is a useful weekend project when you need a stable platform for painting, changing light fixtures, or reaching high shelves. This design uses two front stiles with three wide treads, a folding rear support, and a locking spreader. It is intended for household use, not commercial work or standing on the top cap.
Contents
Plan and dimensions
The dimensions below produce a ladder about 30 inches tall at the top tread. The treads are 18 inches wide and 5-1/2 inches deep, giving noticeably more foot room than a typical narrow stepladder.
| Part | Quantity | Suggested material and size |
|---|---|---|
| Front stiles | 2 | 1 x 4 hardwood, 48 inches long |
| Rear legs | 2 | 1 x 4 hardwood, 42 inches long |
| Treads | 3 | 1 x 6 hardwood, 18 inches long |
| Top cap | 1 | 1 x 6 hardwood, 20 inches long |
| Rear braces | 2 | 1 x 3 hardwood, cut to fit |
Use straight, dry lumber without knots at hinge locations. Hardwood is preferable because the screws holding the hinges and tread supports get repeated stress. Pine is cheaper and acceptable for a light-duty household ladder, but inspect it carefully and avoid soft, crushed edges.
Tools and hardware
You will need a tape measure, combination square, circular saw or miter saw, drill, countersink bit, clamps, and a sander. A table saw is helpful but not essential. Buy two heavy-duty strap hinges or folding-ladder hinges, two locking spreader arms, exterior-rated wood glue, and 2-inch and 1-1/4-inch structural screws. A heavy-duty ladder hinge set is a better choice than small utility hinges, which can bend or pull out.
For the feet, use rubber pads or nonslip rubber ladder feet caps sized for the actual lumber. Felt furniture pads are not suitable; they slide on smooth floors and compress quickly.
Cut and mark the parts
Cut the front stiles to 48 inches and the rear legs to 42 inches. Mark the bottom of each front stile as the reference end. Measure upward and mark the top surfaces of the treads at 8, 17, and 26 inches. These intervals keep the steps comfortable without making the ladder unnecessarily tall.
Cut the treads square to 18 inches. Round their front edges with a 1/8-inch router bit or several sanding passes. Sharp tread edges are uncomfortable and more likely to chip. Cut the top cap to 20 inches so it overhangs the stiles slightly on each side.
Lay the two front stiles side by side, inner faces up, and transfer the tread marks across both. The treads should fit between the stiles, with their ends flush against the inside faces. Do not rely on screws alone: the treads need a glued shoulder, a cleat, or a half-lap joint to resist twisting.
Assemble the front section
For a straightforward build, install a 1 x 2 cleat beneath each end of every tread. Cut twelve cleat pieces about 5 inches long. Glue and screw each cleat to the inside of the stile, then set the tread on the cleats and fasten it with two 1-1/4-inch screws per side. Predrill every hole to prevent splitting.
Check that the stiles remain parallel before the glue sets. Measure diagonally from the top of one stile to the bottom of the other, then reverse the measurement. If the numbers differ by more than 1/8 inch, clamp and adjust the frame. A twisted front section will make the ladder rock even when the floor is level.
Attach the top cap across the stiles with glue and four 2-inch screws. Keep the top cap broad enough to serve as a handhold, but do not treat it as a standing surface unless the design is specifically reinforced for that use.
Attach the folding rear section
Set the rear legs behind the front section, with their bottoms about 24 inches behind the front feet when the ladder is open. The legs should angle inward slightly toward the top. Trim the bottoms so the cut faces sit flat on the floor when the ladder is opened to this position.
Position the strap hinges near the top, one on each side. Use all supplied screw holes, but replace short decorative screws with structural screws if the hinge manufacturer permits it. Keep at least 1 inch of wood around each screw so the stile does not split. Test-fold the ladder before tightening the hinge screws fully.
Add a horizontal rear brace about 10 inches above the floor and a second brace near the middle of the rear legs. Glue and screw the braces in place. These braces prevent the rear legs from spreading sideways. Install the folding spreader arms between the front and rear sections; they must lock open firmly and fold flat without binding.
Finish and test the ladder
Sand all surfaces to 120 or 150 grit. Ease every corner, especially the stile edges and tread fronts. Apply two or three coats of polyurethane, porch paint, or another durable finish, sanding lightly between coats. A non-slip stair tread tape can improve grip, but it should supplement—not replace—solid, level treads and rubber feet.
Before climbing, open the ladder fully on a clean, level floor and confirm both spreaders are locked. Push sideways on the top cap and each tread. There should be no visible hinge movement, loose screws, or rocking. Test it first with a 50-pound sandbag, then with your weight while holding a stable support.
Stop using the ladder if a tread cracks, a hinge loosens, a foot lifts, or the rear section fails to lock open. Never stand on the top cap or highest tread unless the design has a proper guardrail and is rated for it. For frequent work above 6 feet, a commercially rated fiberglass or aluminum ladder is the safer purchase.
When buying is the better choice
Building makes sense when you want unusually wide treads, a particular height, or furniture-quality wood. It is not automatically cheaper once hinges, spreaders, finish, and hardware are included.
| Option | Best for | Main trade-off |
|---|---|---|
| Homemade hardwood ladder | Custom dimensions and occasional indoor use | Requires careful testing and maintenance |
| Basic wooden stepladder | Light household tasks on a tight budget | Usually narrower treads and less compact folding |
| Rated fiberglass stepladder | Electrical work, frequent use, and guaranteed load ratings | Costs more and offers less custom appearance |
If the project is mainly about saving money, compare the total cost before cutting wood. A basic rated ladder is often the cheaper option and comes with tested hinges, feet, and a published load limit. Build this version for the wide, comfortable treads and custom fit—not to avoid buying safety-critical hardware.