What's inside
As an Amazon Associate I earn from qualifying purchases. This post may contain affiliate links at no extra cost to you.
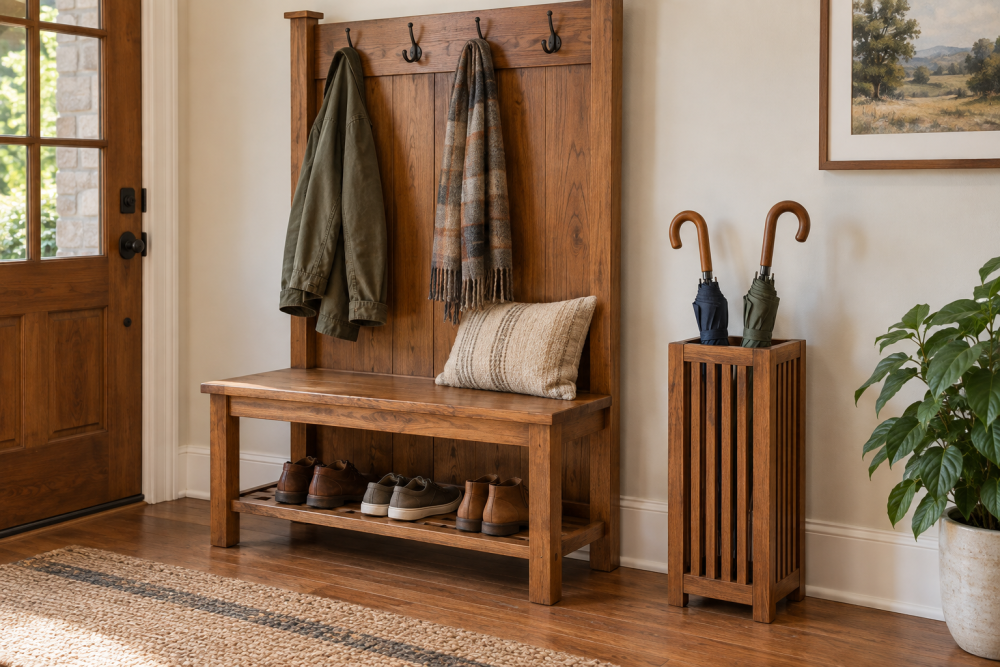
A wooden hall tree gives you a place to hang coats, drop keys, and sit while putting on shoes without taking much floor space. This version is a straightforward weekend project: a narrow cabinet-like frame, a small bench seat, and a row of hooks. It is sturdy enough for everyday use, but simple enough for a first furniture build.
Contents
Choose the Size and Design
A practical finished size is 36 inches wide, 16 inches deep, and about 72 inches tall. That gives two or three coats plenty of hanging room while keeping the hall tree from crowding a walkway. Set the seat at 18 inches high, which is close to a normal chair height.
The project uses two side panels, a top, a seat, a lower shelf, a back panel, and a hook rail. Plywood is the sensible choice for the main structure because it stays flatter than wide solid boards. Use 3/4-inch plywood for the sides, top, seat, and shelf. A 1/4-inch plywood back keeps the unit square and reduces weight.
| Material | Advantages | Drawbacks | Best use |
|---|---|---|---|
| Paint-grade plywood | Stable, affordable, easy to paint | Edges need covering or filling | Most indoor hall trees |
| Hardwood plywood | Good appearance and stable panels | Costs more; veneer can splinter | Clear finish or stained builds |
| Solid pine boards | Easy to find and machine | Can warp and dent | Trim, hook rail, and budget builds |
| Solid hardwood | Strong, attractive, durable | Expensive and requires more careful joinery | Visible trim or premium builds |
If you want the least expensive version, paint-grade plywood with pine edge trim is sufficient. Spending more on hardwood plywood only makes sense when the hall tree will be stained or placed in a prominent entryway.
Materials and Tools
For a 36-by-16-by-72-inch hall tree, buy one 4-by-8-foot sheet of 3/4-inch plywood, one half sheet of 1/4-inch plywood, and a 1-by-6 board at least 36 inches long for the hook rail. You will also need wood glue, 1 1/4-inch pocket-hole screws or trim-head screws, 1 1/4-inch brad nails, sandpaper, primer, and paint or finish.
Choose heavy-duty coat hooks with two mounting holes when possible. Four hooks spaced 8 to 9 inches apart are suitable for most families. Include a wall-attachment method such as a French cleat or metal anti-tip brackets. The hall tree should not be allowed to tip when a child climbs or pulls on a coat.
Basic tools include a circular saw and straightedge, drill, pocket-hole jig, tape measure, square, clamps, and random-orbit sander. A table saw is convenient but not required. A circular saw guide rail makes long, straight cuts much easier.
Cut the Parts
Cut two side panels at 72 by 16 inches. Cut the top at 34 1/2 by 16 inches so it fits between the sides. Cut the seat at 34 1/2 by 16 inches and the lower shelf at 34 1/2 by 14 inches. The shelf is slightly shallower so shoes do not catch on its front edge.
Cut the hook rail from 1-by-6 stock to 34 1/2 inches. If you prefer a thicker-looking rail, laminate two pieces or use a 1-by-8 board ripped to about 6 inches. Cut the back panel to approximately 72 by 36 inches after the main carcass is assembled. Measuring afterward is safer than assuming the plywood dimensions are exact.
Before assembly, mark the inside faces of both side panels. Measure 18 inches up from the floor for the top of the seat and mark a second line about 6 inches below the seat for the shelf. Keep the hook rail’s top edge around 58 to 60 inches above the floor. This leaves enough room for adult coats without placing the hooks too high for children.
Assemble the Main Frame
Drill pocket holes on the underside of the top, seat, and shelf. Apply glue to the mating edges, clamp the top between the sides, and drive the screws. Check for square by measuring diagonally from corner to corner; the two measurements should be within about 1/8 inch.
Install the seat next. A seat that is only screwed into the side panels can loosen, so add a pair of 1-by-2 cleats beneath it along the side panels or across the back. Glue and screw the cleats in place before attaching the seat. The lower shelf can rest on cleats as well. This support is important because a person may put more than 200 pounds on the seat while standing up.
Do not rely on nails alone for the seat. They are useful for holding parts while glue dries, but they do not provide the same long-term resistance to side-to-side movement as screws and glued joints.
Square the Cabinet and Add the Hooks
Place the 1/4-inch back over the rear of the frame and align one corner carefully. Tack it with brad nails, then measure both diagonals again before fastening the remaining edges every 6 to 8 inches. The back acts as a large square, so installing it while the frame is crooked permanently locks in the problem.
Attach the hook rail between the side panels with glue and screws from the sides. For extra strength, add a horizontal cleat behind the rail. Predrill the hook holes to prevent the wood from splitting, especially near the ends. Keep the outermost hooks at least 3 inches from the side panels.
Use iron-on wood edge banding or solid-wood strips to cover exposed plywood edges. Solid strips are more durable on the seat’s front edge; edge banding is faster and fine for painted surfaces.
Sand, Finish, and Install
Sand exposed surfaces with 120-grit paper, then 180 grit. Ease every sharp corner with two or three light sanding passes. Fill screw holes and plywood voids before painting. For a painted build, apply primer to all edges, let it dry, and sand lightly before two finish coats. Plywood edges absorb paint quickly, so skipping primer often leaves them rough and dull.
For a clear finish, test stain on an offcut first. Plywood veneer and solid pine can absorb color differently. Two or three coats of water-based polyurethane are practical for an entryway because they dry quickly and do not yellow as much as oil-based finishes.
Install the hall tree against wall studs whenever possible. Use furniture anti-tip wall anchors if the layout does not allow a direct screw into a stud. Check that the unit sits level, tighten the hook screws after the finish cures, and test the seat with gradual weight before regular use. A small gap behind the unit for baseboard trim is acceptable, but do not leave enough space for it to rock or tip.