What's inside
As an Amazon Associate I earn from qualifying purchases. This post may contain affiliate links at no extra cost to you.
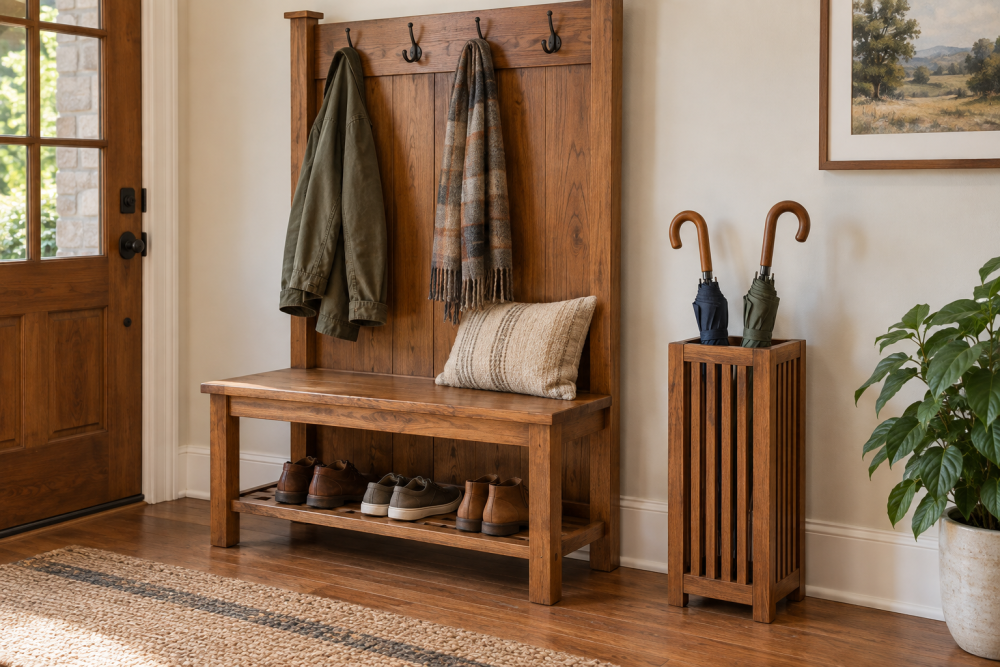
A hall tree with a bench solves the entryway pile-up — coats on the floor, shoes scattered, bags in the way. It’s essentially a low storage bench with a tall back panel for hooks. Built right, it holds 100+ pounds of winter gear without racking or pulling off the wall. Built wrong, it wobbles, sags, or rips hooks out of softwood. This guide gives you a proven, shop-tested sequence for a freestanding 48-inch wide hall tree that fits most entryways and can be built in a weekend with basic tools.
Contents
Planning and Sizing
Start with the space, not the lumber. Measure your wall width and leave at least 2 inches of clearance on each side for baseboards and air circulation. A good all-around size is 60 to 68 inches tall, 48 inches wide, and 16 to 18 inches deep. Bench height should be 17 to 18 inches from floor to top of the seat — standard chair height, comfortable for putting on boots. Bench depth of 16 inches is the minimum for an adult to sit without feeling perched; 17.5 inches is more comfortable if you have the floor space.
Plan for anchoring. Even a heavy hall tree will tip if two kids hang on it. You need to lag it to wall studs at the top rail. If your unit will be freestanding in the middle of a room, widen the bench base to 18 inches deep and add a 3.5-inch toe kick recess to lower the center of gravity.
Hook height matters. Mount the main row at 60 to 62 inches from the floor for adult coats, and a lower row at 40 to 42 inches for kids or bags. Space hooks 8 to 10 inches apart so bulky parkas don’t overlap. Mark stud locations before you finalize hook placement — ideally at least two hooks hit solid backing, not just 3/4-inch panel.
Materials and Tools
For a painted hall tree, poplar and 3/4-inch birch plywood are the best value — stable, cheaper than hardwood, and they paint well. For a stained piece, use solid maple, white oak, or walnut for the visible frame and plywood for the back panel. You will need:
Lumber: (1) sheet 3/4-inch hardwood plywood for the back panel and bench top, (2) 1×4 and 1×6 solid stock for stiles, rails, and bench frame, (1) 1×12 for the bench front apron if you want a solid look.
Hardware: 1-1/4-inch pocket screws, 2-inch wood screws for bench framing, 2-1/2-inch lag screws with washers for wall anchoring, 4 heavy-duty double coat hooks rated for at least 35 lbs each, and construction adhesive.
Tools: Miter saw, table saw or circular saw with straight-edge guide, drill/driver, pocket hole jig, level, clamps, and a random orbit sander with 120 and 180 grit. A brad nailer speeds up assembly but isn’t required — you can clamp and screw.
Wood Choice Comparison
Your wood choice drives cost, weight, and durability. Don’t use soft pine or MDF for structural parts — hooks will wallow out and the bench will dent in months.
| Wood | Cost (approx. per board foot) | Pros | Cons |
|---|---|---|---|
| Poplar + Birch Plywood (paint-grade) | $3 – $5 | Stable, easy to mill, takes paint perfectly, affordable | Does not stain well, dings more easily than oak/maple |
| White Oak | $8 – $12 | Very strong, excellent screw holding for hooks, classic grain | Heavy (unit will be 90+ lbs), harder to sand, higher cost |
| Hard Maple | $7 – $10 | Hardest bench surface, resists dents, clean modern look | Burns easily when cutting, requires sharp blades |
| Walnut | $12 – $16 | Rich color, no stain needed, stable | Expensive, softer than maple/oak so hooks need backing block |
For most builders, poplar framing with a birch plywood panel and bench is the smart money. If you want a natural finish that takes abuse, white oak is worth the upgrade. The cheaper pine boards from the big-box store are fine for shop jigs, but not for a load-bearing bench.
Building the Bench Base
The bench is the foundation. If it racks, the whole tree wobbles. Build a simple box frame from 3/4-inch plywood and 1×4 cleats.
Cut two side panels 17-1/4 inches tall x 16 inches deep. Cut a front apron 46-1/2 inches long x 9-1/4 inches tall (from 1×10 or plywood) and a back rail 46-1/2 x 3-1/2 inches. Connect sides to apron and rail with glue and pocket screws — three per joint, spaced evenly. Add a center divider (16 x 17-1/4 inches) if your bench is over 42 inches wide; without it, a 3/4-inch plywood seat will sag more than 1/8 inch under a 200-lb load within a year.
For the seat, cut 3/4-inch plywood to 48 x 17 inches with a 1/4-inch overhang on front and sides. Glue and screw it to the frame from underneath with 1-1/4-inch screws every 8 inches. If you want a solid-wood seat, use tongue-and-groove boards and attach with figure-8 fasteners or elongated screw holes to allow wood movement — screwing a solid top down tight will crack it across the width when seasons change.
Add a bottom shelf 3 inches off the floor between the sides for shoe storage. This shelf acts as a stretcher and doubles the racking resistance. Check for square by measuring diagonals before the glue dries; they should be within 1/16 inch.
Building the Back Frame and Hooks
The back panel carries all the hook load. Don’t rely on 1/4-inch beadboard alone — it will not hold screws.
Build a frame-and-panel back: two vertical stiles 1×4 x 60 inches and three horizontal rails 1×4 x 41 inches (top, middle, bottom). Cut a 3/4 x 3/8-inch rabbet on the inside back edge of the frame to receive a 1/2-inch or 3/4-inch plywood panel. Glue and pocket-screw the frame, then drop in the plywood panel and pin it with brads. This gives you 3/4-inch solid wood wherever a hook lands, plus a stiff panel that prevents flex.
Dry-fit the back upright on the bench and clamp it plumb. The back should sit flush with the rear edge of the bench seat and be screwed through the bench back rail into the stiles with 2-inch screws — six screws minimum. For extra strength, add two L-brackets underneath the seat where the stiles meet the bench sides.
Now install hooks. Drill pilot holes — skipping this is the number one failure mode for hook pull-out in hardwoods, where the screw snaps or splits the stile. Use #10 x 1-1/2-inch pan-head screws into solid stiles or the middle rail, not just plywood. If a hook location falls only on plywood, glue and screw a 3/4-inch hardwood backing block (4 x 4 inches) behind the panel at that spot. Choose heavy-duty wall coat hooks with two screw holes and a wide base rather than single-screw robe hooks; they spread load and don’t rotate under a heavy backpack.
Assembly, Finishing, and Installation
Sand everything to 180 grit before finishing. Break all bench edges with a light 1/8-inch roundover — sharp plywood edges chip and feel cheap. For paint, prime with shellac-based primer on poplar/birch to block grain bleed, then two coats of durable acrylic enamel in satin. For stain, use a pre-stain conditioner on maple or pine to avoid blotching; oak and walnut don’t need it.
Apply finish before final hook installation to avoid finish pooling around hardware. Let cure at least 24 hours before heavy use.
Move the unit to its wall and level it. Shim under the bench sides if your floor is uneven — an unshimmed bench will twist and open joints over time. Locate studs and drill through the top rail of the back frame. Drive 2-1/2-inch lag screws with fender washers into at least two studs. Test by pulling the top forward with 40 to 50 lbs of force; there should be zero movement. If you can’t hit studs, use heavy-duty toggle anchors rated for 80 lbs in shear, but studs are always better.
Finally, add felt pads under the bench and shelf to protect flooring, and consider a single coat of paste wax on the bench seat for scuff resistance. With solid construction and proper wall anchoring, this hall tree will handle daily entryway abuse for years without loosening.