What's inside
As an Amazon Associate I earn from qualifying purchases. This post may contain affiliate links at no extra cost to you.
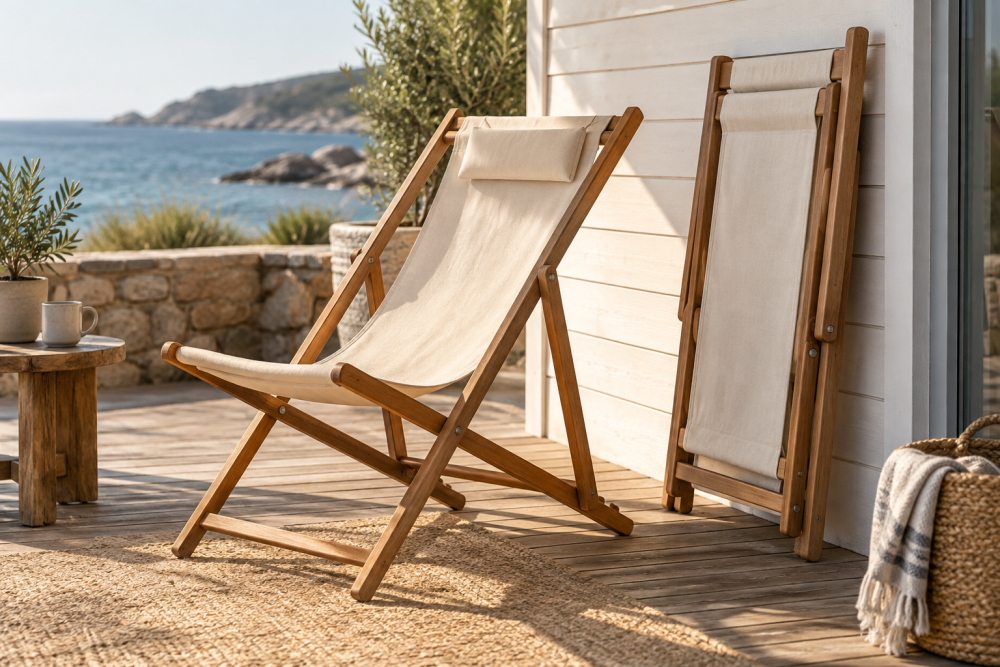
A folding wooden beach chair is a practical weekend project: it uses ordinary lumber, folds flat for transport, and can be repaired instead of discarded when the fabric wears out. The design below is a low sling chair with two hinged wooden side frames. It is sized for an adult, but the seat height and width can be adjusted.
Contents
Design and materials
The chair uses two matching side frames connected by a fabric sling. Each side is an X-shaped assembly: a front leg and a rear leg cross at a pivot bolt. When the legs open, the fabric seat and back support the user. When they close, the chair folds to roughly 6 inches thick.
| Material | Recommended choice | Trade-off |
|---|---|---|
| Frame lumber | Cedar, white oak, or straight-grained ash | Cedar is light and weather-resistant but dents easily; oak and ash are stronger but heavier. |
| Seat fabric | Outdoor canvas or solution-dyed polyester | Canvas feels sturdy; polyester dries faster and usually resists fading better. |
| Finish | Exterior spar varnish or penetrating outdoor oil | Varnish gives better water protection but needs sanding and recoating; oil is easier to refresh. |
Buy two 8-foot 1×3 boards for the legs, preferably with no knots near the center. You will also need two 8-foot 1×2 boards for braces and arm supports, 1-inch-wide outdoor webbing or heavy fabric, four 1/4-inch by 3-inch stainless-steel carriage bolts, four washers, four locknuts, exterior screws, waterproof glue, and two short lengths of 1-inch dowel or hardwood for cross braces. A stainless carriage bolt set is worth buying for this project because ordinary plated hardware rusts quickly around salt water.
Cutting list and dimensions
Cut four leg pieces, each 36 inches long. These become two front legs and two rear legs. Cut four side braces at 18 inches. Cut two arm supports at 21 inches. For a slightly taller chair, increase the legs to 39 inches, but do not change the pivot location without checking the fold.
Mark the pivot center 17 inches up from the bottom of every leg. The front and rear legs on each side overlap at this point. Round the lower outside corners and ease every edge with 120-grit sandpaper. Sharp corners cut fabric and become uncomfortable against bare legs.
Build the folding side frames
Lay one front leg and one rear leg together in an X, with the front leg on the outside. Align their pivot marks and clamp them. Drill a 1/4-inch hole through both boards. Use a drill press if available; a crooked hole makes the chair twist and fold poorly.
Install a carriage bolt from the outside, add a washer and locknut on the inside, and tighten it only until the legs still swing smoothly. Do not clamp the wood rigidly. The pivot must move without side-to-side slop, so add a thin nylon washer between the legs if the joint feels loose.
Repeat for the second side. Set both frames on a flat surface and check that the legs sit at the same angle. Measure from the floor to the pivot on both sides before attaching any braces. A difference of more than 1/8 inch will leave the chair rocking.
Add braces and arm supports
With each X frame open, position one 18-inch brace between the front legs and another between the rear legs. The braces should sit about 5 inches above the floor and remain clear of the moving legs. Use glue and two exterior screws at each end, but predrill to avoid splitting the 1×3 stock.
Fit the 21-inch arm supports across the top of each side frame. The front end should sit about 24 inches above the ground, and the rear end about 20 inches above the ground. This downward slope is comfortable and helps the back recline. Attach each arm support to its corresponding leg with screws through elongated clearance holes. The holes allow minor wood movement without splitting the arm.
Keep all fixed braces on the inside faces of the frames. Anything crossing the outside faces can catch when the chair folds. Open and close the bare frame several times before adding fabric. If a leg binds, identify the contact point and remove only enough material to create a 1/16-inch clearance.
Make and attach the fabric sling
Measure the distance between the front and rear top supports with the chair fully open. Cut the seat-and-back sling from outdoor fabric 2 inches wider than the inside distance and about 42 inches long. The exact length depends on the angle of your frame; make a temporary sling from an old sheet first and test it.
Fold each short end over twice to create a 1-inch hem. Sew a straight seam across each hem, then add a second row of stitching. For extra strength, sew a 2-inch-wide webbing strip into each end before folding. A weather-resistant outdoor fabric is a better choice than indoor cotton, which stays wet and mildews.
Wrap the front end around the front support and secure it with stainless screws and large washers, or sew a sleeve that slides over a removable dowel. Repeat at the back. The fabric should be taut when occupied but not drum-tight when empty. If it is too tight, the chair will be difficult to fold and the frame may rack sideways.
Sand, finish, and test
Disassemble the pivot hardware and sand the frame through 180 grit. Break every edge, especially around the fabric contact points. Apply two or three coats of exterior finish, sanding lightly between coats if the product requires it. A spar varnish for outdoor wood offers better protection than interior polyurethane, but an inexpensive exterior penetrating oil is fine if you are willing to reapply it each season.
Reassemble the chair and tighten the pivot locknuts until there is no obvious wobble. Test it gradually: first press down with your hands, then sit carefully, then shift your weight from side to side. The most common failure is a split leg at the pivot. If you see movement or a crack, stop using the chair and replace the leg rather than adding a larger bolt.
Use and seasonal care
Do not leave the chair buried in wet sand or standing in salt spray. Rinse it with fresh water after beach use and let the fabric dry fully before folding. Store it indoors or under a breathable cover during winter. Inspect the pivot bolts and fabric stitching at the start of each season. Recoat exposed wood when it looks dry, and replace the sling at the first sign of tearing around a fastener.
For a beach chair that will live mostly in a car trunk, cedar keeps the weight manageable. For frequent use by heavier adults, choose ash or oak and use through-bolted braces instead of screws alone. That adds weight, but it is the safer trade-off for a frame that must tolerate repeated folding and uneven ground.