What's inside
As an Amazon Associate I earn from qualifying purchases. This post may contain affiliate links at no extra cost to you.
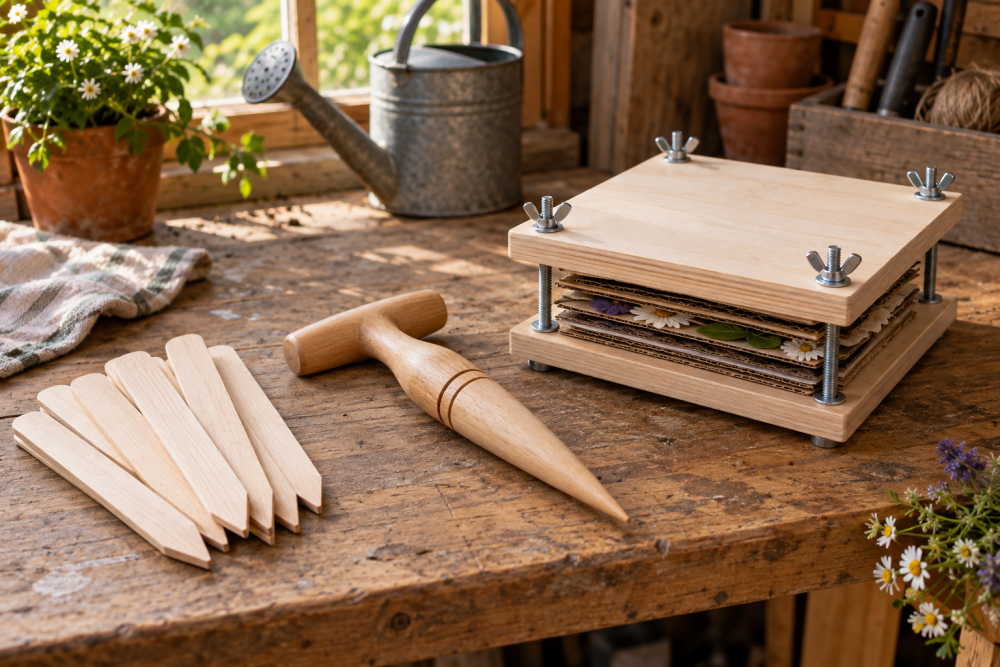
A wooden leaf-pressing frame is a simple beginner project: two flat boards, a few bolts, and wing nuts provide even pressure while leaves dry. Unlike a stack of books, the frame is reusable, easy to open, and less likely to damage a book’s pages. It also makes a useful seasonal project for autumn collecting, school displays, greeting cards, and nature journals.
Contents
Materials and tools
Use straight, flat boards for the two press plates. Plywood is the most practical choice because it is stable and inexpensive. A pair of 12-by-12-inch pieces of 1/2-inch plywood will handle most leaves. Thicker 3/4-inch plywood feels more substantial, but it adds weight without improving the pressing much.
- Two 12-by-12-inch plywood panels, 1/2 inch thick
- Four 1/4-inch-diameter by 4-inch-long carriage bolts
- Four 1/4-inch wing nuts
- Eight 1/4-inch washers
- Four 1/4-inch nuts, if needed to hold the carriage bolts during assembly
- Four or more sheets of corrugated cardboard
- Several sheets of absorbent paper, such as newsprint or plain printer paper
- Sandpaper, 120 and 180 grit
- Drill and 1/4-inch drill bit
- Ruler, pencil, square, clamps, and a wrench
A small plywood project panel is fine for this build. Avoid warped boards, soft construction scraps with large voids, or MDF if the press may get damp. MDF stays flat when dry but swells quickly around moisture.
| Plate material | Advantages | Drawbacks | Best choice for |
|---|---|---|---|
| 1/2-inch plywood | Flat, light, inexpensive | Edges need sanding | Most beginners |
| 3/4-inch plywood | Stiffer and more durable | Heavier and costlier | Frequent use |
| Solid pine | Easy to find and cut | Can cup or twist | A quick, low-cost build |
Plan the frame
Mark the four bolt holes 1 inch in from each corner of both plywood panels. On a 12-inch square, each hole center will be 1 inch from the two adjoining edges. Keep the layout identical on both plates. A square and sharp pencil make this much more accurate than measuring each hole separately.
The holes must be far enough from the edge to avoid splitting, but close enough to leave a useful pressing area. If you want a larger frame, increase the plates to 16 inches square and use 5-inch bolts. Do not simply use longer bolts on a small frame; excessive exposed thread makes the press awkward and easier to knock out of alignment.
Cut and prepare the plates
If your plywood is already 12 by 12 inches, inspect the corners and skip cutting. Otherwise, mark the dimensions and cut with a circular saw, jigsaw, or table saw. Support the sheet near the cut to reduce splintering. A slightly imperfect edge is acceptable, but the faces should be reasonably flat.
Sand all edges with 120-grit paper, then smooth them with 180 grit. Round the corners lightly. This prevents sharp plywood layers from catching your hands or tearing the paper inside the press. Do not sand the broad faces aggressively; you want them to remain flat.
Drill the bolt holes
Clamp the two plates together with their best faces outward and their edges aligned. Drill through both plates at the four marked locations. Drilling the plates as a stack is the easiest way to keep the holes matched. Place a scrap board underneath to reduce blowout as the bit exits.
Test one hole with a bolt. A 1/4-inch bit may leave a snug fit, which is useful if the carriage bolt needs to stay in place. If the bolt will not pass through easily, enlarge the hole slightly with a 17/64-inch bit. Keep the holes straight. Angled holes can make the wing nuts bind when the plates are tightened.
For a cleaner result, countersink the outside of the lower plate just enough for the square shoulder of each carriage bolt to seat. This is optional. A regular round-head bolt also works if you add a washer and hold the bolt head with pliers while tightening the wing nut.
Assemble the press
Put a washer on each bolt and insert the bolts through the lower plate from the outside. If the carriage bolts fit tightly, their square shoulders will stop them from turning. Add another washer, then a wing nut, to each bolt. Leave the nuts loose while loading the leaves.
Use 1/4-inch carriage bolt hardware sold as a set if you want to avoid counting individual washers and nuts. Zinc-plated hardware is adequate for indoor storage. Stainless steel costs more but is worthwhile if the frame will be used in a damp shed or greenhouse.
Load and press the leaves
Make a sandwich in this order: lower plywood plate, cardboard, absorbent paper, leaves, absorbent paper, cardboard, and upper plywood plate. Do not overlap leaves. Overlapping traps moisture and leaves permanent ridges in the specimens.
Place the thickest leaves near the center and keep bulky stems from pointing directly at the plywood. For especially thick leaves, add another cardboard layer above and below. Tighten the four wing nuts gradually in a diagonal pattern, as you would tighten wheel nuts. Stop when the plates are firmly compressed; crushing the leaves does not speed drying.
Plain newsprint is usually better than glossy paper because it absorbs moisture. If you cannot find newsprint, printer paper is acceptable for thin leaves. Replace damp paper after the first 24 hours. A pack of unprinted newsprint sheets is useful for repeated pressing and costs less than using paper towels.
Drying and troubleshooting
Leave the press in a dry, ventilated room for 7 to 14 days. Thin, dry leaves may finish in five days; fleshy leaves can take three weeks or longer. Check the stack after 24 hours, then every few days. If the paper feels damp or smells musty, replace it immediately and dry the press in a warmer, less humid location.
Leaves that curl usually lacked even pressure or were too wet when loaded. Add cardboard layers and retighten the nuts. Brown or black patches generally indicate trapped moisture, not insufficient pressure. Moldy leaves should be discarded rather than pressed again. If the plywood bows, the plates are too thin, the pressure is uneven, or a leaf stack is too thick. Reduce the load and tighten each corner by the same amount.
For long-term storage, remove fully dry leaves and place them between clean sheets of paper under a light book for a day. Store the finished specimens flat in an envelope or portfolio away from direct sunlight. Keep the frame loose and dry between uses so the plywood does not remain compressed or absorb moisture.