What's inside
As an Amazon Associate I earn from qualifying purchases. This post may contain affiliate links at no extra cost to you.
Contents
A Small Thanksgiving Stand You Can Build in an Afternoon
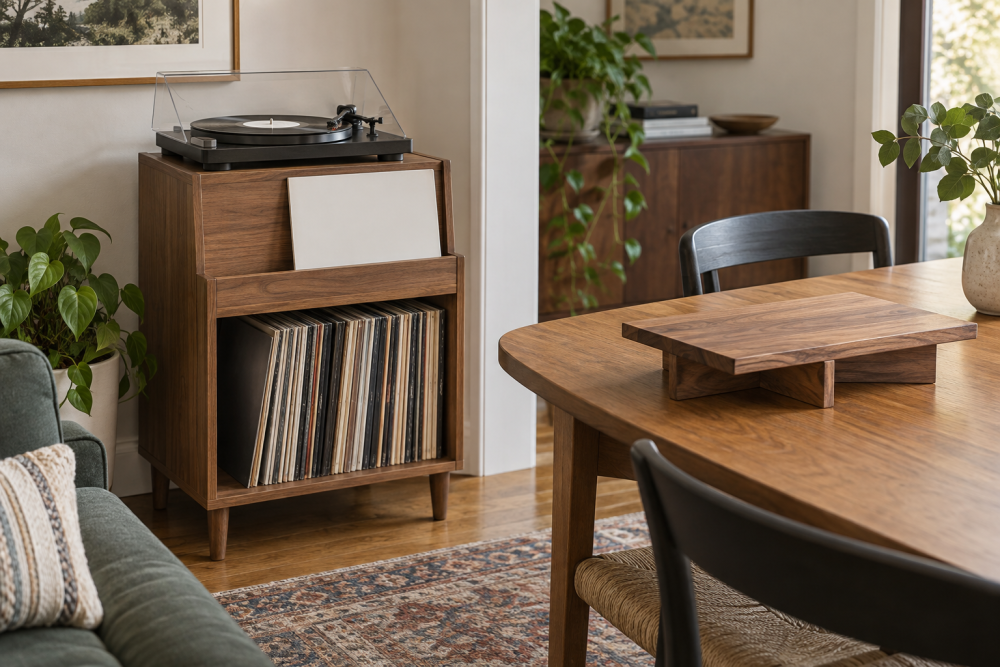
This wooden serving stand raises a pie, roast, bowl, or stack of side dishes above the table without taking up much space. It uses two identical legs that slide together through a centered slot. The interlocking joint keeps the stand upright, while the removable design makes it easy to store flat after Thanksgiving.
The finished stand is about 18 inches long, 8 inches wide, and 6 inches high. Those dimensions suit a serving board or platter up to roughly 16 inches long. You can scale the pieces up, but a longer top needs thicker legs or a wider stance to prevent tipping.
Use straight, dry lumber. A clear 1-by-8 board is the simplest choice, although its actual thickness is about 3/4 inch. Avoid construction lumber with large knots or twist; it is cheap, but it makes accurate slots and flat glue-ups harder.
Materials and Tools
- One 1-by-8 board, at least 24 inches long
- 120- and 180-grit sandpaper
- Wood glue, optional for a permanent version
- Food-safe finish, such as mineral oil and beeswax, if food will touch the wood
- Table saw, jigsaw, or handsaw
- Drill and 1/4-inch bit
- Combination square, pencil, ruler, and clamps
A food-safe mineral oil and beeswax finish is inexpensive and easy to renew. Do not use ordinary furniture stain or an unknown varnish where food will sit directly on the surface. If you plan to use a separate platter every time, a standard cured clear finish is also reasonable.
Cut List and Design Choices
| Part | Quantity | Finished size | Purpose |
|---|---|---|---|
| Top board | 1 | 18 x 7 1/4 x 3/4 inches | Supports the food or serving platter |
| Interlocking leg | 2 | 8 x 5 1/2 x 3/4 inches | Forms the crossed support |
| Optional feet pads | 4 | 1 x 1 x 1/4 inches | Protects the table and adds grip |
Hardwood gives the best dent resistance, but pine, poplar, and clear fir are perfectly adequate for occasional holiday use. Pine is the cheaper option and is fine if you inspect it for knots and seal it well. Hardwood costs more but holds a cleaner slot and is less likely to compress under a hot, heavy casserole.
Make the Top and Legs
Cut the top board to 18 inches. Round the four corners with a cup or small can, then cut the curves with a jigsaw. You can leave the corners square if you prefer a faster build, but eased corners are safer around crowded tables. Break every sharp edge with 120-grit sandpaper.
Cut two leg blanks at 8 by 5 1/2 inches. Mark the center of each leg along its length. On one leg, measure from the bottom edge and mark a slot 3/4 inch wide by 2 3/4 inches deep. On the other, measure from the top edge and mark the same slot. The slots must be centered across the 5 1/2-inch width.
The nominal slot width is based on 3/4-inch stock, but do not assume your lumber is exactly that thick. Measure the actual thickness with calipers or a ruler. Make the slot 1/32 inch wider than the measured thickness. For example, if the board is 0.72 inch thick, start with a slot about 0.75 inch wide. A slot that is too tight will split the leg or leave the stand rocking.
Drill a 1/4-inch hole at each end of both slot outlines. The holes give a jigsaw blade room to turn and create rounded slot ends. Cut between the holes, staying just inside the lines. Test-fit the two legs before sanding the slot walls. Remove material gradually with a file or folded sandpaper.
Fit the Interlocking Joint
Slide the legs together with the slots facing in opposite directions. The two pieces should meet at the center and form an X when viewed from the end. They should slide together with firm hand pressure, not hammer blows. If the joint will not close, enlarge the slot in tiny increments.
Set the assembled legs on a flat surface and place the top board across them. Center the top so it overhangs each end by about 5 inches. Check for rocking by pressing each corner in turn. If it rocks, mark the high corner and lightly sand the bottom edge of that leg. Do not compensate by forcing the top down with screws; that can twist the stand.
For a removable stand, leave the top unattached. Add four small rubber or cork pads under the top contact points if the board slides. For a permanent version, apply glue to the leg-to-top contact areas and drive two 1 1/4-inch screws through the top into each leg. Drill countersunk pilot holes first to prevent splitting.
Sand and Finish
Sand all surfaces with 120 grit, then finish with 180 grit. Pay particular attention to the slot edges, where rough fibers can make assembly difficult. Do not over-sand the slot width; removing too much material creates a loose joint that wobbles.
Wipe away dust with a clean, slightly damp cloth and let the wood dry. Apply two or three thin coats of mineral oil, allowing 20 to 30 minutes between coats. Add beeswax after the final coat if you want a slightly more water-resistant surface. The finish will not make the stand dishwasher-safe. Wipe spills promptly and wash it by hand with mild soap; never soak the legs.
Useful Tools and Buying Trade-Offs
A small woodworking clamp set is useful for holding the top while you check alignment, but expensive clamps are unnecessary for this project. A basic handsaw and coping saw can replace power tools, though cutting the slots will take longer.
| Choice | Best for | Trade-off |
|---|---|---|
| Pine or poplar | Lowest-cost seasonal stand | More dents and possible grain tear-out |
| Oak or maple | Frequent use and heavier dishes | Higher cost and harder cutting |
| Jigsaw | Quick curved corners and slots | Needs careful control for square cuts |
| Table saw | Repeatable straight cuts | Still needs a drill or chisel for slot ends |
If you need cleaner slot walls, a wood rasp and file set is a better buy than trying to widen the joint with a coarse sanding drum. Before serving food, place the stand on the table and load it with the intended dish. Check that the center of gravity stays between the feet, especially if the platter is heavy or extends beyond the ends.
For a taller stand, increase the leg length and widen the top, but keep the height modest. Above about 8 inches, the same interlocking design becomes easier to tip unless the feet spread farther apart.