What's inside
As an Amazon Associate I earn from qualifying purchases. This post may contain affiliate links at no extra cost to you.
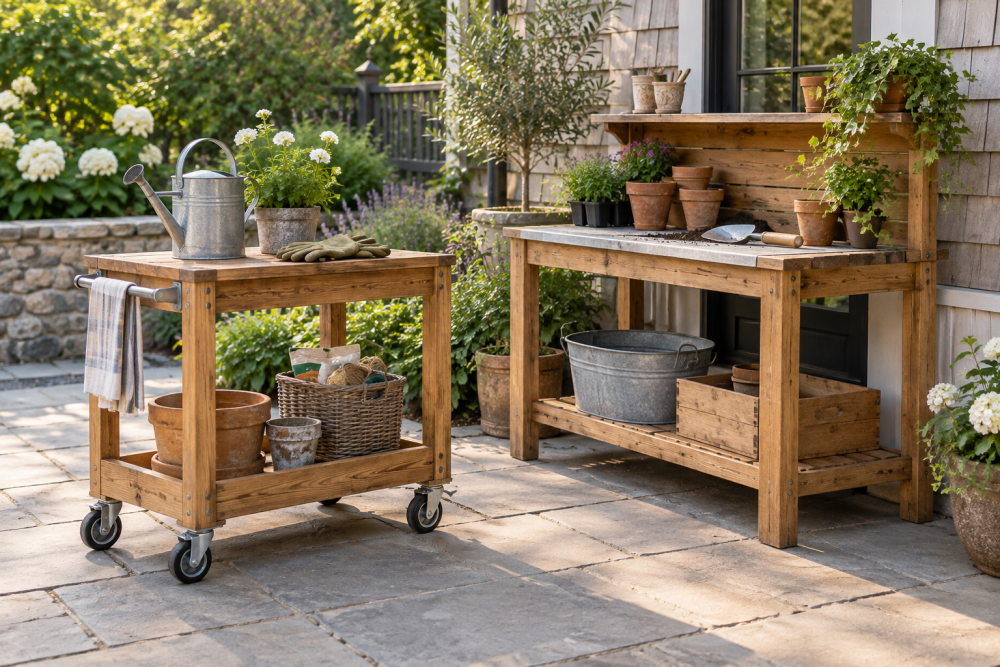
A potting bench earns its space by keeping soil, pots, and hand tools at a comfortable working height. This design uses a slatted top over a removable tray, so spilled mix drops below the work surface instead of collecting on the ground. The tray slides out for emptying, and the open back keeps the bench easy to clean.
Contents
Project overview
The finished bench is approximately 36 inches wide, 20 inches deep, and 36 inches high. That height suits most adults for filling pots without constant bending. Adjust the legs if you are particularly tall or short, but keep the work surface between about 34 and 38 inches high.
| Material | Best use | Trade-off |
|---|---|---|
| Cedar | Outdoor bench with good rot resistance | Costs more and can split near screw ends |
| Pressure-treated pine | Lowest-cost outdoor frame | Heavy, wet when new, and rough until sanded |
| Untreated pine | Covered porch or temporary seasonal use | Rots quickly if left exposed |
For most gardeners, cedar is the sensible middle ground. Pressure-treated lumber is fine for the frame, but use an inert tray and let freshly treated boards dry before finishing. Avoid using an old galvanized container with a rusty bottom; soil and water will find any weak spot quickly.
Materials and tools
You will need two 8-foot 2x4s for the legs and frame, one 8-foot 1×4 for the slatted top, and one 8-foot 1×6 for the lower shelf and braces. Buy one extra 1×4 if you want a wider top or expect cutting mistakes. You will also need a shallow tray about 30 inches wide by 16 inches deep, exterior screws, wood glue rated for outdoor use, and exterior finish.
A galvanized utility tray is a practical soil catcher. A plastic mixing tub is cheaper and will not rust, but it may sag when full of damp soil unless supported underneath. Use a box of exterior wood screws rather than drywall screws, which snap or rust outdoors.
Useful tools include a circular saw, drill and bits, tape measure, square, clamps, and a sander. A pocket-hole jig is optional; ordinary screws driven through predrilled holes work just as well on this utilitarian project.
Cut list
Cut four legs from 2x4s at 34 inches. Cut two long frame rails at 36 inches and two short rails at 17 inches. These rails form a top frame with the legs attached below it. Cut four top slats at 36 inches from 1×4 stock. Space them with roughly a 1/2-inch gap. Cut two lower-shelf boards at 36 inches and two shelf cleats at 17 inches.
Before cutting every piece, measure the actual tray. Lumber dimensions vary, and a tray that is 1 inch wider than expected can prevent the slats from fitting or make removal impossible. Leave at least 1/2 inch of clearance on each side of the tray.
Build the frame
Start by making the top frame. Place the two 36-inch rails parallel and fit the 17-inch rails between them. Check that the assembly is square by measuring both diagonals; the measurements should match within 1/8 inch. Drill pilot holes and drive two exterior screws through each joint. Add glue if the bench will stay under cover, but do not rely on glue alone outdoors.
Position one leg inside each corner, flush with the top edge of the frame. Drive two screws through each long rail and one or two through each short rail. Predrill close to the ends of the 2x4s. Without pilot holes, cedar commonly splits and pressure-treated lumber can force the screw off line.
Turn the frame upright and check it for wobble. If one leg is slightly long, mark it and trim it rather than forcing the frame flat with screws. A rocking potting bench is annoying, and spilled water will always run toward the same corner.
Install the soil-catching top
Cut or position the four 1×4 slats across the frame. Use a scrap block as a spacer so every gap stays consistent. A 1/2-inch gap catches most potting mix while still letting fine material fall into the tray. Larger gaps shed soil faster but allow small pots, labels, and hand tools to drop through.
Center the tray beneath the slats. Install two 1×4 cleats beneath the frame, one on each side, to act as runners. Set them low enough that the tray sits about 1/4 inch below the slats. Add a front stop across the bottom of the frame so the tray cannot slide through. Leave the back open, or add a small rear stop if the bench will be moved frequently.
Test the tray before fastening the cleats permanently. It should slide out without binding, even when the bench is slightly out of square. Do not make the tray a tight fit; wet soil and wood movement can easily consume 1/4 inch of clearance.
Add the shelf and bracing
Install the two lower-shelf boards between the legs, about 8 to 10 inches above the ground. Screw the shelf cleats to the inside faces of the legs, then fasten the boards to the cleats. This shelf holds bags of mix, empty pots, or a watering can, but do not store heavy bags where they can make the bench top unstable.
Add a diagonal brace to the back if the bench will stand in an exposed yard. A single 1×4 brace running from the lower corner on one side to the upper corner on the other greatly reduces side-to-side racking. A second brace on the opposite diagonal is stronger but makes the back less convenient to access. For a sheltered porch, the shelf and a square frame may be sufficient.
Sand and finish
Sand exposed edges with 80-grit paper, then finish with 120 grit. Round the front corners of the slats slightly; sharp corners catch sleeves and splinter easily. Pay special attention to cut ends, which absorb water faster than factory edges.
Apply two coats of an exterior penetrating oil or exterior porch paint, following the drying time on the label. Leave the tray unfinished and removable. Do not seal over damp pressure-treated lumber; it may peel as the boards release moisture. Place the bench on pavers or a level gravel pad rather than directly on soil.
Use and maintenance
Keep the soil catcher no more than half full. A tray packed with wet mix becomes heavy enough to bend plastic or pull the runners loose. Empty it after each major potting session, rinse it, and let it dry before sliding it back in.
At the start of spring, tighten loose screws and inspect the leg ends, shelf, and underside of the slats. Replace any board that stays soft after drying. If the bench sits in full weather, move it under cover for winter or use a breathable cover; wrapping wet wood tightly in plastic often encourages rot rather than preventing it.