What's inside
As an Amazon Associate I earn from qualifying purchases. This post may contain affiliate links at no extra cost to you.
Contents
Planning and Dimensions
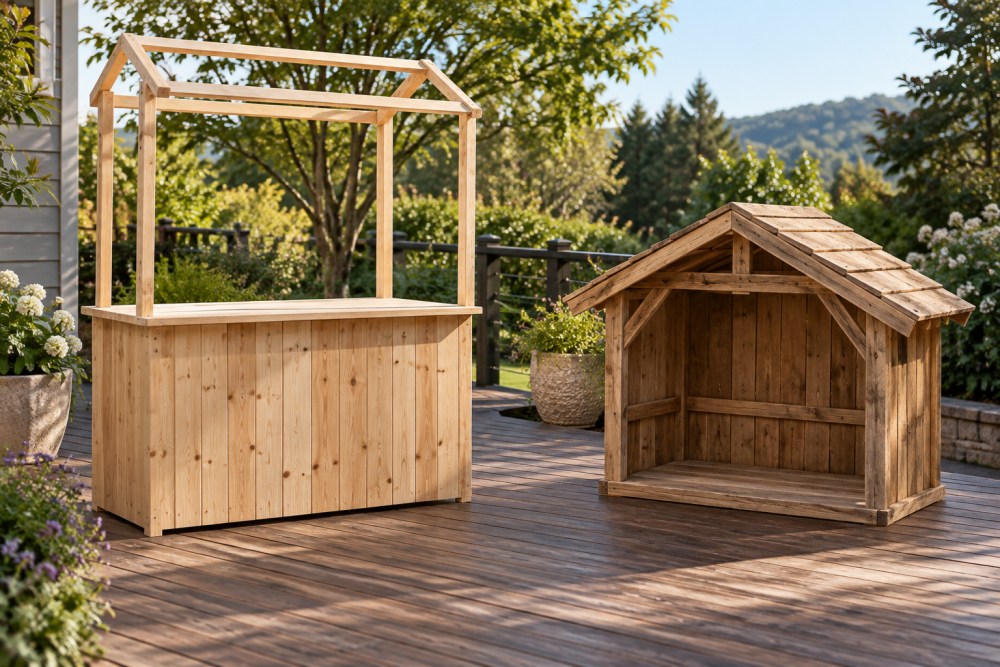
A full-size outdoor nativity stable needs to be big enough to shelter 24- to 36-inch figures without looking oversized on a lawn. A good working size is 60 inches wide, 32 inches deep, and 60 inches tall at the back wall, dropping to 54 inches at the front for the roof slope. That 6-inch drop over a 32-inch depth gives you about a 10-degree pitch — enough to shed rain and light snow without making the build complicated.
If you go smaller than 48 inches wide, the Holy Family figures look cramped and you lose the visual effect from the street. If you go wider than 72 inches, wind load becomes a real problem and you will need ground anchors. For most yards, 60 inches is the sweet spot. Keep depth shallow. Anything over 36 inches deep catches wind like a sail and takes up too much storage in January.
Materials and Cut List
Use rough-sawn lumber if you want that traditional stable look. Smooth dimensional lumber from the big box store works fine but looks too clean — hit it lightly with a wire brush or a hand plane to add texture.
For a 60-inch stable you will need: four 4×4 posts at 60 inches (back) and 54 inches (front) for the corners, six 2x4s at 60 inches for top and bottom plates and floor joists, ten 1×6 cedar or pine boards at 60 inches for the back wall cladding, four 1×6 boards at 32 inches for the side walls (optional, many stables leave sides open), and three 2x4s at 36 inches for roof rafters. For the roof, use 1×6 tongue-and-groove or plywood sheathing topped with cedar shingles or corrugated panels.
Fasteners matter outdoors. Use 2-1/2 inch and 3-inch exterior wood screws with a star drive and coated for pressure-treated lumber. Interior drywall screws will rust, bleed, and fail after one wet season. You will use about 1 lb of 3-inch screws for the frame and 1 lb of 1-1/4 inch screws for cladding.
Wood Choice for Outdoor Use
Not all wood holds up the same outside in December weather. Here is how the common options compare for this project:
| Wood Type | Cost for This Build | Rot Resistance | Trade-off |
|---|---|---|---|
| Untreated SPF / White Pine | $80 – $110 | Low | Cheapest, easiest to find. Must be sealed on all sides or it will warp and rot in one season. |
| Pressure-Treated Pine | $110 – $150 | High | Heavy, wet when bought, tends to twist as it dries. Best for the base and posts that touch the ground. |
| Western Cedar | $180 – $250 | Very High | Light, stable, naturally weather resistant. The best choice if you want to leave it unfinished for a year or two. |
| Douglas Fir | $100 – $140 | Moderate | Stronger and stiffer than pine, less prone to sagging on the roof. Good middle ground if sealed well. |
If you are on a budget, build the base and posts from pressure-treated lumber and clad the walls and roof with cheap pine. That hybrid saves about $60 and puts rot resistance where it actually matters — at ground contact. If you want to build it once and store it for 10 years, cedar is worth the premium.
Tools You Need
You do not need a shop full of tools for this. A circular saw with a straight-edge guide handles all the crosscuts and rips. A drill/driver does the assembly. A speed square is essential for marking the 10-degree bevel on the tops of the posts so the roof sits flat. A level and a tape measure do the rest.
A miter saw is faster and more accurate for cutting the 4×4 posts and rafters, but it is not required. Do not use a jigsaw for structural cuts — it will wander and leave you with gaps at the joints. If you plan to add texture to smooth lumber, a cheap wire brush attachment for your drill saves an hour of hand work.
Building the Frame
Start by building two side frames flat on the ground. Each side is a front post (54 inches) and a back post (60 inches) connected at the bottom with a 32-inch 2×4 and at the top with another 32-inch 2×4. Predrill and use two 3-inch screws per joint. Check for square by measuring diagonals — they should be within 1/8 inch of each other.
Stand the two side frames up and connect them with the 60-inch front and back plates at top and bottom. This is where most stables fail: they rack. Add a 32-inch diagonal brace of 2×4 inside each side frame, running from the bottom front corner to the top back corner. That single brace prevents the whole structure from parallelogramming in the wind.
For the floor, lay two 60-inch 2×4 joists across the bottom plates, 16 inches on center, and deck them with 1×6 boards if you want a raised platform for the figures. If your display sits on grass or concrete, you can skip the floor and just let the 4×4 posts sit directly on the ground. In that case, cut the bottom of the posts at a slight angle or add plastic post feet so they do not sit in standing water.
Building the Sloped Roof
The sloped roof is the most visible part and the most common source of leaks. Cut three rafters from 2x4s at 36 inches long. The roof should overhang the front by 4 inches and the back by 2 inches to drip water clear of the walls. On a 32-inch deep frame, that means your rafter length covers the depth plus overhangs.
Bevel the top of each 4×4 post at 10 degrees so the rafter has full contact. If you skip the bevel, the rafter sits on an edge, flexes under snow, and screws pull out. Lay the rafters across the top plates on 20-inch centers and secure with 3-inch screws toenailed at an angle, or with hurricane ties if you are in a windy area.
Sheathe the rafters with 1×6 boards running side to side, or a single sheet of 1/2-inch exterior plywood cut to 38 x 64 inches. If you use plywood, seal the top face and all edges before you install it — end grain wicks water and delaminates in one winter. Top the sheathing with your roofing. Cedar shingles look authentic but take time. Corrugated PVC or metal panels installed with rubber-washer screws shed water instantly and hold up to snow load. Overlap panels by one full corrugation and run a bead of exterior sealant under the top edge where it meets the back wall.
Finishing, Anchoring, and Storage
Finish matters more than wood species for longevity. Apply an exterior wood sealant or spar urethane to all sides, including the bottoms of the posts and the underside of the roof, before assembly. People always seal only what they can see, then wonder why the bottom 6 inches rot first.
For color, use an exterior wood stain rather than paint. Paint peels on rough-sawn wood after freeze-thaw cycles; stain soaks in and can be recoated without scraping. A dark walnut or early American stain gives a barn-like look without hiding grain.
Anchor the stable. Even at 80 to 100 pounds, a 60-inch wide stable with a solid back wall will slide or tip in a 30 mph gust. Drive two 30-inch rebar stakes through pre-drilled holes in the bottom plates into the ground, or screw eye bolts into the back posts and tie them to ground anchors with paracord.
If you need to store it, design for knock-down. Instead of gluing joints, use 3/8 x 3-1/2 inch carriage bolts where the side frames meet the front and back plates. You can then disassemble into five flat panels — two sides, back wall, roof, and floor — and store them against a garage wall. Label the bolt holes with a marker so reassembly in November takes 20 minutes, not two hours.