What's inside
As an Amazon Associate I earn from qualifying purchases. This post may contain affiliate links at no extra cost to you.
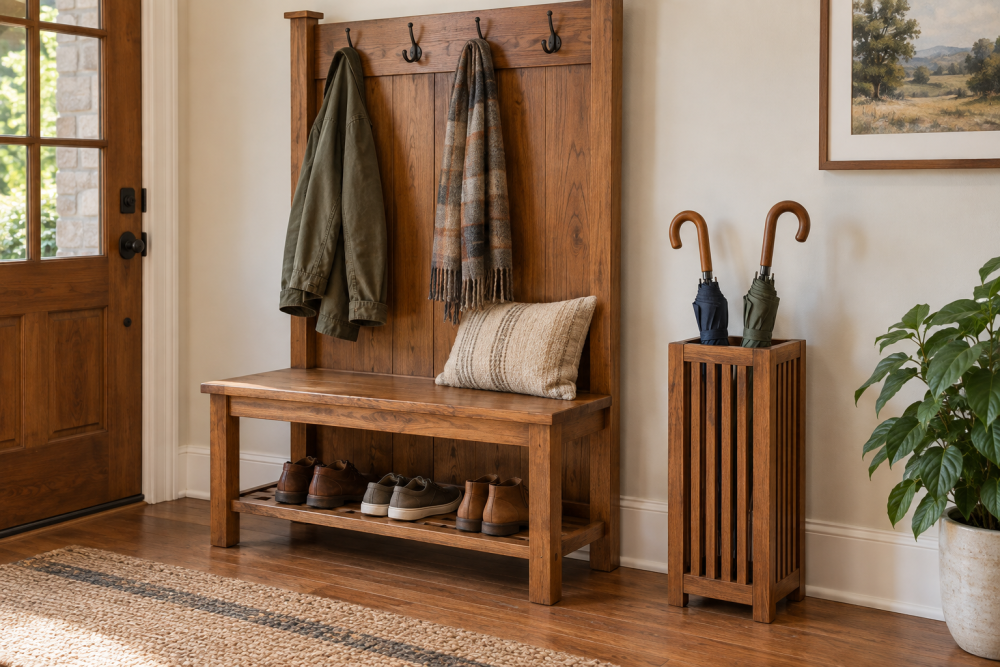
A narrow hall tree adds a place to sit, hang coats, and store shoes without taking over the entryway. This version is designed for a tight wall: it is about 36 inches wide, 72 inches tall, and 14 inches deep. The seat is only 12 inches deep, so it remains useful without becoming a hallway obstacle.
The project uses a plywood carcass, a solid-wood seat, and a simple back rail with hooks. It is suitable for a careful beginner with a circular saw or table saw. Allow a full weekend, including finishing time.
Contents
Dimensions and Materials
The finished dimensions below leave enough room for two or three coats while keeping the unit compact. Adjust the width to suit your wall, but avoid making the seat wider than the available wall space unless you plan to anchor it securely.
| Part | Finished size | Suggested material |
|---|---|---|
| Side panels | 72 × 14 × 3/4 inches, two pieces | Birch or sanded plywood |
| Seat | 36 × 12 × 1 inch | Solid pine, poplar, or hardwood |
| Lower shelf | 34 1/2 × 13 1/2 × 3/4 inches | Plywood |
| Back rail | 34 1/2 × 5 1/2 × 3/4 inches | Solid wood or plywood |
| Back panel | 34 1/2 × 24 × 1/4 inch | Hardboard or plywood |
You will also need wood glue, 1 1/4-inch pocket-hole screws or equivalent screws, 1 1/4-inch brad nails, sandpaper from 120 through 220 grit, four to six coat hooks, and a wall-anchoring method. A pocket-hole jig kit is the simplest way to make strong, hidden joints. If you do not own one, ordinary countersunk screws work, but you will need to plug or fill the holes.
Cutting and Preparation
Break down the plywood with a straightedge and a circular saw, or have the store make the long cuts. Support the sheet on rigid foam insulation so the offcut does not pinch the blade. Measure every piece from the same reference edge. Small errors compound quickly in a narrow cabinet.
Before assembly, mark the inside faces of both side panels. Measure up 17 inches from the floor for the top of the lower shelf and 18 inches for the top of the seat. These measurements provide a useful shoe compartment and a comfortable sitting height once the one-inch seat is installed. Drill pocket holes on the hidden faces of the shelf and back rail.
Ease every exposed plywood edge with a sanding block. A sharp plywood corner chips easily and feels unpleasant against clothing. If you are painting, apply edge banding or filler to the front plywood edges. If you are staining, use solid-wood edging; exposed plywood layers are difficult to make look intentional.
Assemble the Carcass
Lay one side panel flat with its inside face up. Apply glue to the shelf ends, align the shelf with your marks, and drive the screws. Check that the shelf is square to the side before tightening. Add the opposite side, then measure diagonally from corner to corner. The two diagonal measurements should be within about 1/8 inch. If they are not, push the cabinet into square before the glue sets.
Install the back rail near the top, leaving its upper edge flush with the top of the side panels. The rail gives the hooks something substantial to hold and stops the sides from racking. Attach the 1/4-inch back panel with glue and brads, keeping the carcass square as you work. The back panel is not merely decorative; it greatly improves stiffness.
For a cleaner look, set the back panel into shallow rabbets in the side panels. This is optional. A surface-mounted panel is faster and plenty strong for coats, provided the unit is anchored to the wall.
Build and Attach the Seat
Use a straight, dry board for the seat. A glued-up pine panel is cheaper than hardwood and works well, but inspect it for knots and cupping. Let new lumber sit indoors for several days before cutting if it came from a cold or damp store.
Round the front corners slightly and sand the top through 180 or 220 grit. Attach the seat from below with four or six screws through the side panels and back rail. Drill clearance holes so the screws pull the seat down rather than splitting its edges. Do not rely on glue alone: people put shifting, sideways loads on a seat when standing up.
For extra strength, add two 12-inch triangular brackets under the seat near the side panels. They are worthwhile if the hall tree will be used by children or anyone who may drop heavily onto it.
Finish and Hardware
Sand the complete unit with 120 grit, then 180 grit. Use 220 grit only for the final light pass; polishing the surface too much can reduce stain absorption. Vacuum the dust and wipe with a slightly damp cloth before finishing.
Paint is the forgiving choice for plywood and mixed materials. A water-based cabinet or trim enamel gives a hard, easy-clean surface. For a natural finish, use a clear water-based polyurethane or a wipe-on oil finish. The cheaper water-based polyurethane is fine for normal coats and shoes; spend more only if you need unusually high abrasion resistance.
Install hooks on the back rail or back panel, spacing them at least 6 inches apart. Pre-drill each hole, especially near plywood edges. Choose hooks with screws long enough to pass through the hook and into the rail, but not so long that they emerge from the back.
Anchor It Safely
Do not leave a tall hall tree freestanding. Locate at least one wall stud and drive two 2 1/2- or 3-inch screws through the back rail into it. Use a second stud when possible. If the studs do not line up with the rail, install a horizontal cleat on the wall first, or use appropriately rated hollow-wall anchors. Lightweight picture-hanging hardware is not suitable.
Before loading the hooks, pull the top of the unit toward you firmly. Any movement means the anchoring needs attention. A properly anchored hall tree should not rock when someone sits down or pulls off a heavy coat.
Where to Save Money
A random-orbit sander saves time on the broad panels, but a sanding block is perfectly adequate for one project. Spend money on straight lumber, a sharp blade, and reliable wall anchors before buying specialty tools. Likewise, inexpensive pine is fine when the piece will be painted; hardwood is mainly worth the cost for a clear finish or a more furniture-like seat.
For the cleanest result, test your finish on a scrap cut from the actual seat. Plywood, pine, and poplar absorb color differently, and a sample prevents an entire project from turning unexpectedly orange or blotchy.