What's inside
As an Amazon Associate I earn from qualifying purchases. This post may contain affiliate links at no extra cost to you.
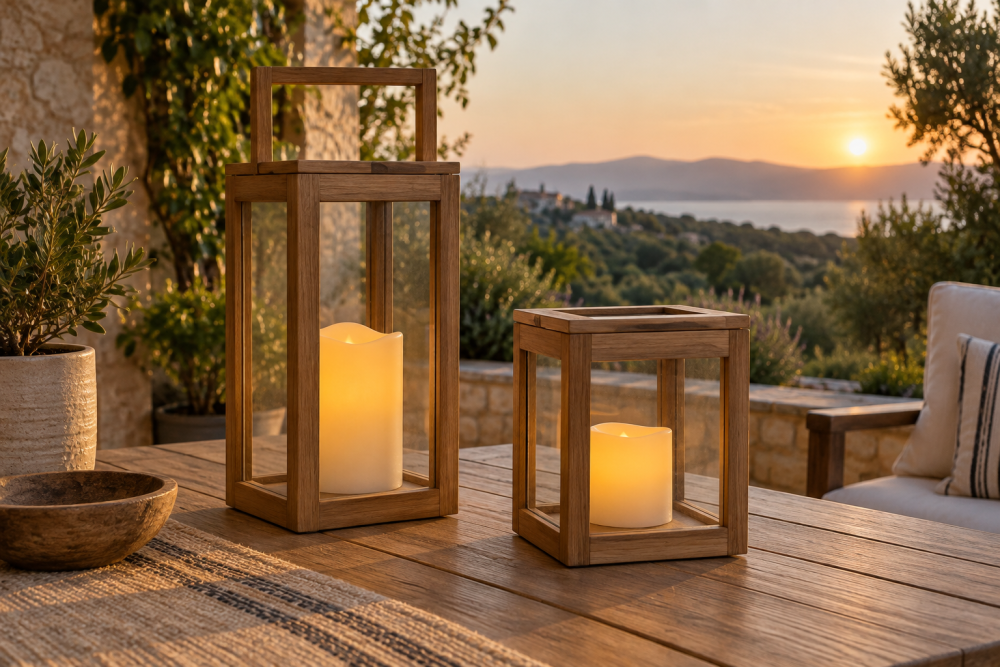
A wooden lantern box with frosted acrylic panels is one of those projects that looks store-bought but is surprisingly simple to build with basic cuts and glue. It’s just a four-sided frame with a base and a removable top, but the frosted panels diffuse light in a way plain wood or clear glass can’t match. This version is 12 inches tall and 7 inches square — big enough for a pillar candle or a string of LEDs, small enough to build from a single 6-foot 1×4. No mitered glass work or complex joinery required.
Contents
What You’ll Need: Materials and Tools
For the frame, use a stable, straight-grained hardwood. Poplar paints well and is cheap, cedar holds up outdoors if you want to put these on a porch, and white oak or walnut looks best if you plan to leave the wood natural. Avoid construction-grade pine if you can — it dents easily and the knots will bleed through a light finish. You’ll need one 1×4 (actual 3/4″ x 3-1/2″) at 6 feet, a 7″ x 7″ piece of 1/4″ plywood for the bottom, and four pieces of frosted acrylic cut to size. 1/8″ thick acrylic is ideal; 1/16″ flexes and rattles, 1/4″ is overkill and harder to fit into grooves.
For tools, a miter saw or table saw for the frame, a table saw with dado blades or a router with a 1/4″ straight bit to cut the grooves for the panels, and a brad nailer or clamps for assembly. You’ll also need wood glue, 1-1/4″ brad nails, 120 and 220-grit sandpaper, and a finish. If you don’t have a dado stack, a single blade with two passes works fine — just test the width on scrap until the acrylic slides in with a little friction but doesn’t bind.
Cut List and Dimensions
These dimensions assume 3/4″ thick stock and 1/8″ acrylic. Adjust if your lumber measures differently.
Vertical stiles: 4 pieces at 3/4″ x 3/4″ x 12″. Rip these from your 1×4. Horizontal rails: 8 pieces at 3/4″ x 3/4″ x 5-1/2″. This creates a 7″ x 7″ outer frame (5-1/2″ rail + 3/4″ + 3/4″ stile). Base panel: 1 piece at 5-1/2″ x 5-1/2″ x 1/4″ plywood. Top frame: 4 pieces at 3/4″ x 1-1/2″ x 7″ mitered at 45 degrees to form a square lid that sits on top, or just cut a flat 7″ x 7″ lid if you prefer simpler. Acrylic panels: 4 pieces at 5-1/2″ x 10-3/4″ x 1/8″. The height is slightly short to allow for the top and bottom rails and a 1/16″ clearance so the panels don’t bind with wood movement.
Cut all stiles and rails to length first, then dry-fit the box on a flat surface. Check for square by measuring diagonals — they should be within 1/32″. If they’re off, one of your cuts is long. Trim now, because you can’t force it square later without cracking an acrylic panel.
Cutting Grooves for the Acrylic Panels
The cleanest way to hold the acrylic is a 1/4″ deep groove centered on the inside face of each stile and rail. Set your blade or router to cut a groove 1/4″ deep and slightly wider than 1/8″ — about 5/32″ — so the panel floats. Cut grooves on the inside edge of all four stiles (full length) and on one edge of all eight rails.
This is the step where most beginners ruin a piece. Failure mode: cutting the groove too close to the edge, which leaves a thin wall that snaps when you assemble. Keep at least 1/4″ of wood on each side of the groove. On 3/4″ stock, that means centering it perfectly. Failure mode two: grooves that are too tight. Acrylic expands slightly in heat. If you have to hammer a panel in, it will bow or crack the frame when temperatures change. It should drop in with light finger pressure.
If you don’t want to cut grooves, the alternative is to build the frames solid and staple or pin the acrylic to the inside face with small stops. It works and is faster, but you will see the fasteners and the panel edge from the outside unless you paint the frame.
Choosing the Right Panel Material
Not all translucent panels behave the same. Frosted acrylic is the best all-around choice for a lantern, but it’s worth understanding the trade-offs.
| Material | Light Diffusion | Durability | Cost for 4 Panels | Best For |
|---|---|---|---|---|
| Frosted Acrylic (1/8″) | Excellent, soft glow hides LED dots | Won’t shatter, scratches can be buffed | $12 – $18 | Indoor/outdoor lanterns, kid-friendly |
| Clear Acrylic with Frosted Film | Good, but film can bubble or peel | Same as acrylic, film is the weak point | $8 – $12 | Budget build, short-term use |
| Glass (frosted or seeded) | Excellent, slightly sharper look | Breaks if dropped, heavy | $20 – $35 custom cut | Higher-end indoor lantern |
| Polycarbonate (frosted) | Good, slightly less clear | Virtually unbreakable, yellows in UV over years | $15 – $22 | Porch lanterns that get knocked over |
For most people, pre-frosted frosted acrylic sheets are the right call. You can buy them already cut to size on Amazon or at a home center, or buy a 12″ x 24″ sheet and cut it yourself. To cut acrylic, score deeply with a utility knife and snap it, or cut it on a table saw with a fine-tooth blade (60 teeth or more) at slow feed rate. Don’t use a jigsaw — it melts and chips the frosted surface. Leave the protective film on until final assembly.
Assembly Step-by-Step
Build two side frames first. Lay two stiles parallel, grooves facing in, and fit two rails between them with the acrylic panel seated in the grooves. The panel should float — don’t glue it. Wood moves, acrylic doesn’t, and gluing the panel will eventually split the frame. Apply glue only to the rail-to-stile joints. Pin with a single 1-1/4″ brad nail per joint or clamp for 30 minutes. A 18 gauge brad nailer makes this much easier than trying to clamp four small pieces at once.
Once you have two complete sides, stand them up and connect them with the remaining four rails and two acrylic panels to form the box. Glue and pin the joints. Check for square again before the glue sets. Drop the 1/4″ plywood base into the bottom — it should sit on the lower rails. You can glue it or just let gravity hold it so you can remove it to change the candle. If you want a more finished bottom, add four small 1/2″ square feet glued to the corners to lift the lantern off the table and hide the plywood edge.
The lid is separate. For a simple flat lid, cut a 7″ square from 3/4″ stock, sand the edges with a 1/8″ roundover, and add a small knob or leather loop in the center for lifting. For a framed lid that traps the light better, miter four 1-1/2″ wide pieces into a square frame and glue a piece of frosted acrylic or plywood into a rabbet on the underside. The framed lid is more work but looks much better when the lantern is lit.
Finishing and Lighting
Sand everything to 220-grit before finishing, but mask the grooves with painter’s tape so finish doesn’t build up where the acrylic sits. For indoor lanterns, a clear water-based polyurethane keeps the wood light and won’t yellow. For outdoor use, use an exterior spar urethane or a penetrating oil like teak oil that can be reapplied yearly. If you paint, prime first — especially with poplar, which soaks up paint unevenly at end grain.
For light, never use a real flame inside acrylic. Even with ventilation, the heat will warp 1/8″ acrylic over time and soot will cloud the frosting permanently. Use battery-operated LED pillar candles with timer or a short strand of warm-white fairy lights. A single 3″ x 4″ LED pillar fills this size lantern perfectly. If you use fairy lights, staple a small binder clip inside the lid to keep the battery pack hidden. Drill a 3/8″ vent hole in the base if your LED gets warm, though most don’t need it.
The whole build takes about 2 to 3 hours plus finish drying time, and material cost is typically $25 to $40 if you already have glue and finish. Build two at once — the setup time for the groove cuts is the same whether you make one or four, and they make better gifts in pairs.