What's inside
- Why Start With Box Joints
- What “Accurate” Actually Means for Box Joints
- Jig and Tool Setup Before Your First Cut
- Project 1: The Open Storage Tray
- Project 2: Small Keepsake Box With Captured Bottom
- Project 3: Divided Desk Organizer
- Project 4: Sliding-Lid Box
- Comparison: Which Project to Start With
- Common Failures and How to Fix Them
- Getting Clean Results Without Wasting Wood
- What to Build Next
- Why Start With Box Joints
- What “Accurate” Actually Means for Box Joints
- Jig and Tool Setup Before Your First Cut
- Project 1: The Open Storage Tray
- Project 2: Small Keepsake Box With Captured Bottom
- Project 3: Divided Desk Organizer
- Project 4: Sliding-Lid Box
- Comparison: Which Project to Start With
- Common Failures and How to Fix Them
- Getting Clean Results Without Wasting Wood
- What to Build Next
As an Amazon Associate I earn from qualifying purchases. This post may contain affiliate links at no extra cost to you.
Contents
- Why Start With Box Joints
- What “Accurate” Actually Means for Box Joints
- Jig and Tool Setup Before Your First Cut
- Project 1: The Open Storage Tray
- Project 2: Small Keepsake Box With Captured Bottom
- Project 3: Divided Desk Organizer
- Project 4: Sliding-Lid Box
- Comparison: Which Project to Start With
- Common Failures and How to Fix Them
- Getting Clean Results Without Wasting Wood
- What to Build Next
Why Start With Box Joints
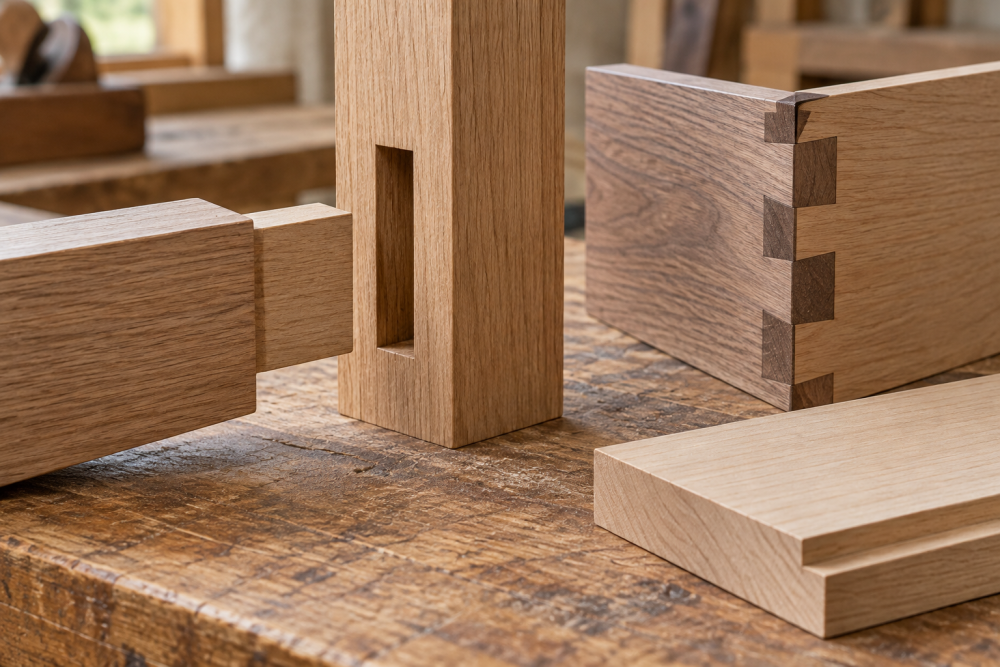
Box joints look simple but they punish small errors fast. Unlike dovetails, you don’t need angled cuts, just straight, square, repeatable fingers. That makes them ideal for learning machine setup, jig control, and dry-fit discipline without hand-cut joinery skills. If your fingers are off by 0.010″ it still looks okay. If they are off by 0.030″ the joint either won’t assemble or falls apart without glue. You will see your mistakes immediately, which is exactly what you want as a beginner.
They are also stronger than they look. A glued box joint on 1/2″ poplar or soft maple gives you long-grain to long-grain glue surface on every finger. For small boxes, trays, and organizers you don’t need additional fasteners. That keeps the projects contained and cheap while you learn.
As an Amazon Associate we earn from qualifying purchases at no extra cost to you.


What “Accurate” Actually Means for Box Joints
Forget perfection. Aim for a fit that assembles with light hand pressure or a few taps from a rubber mallet, not a hammer. For most softwoods and hardwoods, that means your finger width and slot width need to match within 0.005″ to 0.015″. Any tighter and seasonal expansion will crack the box. Any looser and the glue has to fill gaps, which it does poorly.
Two numbers control everything: blade or bit kerf and the jig’s index key. If you cut 1/4″ fingers, your key must be exactly 1/4″ plus or minus a few thousandths, and it must sit exactly one kerf away from the blade. A common beginner error is cutting fingers in cheap plywood first. Don’t. Plywood’s voids and inconsistent thickness hide fit problems. Start with flat, straight, dimensioned solid wood like poplar, soft maple, or alder at 1/2″ thick.
Jig and Tool Setup Before Your First Cut
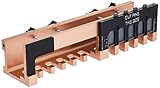
You have two honest paths for your first jig: a simple table saw sled with a pin, or a router table jig. A table saw with a dado blade set for table saw cuts faster and leaves a flat-bottomed slot, but a good dado set costs more than the wood for three projects. A single blade with multiple passes works if you are on a budget and own a reliable miter gauge, it just takes longer and adds cumulative error if your sled has play.
A router table with a straight bit is cheaper to start if you already own a router, but you need rigid featherboards and dust extraction because you will be making a lot of shallow passes. Either way, add a pair of digital calipers for woodworking to your kit. You cannot tune a box joint by eye. Measure the key, measure the cut, measure the test fingers. When the cheaper option is fine: a shop-made MDF sled and a single hardwood key is plenty accurate for 3/8″ and 1/2″ joints. You don’t need an aluminum box joint jig for table saw until you decide you like this joinery.
For all projects below, mill your stock to final thickness, cut to width, and keep board width consistent to within 1/64″. Differences in board width telegraph as uneven top edges that you can’t sand out without changing finger size.
Project 1: The Open Storage Tray
This is your calibration project. No bottom, no lid, just four sides joined at the corners. Make it 10″ long x 6″ wide x 3″ tall from 1/2″ poplar with 1/2″ fingers.
Why 1/2″ fingers: They are forgiving to set up, easy to see, and you only need 6 fingers per corner. Cut all four sides to exactly 3″ wide. Set your jig to cut 1/2″ slots and test on scrap until a dry joint slides together with slight friction. Then cut all sides without changing the setup. If the tray rocks, your crosscuts weren’t square. If the last finger is half-width, your board width wasn’t divisible by 1/2″. Trim all boards together or adjust your finger size. Glue, check for square by measuring diagonals, and clamp with band clamps or tape.
Failure mode to watch: burning on the second pass. It means you are hesitating in the cut or your blade is dull. Push steadily, and use a backer board on the sled to prevent tearout on the back edge.
Project 2: Small Keepsake Box With Captured Bottom
Next step: add a groove for a bottom panel. Size it 8″ x 5″ x 4″ tall, still in 1/2″ stock but move to 3/8″ fingers. This teaches you to plan joint layout around a groove.
Cut a 1/4″ wide x 1/4″ deep groove on the inside faces of all four sides, 3/8″ up from the bottom edge, before you cut the box joints. Use the same table saw or router table setup so the groove is centered and consistent. Then cut the 3/8″ fingers. The bottom panel itself is 1/4″ plywood or hardboard, cut 1/16″ smaller than the groove-to-groove dimension so it floats. Assemble three sides, slide the bottom in, then add the fourth side.
This is where people glue the bottom solid and the box cracks later. Don’t glue the panel. And don’t cut the groove after the fingers, you will blow out the thin fingers at the bottom. If your fingers are tight, lightly sand the sides of the fingers, not the ends. Sanding the end grain does nothing for fit.
Project 3: Divided Desk Organizer
This project forces repeatability. Build a 12″ x 6″ x 4″ open box with one or two internal dividers that sit in dadoes. Use 1/4″ fingers here. You will make 16 fingers per corner, so any error compounds quickly.
With 1/4″ fingers, creep matters. If your key is 0.008″ narrow, after 8 fingers you are 0.064″ off and the top will not line up. This is the project that shows you whether your sled has slop. Mill six to eight test fingers, measure the total width of the joint, and compare it to your target. Adjust the key with tape shims if needed, a single layer of blue painter’s tape is about 0.005″.
For dividers, cut 1/4″ dadoes 1/8″ deep across the long sides before assembly. Cut dividers from 1/4″ stock so they press-fit without glue. That way you can practice fitting without having to get box joint fingers perfect on small internal pieces. It’s also practical, the dividers keep the long sides from bowing.
Project 4: Sliding-Lid Box
A sliding lid looks advanced but it is just two grooves and careful top-edge planning. Make a 9″ x 6″ x 3-1/2″ box with 3/8″ fingers and a 1/4″ plywood lid that slides in from the end.
After milling your sides but before cutting joints, cut a 1/4″ wide x 5/16″ deep groove along the inside top edge of both long sides and one short side. Stop the groove 3/8″ short of the ends on the closed end so the lid has a stop. On the open end, cut the groove all the way through. Assemble the box, then cut the lid to fit with about 1/32″ side-to-side play. If the lid binds, the box is out of square or the grooves are not aligned. Measure groove height from the top edge on all three pieces, it must be identical.
Trade-off: This lid is not dust-proof and it weakens the top fingers slightly. Keep lid thickness at 1/4″ and don’t place the groove closer than 3/16″ from the top edge or the remaining wood will be fragile and chip.
Comparison: Which Project to Start With
| Project | Finger Size | What It Teaches | Time | Difficulty If Jig Is Sloppy |
|---|---|---|---|---|
| Open Storage Tray | 1/2″ | Basic jig setup, square assembly | 2-3 hours | Low – errors hide |
| Keepsake Box w/ Bottom | 3/8″ | Groove planning, panel fit | 3-4 hours | Medium |
| Divided Organizer | 1/4″ | Repeatability, cumulative error control | 4-6 hours | High – errors compound |
| Sliding-Lid Box | 3/8″ | Aligned grooves, lid fitting | 4-5 hours | Medium-High |
Start in order. Don’t jump to 1/4″ fingers until you can get a gaps-free 1/2″ joint without forcing it. Each smaller finger size halves your margin for error.
Common Failures and How to Fix Them
Gaps on one side of every finger: Your key is not perpendicular to the sled base or your blade is not 90 degrees to the table. Check both with a square, not by eye.
Joint is tight at the bottom, loose at the top: Your stock has a slight taper in thickness or your sled lifts during the cut. Check thickness with calipers at both ends and hold the workpiece firmly flat to the sled.
Fingers split during dry fit: You left the fit too tight and hit it too hard. Box joints should not need more than light mallet taps. If you have to pound, re-cut with the key shimmed outward 0.003″ to 0.005″.
Tearout on the back of the cut: Add a sacrificial backer to the sled and replace it when it gets chewed up. A zero-clearance insert on the saw also helps.
Box not square after glue-up: You glued without checking diagonals. Dry-clamp first and measure corner to corner. If diagonals differ by more than 1/32″ on a small box, adjust clamp pressure before the glue grabs. For thin-walled boxes, tape is often better than bar clamps because it pulls evenly.
Getting Clean Results Without Wasting Wood
Mill extra scrap from the same boards you will use for the project, not from offcuts of different species or thickness. Cut at least four test joints and break them after glue dries to check glue coverage. You want thin, even squeeze-out on every finger, not pools at the bottom. Use a small brush to spread glue inside the slots rather than on the fingers, it reduces mess and gaps.
Sand inside faces to 150 grit before assembly and ease the outside edges after. If you sand after assembly, you will round over the sharp finger edges that make a box joint look crisp. Finish with a thin film finish like shellac or water-based poly so you don’t build up thickness on the fingers, which affects lid fit on project 4.
What to Build Next
Once your 1/4″ divided organizer comes together without gaps, you are ready to scale up or add variations: try same 1/4″ joint on 3/4″ stock for a tool tote, or alternate finger widths for a decorative pattern, or cut matching fingers on the dividers themselves for a fully joined interior. Keep the same jig and only change one variable at a time so you know what helped.