What's inside
- Wood Projects to Build: Ideas, Materials, and Tools for Every Skill Level
- Compare projects before you buy materials
- Choose by space, budget, and experience
- Materials: pick for the project’s environment
- Tools worth having—and what can wait
- A practical cost check before starting
- Build for durability, not just appearance
- Related Guides
- Wood Projects to Build: Ideas, Materials, and Tools for Every Skill Level
- Compare projects before you buy materials
- Choose by space, budget, and experience
- Materials: pick for the project’s environment
- Tools worth having—and what can wait
- A practical cost check before starting
- Build for durability, not just appearance
- Related Guides
As an Amazon Associate I earn from qualifying purchases. This post may contain affiliate links at no extra cost to you.
Contents
- Wood Projects to Build: Ideas, Materials, and Tools for Every Skill Level
- Compare projects before you buy materials
- Choose by space, budget, and experience
- Materials: pick for the project’s environment
- Tools worth having—and what can wait
- A practical cost check before starting
- Build for durability, not just appearance
- Related Guides
Wood Projects to Build: Ideas, Materials, and Tools for Every Skill Level
For a first project with little space or budget, build a small wall shelf or planter; for a useful weekend upgrade, choose a bench or storage chest; and for a larger, more demanding build, consider a workbench or dining table. The best wood projects match the finished piece to your available space, skill, tools, and tolerance for maintenance—not just the appeal of the design.
Compare projects before you buy materials
The dimensions and times below are practical planning estimates, not fixed requirements. They assume a straightforward design, ordinary workshop conditions, and no elaborate joinery or finish schedule. Add time for shopping, drying glue, and applying finishes; oil- or water-based finishes may need several coats and additional curing time.
As an Amazon Associate we earn from qualifying purchases at no extra cost to you.


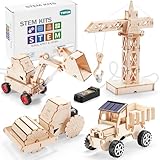

| Project | Typical finished size | Build time | Typical material cost | Core tools |
|---|---|---|---|---|
| Wall shelf | 24–36 in. wide × 8–10 in. deep | 2–4 hours | $20–$60 | Drill/driver, saw, level |
| Planter box | 24 in. long × 10 in. wide × 10–14 in. high | 2–4 hours | $25–$70 | Saw, drill/driver, tape measure |
| Small side table | 18–24 in. square × 20–24 in. high | 5–9 hours | $50–$140 | Saw, drill/driver, sander, clamps |
| Entryway bench | 36–48 in. wide × 14–18 in. deep × 18 in. high | 8–14 hours | $80–$220 | Saw, drill/driver, sander, clamps |
| Storage chest | 30–36 in. wide × 16–20 in. deep × 18–22 in. high | 8–16 hours | $100–$300 | Saw, drill/driver, sander, hinges, clamps |
| Workbench | 48–72 in. wide × 24–30 in. deep × 34–36 in. high | 10–20 hours | $120–$400 | Circular saw, drill/driver, clamps, square |
Costs vary with lumber species, board thickness, hardware, and local availability. The ranges exclude new tools, delivery, and specialty finishes. Pine and construction lumber usually keep costs down; hardwoods such as maple or oak cost more but can suit furniture where appearance and wear resistance matter.
Choose by space, budget, and experience
| Your situation | Good fit | Why it fits | Watch out for |
|---|---|---|---|
| First build; under $60; little storage | Wall shelf or planter | Few parts, simple cuts, and minimal floor space | A shelf must be anchored to suitable wall framing or masonry; planters need drainage and moisture-resistant construction. |
| Beginner with a drill and a saw | Side table | Introduces leg alignment, squareness, and basic finishing | Uneven legs or a twisted top can make the table rock. |
| Some experience; need seating and storage | Entryway bench | Combines a sturdy frame with a useful everyday surface | Check that the legs and joints can handle repeated loading; don’t rely on screws driven into end grain alone. |
| Limited space, but frequent workshop use | Compact workbench | Creates a stable work surface and can be sized to the room | Leave room to move long stock and operate a saw safely. |
| More time and a larger materials budget | Storage chest | Offers substantial storage and opportunities for a fitted lid or dividers | A heavy lid can slam; use suitable hinges and a lid support, and keep fingers clear. |
Materials: pick for the project’s environment
For a low-cost indoor build: Pine boards are widely available and easy to cut and fasten. Expect knots, dents, and differences in moisture that can complicate a perfectly flat finish. Plywood is useful for shelf panels, chest sides, or workbench tops because it is dimensionally stable; choose a grade with an appearance appropriate to exposed surfaces.
For furniture that will see regular use: Hardwood can offer a more durable surface, but it costs more and may take longer to cut and sand. Combining hardwood for visible edges or legs with plywood for broad panels can balance appearance, stability, and cost.
For outdoor projects: Choose lumber rated for the intended exposure, such as suitable cedar or pressure-treated stock, and use exterior-rated fasteners. Keep soil from sitting directly against a planter’s wood; a liner and drainage holes can help, but the liner must not trap water. Let pressure-treated lumber dry as directed before applying a finish, and follow the product label for safe handling.
Before cutting, inspect boards for bow, twist, splits, and loose knots. A low-cost board that is badly warped can create more waste and frustration than a straighter board that costs a little more.
Tools worth having—and what can wait
For many beginner wood projects, a tape measure, pencil, combination square, drill/driver, clamps, and a dependable saw are enough. A circular saw with a guide can make straight cuts in sheet goods and lumber; a handsaw can handle small parts more slowly. A random-orbit sander speeds surface preparation, but sanding blocks work for small projects.
Buy or borrow tools according to repeat use. If this is a one-off shelf, paying for a specialty tool may not make sense. For repeated furniture builds, a sander and a set of clamps can save time across multiple projects. Use eye and hearing protection when appropriate, control dust, secure workpieces before cutting, and follow each tool’s safety instructions.
A practical cost check before starting
Suppose a side table needs $70 of lumber, $15 of fasteners and glue, and $15 of finish: the planned materials total is $100. Add a 10–15% allowance for defects, miscuts, or price variation, bringing the working budget to about $110–$115. If you need to buy a saw or sander as well, include that separately; tool purchases can exceed the cost of a simple project.
Reduce waste by sketching a cut list before shopping. Group parts by board length, account for saw kerfs—the material removed by the blade—and avoid cutting every piece to final size until you have checked the layout. This is especially helpful when a project uses several parts of the same length.
Build for durability, not just appearance
Fit and alignment affect how long a project stays useful. Check each assembly for square before tightening fasteners or allowing glue to set. Predrill near board ends to reduce splitting, and use joints or blocking that carry loads into the frame rather than depending on fasteners in end grain.
Edges and finishes are common wear points. Sanding too aggressively can round over joints or thin a plywood face; work through grits without skipping large jumps, and remove dust before finishing. On frequently handled furniture, finish all accessible surfaces consistently, including edges that might absorb moisture. For outdoor pieces, inspect fasteners and the finish periodically; sun, standing water, and ground contact usually cause trouble sooner than ordinary indoor wear.
Choose a project by what you need it to do and where it will live. A small shelf is a sensible first build, a bench offers more utility for the effort, and a workbench makes sense when you have room to use it. Check the finished dimensions against your space, price the materials before committing, and select a design that your tools can build accurately.