What's inside
As an Amazon Associate I earn from qualifying purchases. This post may contain affiliate links at no extra cost to you.
Fall is a good season to learn hand-planing reclaimed wood. The cooler weather makes long shop sessions easier, and salvaged boards are cheap enough that a beginner can afford a few mistakes. They also expose the real skills: reading grain, setting a plane correctly, supporting uneven stock, and knowing when to stop removing material.
Start with boards that are rough but manageable, such as old shelving, a pine door, or pallet lumber with a known history. Avoid painted boards from unknown buildings, pressure-treated wood, and anything with signs of rot or chemical contamination. Reclaimed wood can contain hidden nails, screws, grit, and staples, all of which can chip a blade or damage a planer.
As an Amazon Associate we earn from qualifying purchases at no extra cost to you.



Contents
Tools and Materials for Reclaimed Wood
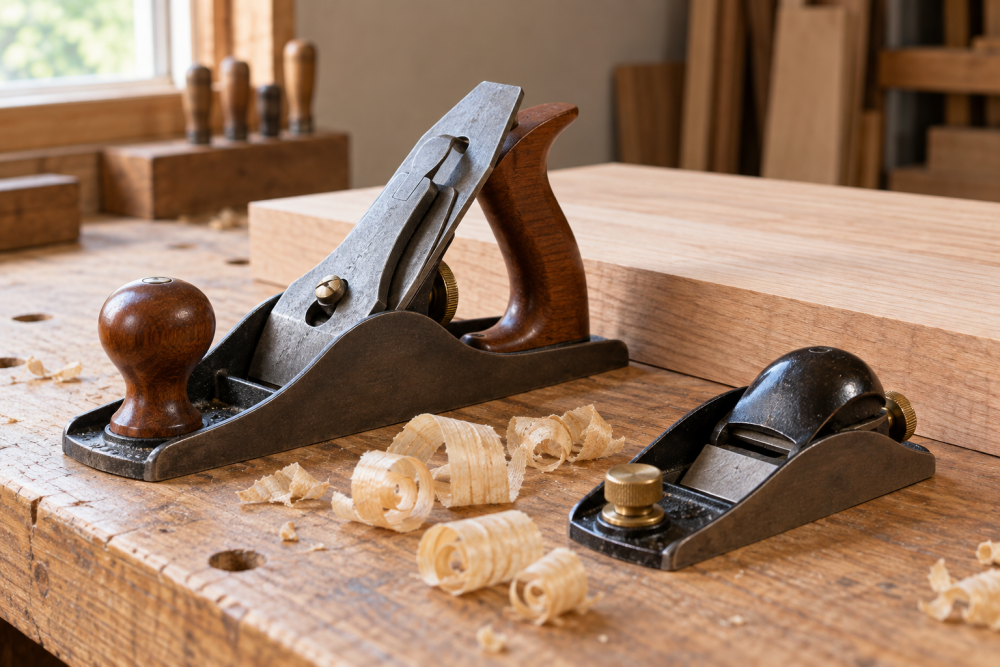
You do not need a complete hand-tool collection. A sharp bench plane, a block plane, a jointer plane or straightedge, a mallet, a marking gauge, and a reliable way to sharpen are enough for the projects below. A No. 4-style bench plane is the most useful first purchase because it can flatten, smooth, and handle moderate boards. A low-angle block plane is useful for end grain and small parts.
For the plane itself, a secondhand option is often fine. Condition matters more than appearance: the sole should not be badly twisted, the frog should adjust securely, and the blade must have enough steel left for sharpening. If you want a new starter tool, compare No. 4 bench hand planes. Spend more on a sharpening system if your current stones or honing guide are unreliable.
Before planing, inspect every face with a bright light and remove metal with a nail puller or end-cutting nippers. Then use a metal detector over the entire board, including the edges. A detector is not a substitute for visual inspection, but it catches buried fasteners that would otherwise ruin a blade. For reclaimed lumber, a basic handheld wood metal detector is usually sufficient.
Choose the Right Fall Project
| Project | Finished size | Planing challenge | Best for |
|---|---|---|---|
| Coat hook board | 24 by 5 by 3/4 inches | Flattening one face and easing edges | First project |
| Serving tray | 18 by 12 by 3/4 inches | End grain, glue-up alignment, handles | Beginner with basic experience |
| Window box | 24 by 8 by 7 inches | Multiple boards and consistent thickness | Confident beginner |
| Small entry bench | 36 by 12 by 18 inches | Long edges, twist, and structural joints | Intermediate woodworker |
The coat hook board is the most forgiving choice. It uses short stock, so cupping and twist are limited, and the final appearance can retain saw marks or old nail holes. A serving tray teaches more difficult work without requiring furniture-scale accuracy. The window box is practical, but outdoor movement and moisture make it less suitable for severely cracked or unstable lumber.
Project One: Reclaimed Coat Hook Board
Choose a board at least 30 inches long, 6 inches wide, and 1 inch thick. Cut it to rough length only after checking for defects. Leave about 2 inches of extra length and 1/2 inch of extra width for cleanup.
Step 1: Mark the best face with a pencil and draw a reference line around one end. Plane high spots diagonally across the grain with the iron set for a shallow cut. Check with a straightedge every few passes. Stop when the face is flat enough that the straightedge does not rock; you do not need to remove every old saw mark.
Step 2: Plane the opposite face until the board is about 3/4 inch thick. Measure at both ends and the center. If the board varies by more than 1/16 inch, keep working the high areas rather than taking heavy cuts across the entire face.
Step 3: Joint one long edge against a fence or shooting board. Mark the reference face and edge so you do not lose track of them. Crosscut the board to final length, then plane the remaining edge parallel. Ease all edges with two or three light block-plane passes.
Step 4: Sand only as much as needed, drill pilot holes, and install three or four coat hooks. Leave at least 3 inches between hooks. Finish with hardwax oil or a water-based clear coat. Old, dry boards can absorb the first coat unevenly, so apply a second coat after the label’s stated drying time.
Project Two: Simple Serving Tray
Use two or three boards totaling at least 13 inches in width. Plane one face and one edge on each board before glue-up. Do not chase perfect thickness; boards between 5/8 and 7/8 inch can make a sturdy tray if their faces meet cleanly.
Arrange the boards to balance color and defects, then mark the order with cabinetmaker’s triangles. Apply a thin, even coat of glue and clamp across the width. Excessive clamp pressure can bow the panel, so tighten only until the joints close. After curing, plane the panel with cuts that follow the grain. Reclaimed boards often change grain direction around knots, so reduce the cut when the plane begins to tear out.
Trim the panel to 18 by 12 inches. Cut two end handles from 3/4-inch stock, round their top edges, and attach them with glue and screws from underneath. For end grain, use a sharp blade, skew the plane about 30 degrees, and support the exit edge with a sacrificial block. Tear-out at the far edge is the most common failure on this project.
Project Three: Fall Window Box
A window box is a useful intermediate project because it requires several consistent parts. Plane the outside faces only; leaving the interior rough saves time and preserves character. Build the box from 3/4-inch boards, with the front and back about 8 inches high and the ends cut to fit between them.
Predrill every screw hole, especially near old nail holes and board ends. Reclaimed pine splits easily when fasteners are driven without a pilot hole. Add a bottom with drainage gaps or drilled holes spaced about 4 inches apart. Line the interior with a plastic planter or membrane rather than relying on finish alone. Moist soil will eventually damage reclaimed wood.
Avoid Common Planing Failures
Tear-out usually means the grain is rising into the cut, the blade is dull, or the cut is too deep. Reverse direction, reduce the iron projection, and take a skewed cut. A board that rocks on the bench is difficult to plane accurately; use stops, dogs, or a temporary cleat, but do not hold the work with your free hand near the blade.
Do not plane through remaining paint, grit, or metal. If a blade strikes a fastener, stop immediately and inspect both the edge and the workpiece. A small nick can be honed out; continuing to plane spreads the damage and makes tear-out worse. For most fall projects, a 25- to 30-degree bevel and a genuinely sharp edge are more valuable than an expensive plane.
When Power Tools Make Sense
A benchtop thickness planer can save time on a large window box or bench, but it is not a shortcut around inspection. One hidden nail can damage knives and eject debris. Use a planer only after metal detection, and take light passes of 1/32 inch or less. For a single coat board or tray, hand-planing is usually cheaper, quieter, and gives better control over which marks remain visible. A low-cost hand-plane sharpening guide is a better first upgrade than buying a larger machine.