What's inside
As an Amazon Associate I earn from qualifying purchases. This post may contain affiliate links at no extra cost to you.
Contents
Engraving Patterns for Metal: What Works on Steel vs Aluminum
For crisp engraving patterns for metal, use finer lines and tighter spacing on a smooth, coated surface; on bare metal, choose a process that can actually mark the alloy. A CO₂ laser with metal-marking spray is usually the practical choice for occasional, high-contrast marks on steel, while a fiber laser is the better fit for repeatable, direct marking and fine detail on compatible metals.
Steel and aluminum need different approaches
“Engraving” can mean removing metal, changing its surface, or bonding a dark mark to it. A CO₂ laser generally does not directly engrave bare steel or aluminum: its wavelength is poorly absorbed by most bare metals. With a suitable marking compound, it can create a contrasting surface mark, but the result is not the same as a deep, cut groove. A fiber laser is designed for direct metal marking and can anneal, discolor, or remove material, depending on the metal and settings.
As an Amazon Associate we earn from qualifying purchases at no extra cost to you.


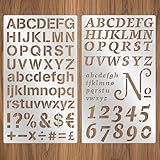

Steel tends to show fine pattern detail well when the surface is smooth. Stainless steel can take a dark annealed mark with appropriate fiber-laser settings; mild steel may oxidize differently, so test the specific alloy and finish. Aluminum is softer and often reflective. Anodized aluminum usually marks by removing or changing the colored anodized layer, producing a bright line. Bare aluminum may need a fiber laser or a compatible marking compound; its appearance varies more with alloy and finish.
| Situation | Pattern starting point | Likely process | Key limitation |
|---|---|---|---|
| Smooth stainless steel, fine ornament | 0.15–0.25 mm lines; 0.4–0.6 mm gap | Fiber laser for direct marking; CO₂ plus metal-marking spray for occasional contrast | Spray marks are generally surface-level, not deep engraving |
| Painted or coated steel, bold label | 0.25–0.5 mm lines; 0.6–1.0 mm gap | CO₂ laser may remove a laser-compatible coating | Test the coating; some finishes release hazardous fumes |
| Anodized aluminum, small graphic | 0.2–0.35 mm lines; 0.5–0.8 mm gap | CO₂ or fiber, depending on coating and desired result | Thin strokes can disappear if the anodizing is uneven |
| Bare aluminum, durable direct mark | 0.3–0.6 mm lines; 0.8–1.2 mm gap | Fiber laser, with settings matched to the alloy | Reflectivity, alloy, and surface finish affect contrast |
| Deep, tactile grooves in either metal | Use wider, separated features; allow for multiple passes | Fiber laser rated for the job, or mechanical engraving | Depth takes time and may require specialized equipment |
These line widths and gaps are conservative design starting points, not machine guarantees. Spot size, focus, power, speed, coating, and the viewing distance all matter. Run a test grid on scrap from the same material before committing a finished part.
Choose by material, volume, and the mark you need
- Choose CO₂ with metal-marking spray if you already own a CO₂ laser, work mainly with wood or other CO₂-friendly materials, and mark metal only occasionally. It can be cost-effective for logos, labels, and decorative graphics when a high-contrast surface mark is enough.
- Choose a fiber laser if metal marking is frequent, you need direct marking without a coating, or you need more control over fine detail and repeatability. It costs more to equip a shop, but avoids applying and cleaning off marking compound for each job.
- Choose mechanical engraving when the mark must be a physical groove and a laser’s surface contrast is not sufficient. It also suits some jobs where the metal’s reflectivity or coating makes laser results unpredictable.
- For coated or anodized parts, identify the coating before choosing a process. Removing a coating can expose a different-colored layer, but the result depends on coating thickness and composition.
Do not judge a process by maximum power alone. Confirm the machine’s wavelength, material compatibility, work area, focus method, enclosure, extraction requirements, and whether its manufacturer supports the intended metal-marking application. A CO₂ laser’s ability to mark a coated item does not mean it can safely process every coating.
Set pattern weight and density for the finished size
Pattern files are often designed on a screen at a much larger scale than the finished mark. Downscaling compresses gaps and can turn parallel lines into a dark, unreadable patch. For small lettering, tight hatching, or an intricate border, simplify the artwork before shrinking it. Remove alternate hatch lines, widen narrow gaps, and avoid details that are smaller than the machine can reliably resolve.
A useful first test is a small matrix of line widths and gaps. For example, on a stainless-steel offcut, test 0.15, 0.2, and 0.3 mm strokes with 0.4, 0.6, and 0.8 mm spacing. Inspect the results at the real viewing distance, not only under magnification. If strokes merge, increase the gap or reduce density. If they break up, increase line weight or adjust focus and settings.
For a laser engraved photo on metal, convert the image into a dithered or halftone pattern suited to the intended process rather than engraving a smooth photograph as if metal were paper. Use a clean, evenly finished blank, preserve larger tonal clusters, and test a crop first. Anodized aluminum and coated metal can produce more predictable image contrast than bare reflective aluminum, but the final appearance depends on the specific surface and laser setup.
Worked setup: when marking spray makes sense
Suppose you need 12 small stainless-steel tags, each with a logo and serial number, and already have a compatible CO₂ laser. A marking compound can be a sensible route if a surface-level dark mark meets the durability requirement. Clean the blank, apply an even coat according to the compound’s instructions, let it dry as directed, and engrave a test piece using the manufacturer’s recommended settings. After processing, remove residue as instructed and check legibility, adhesion, and resistance to handling before making the batch.
The trade-off is setup and cleanup per batch, plus the cost of compound and scrap tests. A fiber laser becomes more attractive as volume rises, when marks need to be direct and repeatable, or when coating application slows production. For deep marks or parts exposed to abrasion, verify actual depth and wear resistance; a dark-looking mark alone does not prove that material was removed.
Keep the mark legible—and the process safe
- Start with a clean, flat surface. Oil, fingerprints, and uneven coating can create blotchy contrast. Avoid aggressive sanding that changes the finish around the design.
- Match density to the blank. Use wider spacing on rough, small, or inconsistently coated surfaces; reserve dense patterns for clean, uniform stock.
- Change one variable at a time. Test line weight, spacing, and laser settings separately so you can identify what improved or degraded the result.
- Account for wear. Marking compounds, surface oxidation, and removed coatings may not withstand abrasion like a deep mechanical groove. Test the part under its real use conditions.
- Use suitable extraction and material checks. Coatings can emit hazardous fumes when heated. Do not process unidentified materials, and follow the machine and marking-compound safety instructions.
For occasional decorative work on a compatible coated metal, a CO₂ laser and marking spray can deliver useful contrast without buying a dedicated metal laser. For regular work on bare steel or aluminum, or for finer repeatable direct marks, a fiber laser is usually the more capable choice. In either case, legibility comes from designing the pattern for the actual surface and finished size—not from packing in the most detail possible.