What's inside
As an Amazon Associate I earn from qualifying purchases. This post may contain affiliate links at no extra cost to you.
Contents
How to Change the Blade on a DeWalt Circular Saw
To change a blade on a DeWalt circular saw, disconnect its power, lock the spindle, remove the arbor bolt and outer washer, replace the blade with its teeth pointing in the saw’s marked direction, then reinstall the hardware and check that the blade spins freely by hand.
The exact lock and wrench arrangement varies by model, so check the saw’s manual if a part is unfamiliar. The steps below apply to many corded and cordless DeWalt circular saws, but the model’s labels and instructions take priority.
As an Amazon Associate we earn from qualifying purchases at no extra cost to you.

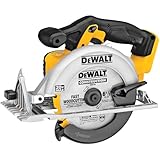


Before you begin: confirm the blade and hardware
Use a blade that matches the saw’s specified diameter and arbor size, and that is rated for a circular saw’s operating speed. The diameter is commonly printed on the blade; the saw’s manual or label identifies the required size. Don’t assume a blade fits just because its arbor hole looks close. Use a manufacturer-approved reducer only when the saw and blade instructions allow one.
| Check | What to verify | Why it matters |
|---|---|---|
| Blade diameter | Match the diameter specified for your saw; common DeWalt handheld saw sizes include 6-1/2 in. and 7-1/4 in. | A blade that is too large may not fit beneath the guard or within the saw’s rated capacity. |
| Arbor fit | Confirm the blade’s center hole matches the saw’s arbor or an approved adapter. | A poor fit can let the blade run off-center or loosen. |
| Blade type | Choose a blade suited to the material and cut, such as a wood-cutting blade for lumber. | Tooth design affects cut quality and how the blade handles the material. |
| Rotation direction | Compare the arrow on the blade with the rotation arrow marked on the saw. | The teeth must face the direction the saw is designed to rotate. |
| Arbor hardware | Inspect the bolt, outer washer and any inner flange for damage, dirt or incorrect placement. | Clean, correctly seated hardware helps clamp the blade securely. |
Wear eye protection and work on a stable surface. Let a recently used blade cool before handling it, and keep your fingers away from its teeth.
Steps for changing a blade on a DeWalt circular saw
1. Disconnect all power
For a corded saw, unplug it from the outlet. For a cordless saw, remove the battery pack; switching the trigger off is not enough. Set the saw down with the shoe supported and the blade clear of the work surface.
2. Retract the lower guard carefully
Use the guard lever to move the lower blade guard out of the way as needed. Don’t force it or wedge it open. If it sticks, binds or fails to return smoothly, stop and address the problem before operating the saw.
3. Engage the spindle lock
Press and hold the spindle-lock button while gently turning the blade by hand until the lock engages. The blade should stop rotating. Keep the lock pressed while loosening the arbor bolt with the supplied blade wrench or the tool specified in the manual. On many models, the bolt loosens counterclockwise, but verify the direction for your saw rather than forcing it.
4. Remove the bolt, washer and old blade
Keep track of the arbor bolt and outer washer as you take them off. Note which way the washer faces and how the blade sits against the inner flange. Lift the old blade out carefully; if it is trapped by debris, don’t pry against the guard or damage the arbor.
5. Clean and inspect the arbor hardware
Wipe sawdust from the arbor, inner flange and outer washer. Check that the flanges are seated properly and have no cracks, heavy wear or burrs. Inspect the bolt threads and the blade’s arbor hole. Replace damaged parts with the correct parts for the saw; don’t substitute a random washer or use a blade with a distorted center hole.
6. Orient and fit the new blade
Match the arrow printed on the blade to the rotation arrow on the saw. On many circular saws, the printed face and tooth direction provide a useful visual check, but the arrows are the reliable guide. With the saw’s shoe resting securely, slide the blade onto the arbor so it sits flat against the inner flange without rocking.
If you’re figuring out how to put a blade on a DeWalt circular saw, this is the key: orient the blade by the arrows, not by which side of the blade faces outward. A backwards blade can cut poorly and behave unpredictably.
7. Reinstall and tighten the arbor hardware
Replace the outer washer in its original orientation, then thread the arbor bolt by hand to avoid cross-threading. Hold the spindle lock and tighten the bolt using the wrench and method specified in the manual. Don’t add lubricant or use an impact wrench unless DeWalt specifically directs you to do so; excess force can damage the bolt or hardware.
8. Check the installation before cutting
Release the spindle lock and lower guard. Rotate the blade carefully by hand to confirm it turns without scraping the shoe or guard. Check that the guard returns freely and that the blade appears centered and seated. Reinstall the battery or plug in the saw only after the wrench is removed and your hands are clear. Make a controlled test cut in scrap material, keeping the work supported and the blade guard unobstructed.
Common mistakes and ownership checks
- Leaving the battery installed: The trigger can be activated accidentally while you work. Remove the pack or unplug the saw before touching the blade.
- Skipping the spindle lock: Holding the blade by hand while loosening the bolt risks injury and can damage the teeth. Use the lock as instructed.
- Guessing the blade direction: Check both arrows. Don’t rely only on the printed side of the blade.
- Mixing up washers: Incorrectly placed or damaged arbor hardware can prevent proper clamping. Keep parts in order and inspect them each time.
- Ignoring a sticky guard: Sawdust buildup can interfere with the lower guard’s movement. Clean according to the manual; don’t operate the saw with a guard that won’t move and return properly.
Blade teeth dull with use, especially when cutting abrasive or dirty material. Signs include slower cutting, more effort, rougher edges or burning. Clean pitch and resin from a blade only with a suitable blade cleaner and according to its instructions; replace blades with cracked, missing or damaged teeth. Keeping blades clean and storing them so their teeth don’t strike other tools helps preserve them.
What if it’s a Craftsman circular saw?
The basic process for changing the blade on a Craftsman circular saw is similar: disconnect power, engage the spindle lock if fitted, remove the arbor hardware, match the new blade’s rotation arrow to the saw and reinstall the hardware. However, bolt direction, wrench type, blade size and lock location can differ by model. Check the Craftsman manual and the saw’s markings rather than assuming DeWalt instructions apply.
Quick final checklist
- Power disconnected: cord unplugged or battery removed.
- Blade diameter and arbor fit match the saw.
- Blade arrow matches the saw’s rotation arrow.
- Inner flange, outer washer and bolt are clean, undamaged and correctly seated.
- Blade turns freely by hand, and the lower guard returns normally.
- Wrench removed and power restored only when ready for a controlled test cut.