What's inside
As an Amazon Associate I earn from qualifying purchases. This post may contain affiliate links at no extra cost to you.
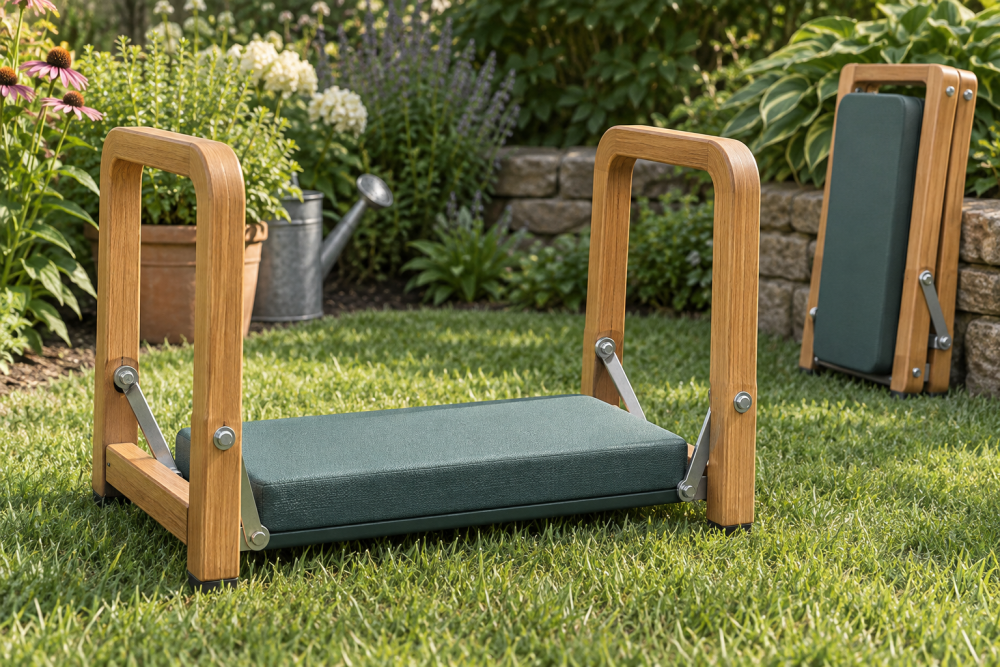
A folding garden kneeler is a useful first spring project: it has a small parts list, straightforward cuts and a clear test at the end. Built with a padded top, it works as a low seat; turned over, its side rails provide handholds for getting back up. The plan below makes a sturdy wooden version that folds flat for storage. It is not a certified mobility aid, so don’t rely on it to support you if you need medical-grade assistance.
Contents
Dimensions and design
The kneeler is about 20 inches long, 10 inches wide and 17 inches high when open. Those dimensions give most adults room to kneel without making the frame awkward to carry. The two end frames are joined by a hinged seat panel. A stop on each frame limits how far the legs open, while a removable pin keeps the kneeler from folding unexpectedly.
Use straight-grained lumber without large knots near the joints. Cedar resists rot and is light, but it dents more easily; untreated pine costs less and is fine if you store the kneeler indoors. For frequent outdoor use, seal the wood and keep the cushion dry.
Materials and tools
Buy one 8-foot 1×3 board for the legs and rails, and one 1×10 board at least 20 inches long for the seat. Actual lumber sizes are smaller than their names: a 1×3 is usually about ¾ by 2½ inches. You’ll also need two 1½-inch-wide seat cleats, four 2½-inch hinges, two ¼-inch bolts about 3 inches long with washers and wing nuts, wood glue, and 1¼-inch exterior screws. Add a piece of 1- to 2-inch-thick foam and outdoor fabric if you want a padded top.
A circular saw and drill are enough for the build; a miter saw makes matching leg cuts easier but isn’t essential. A pair of woodworking clamps helps hold the frames square while fastening them. If you don’t own a saw, ask the lumberyard to make the straight cuts and do the angled cuts by hand.
| Material | Trade-off | Good choice when |
|---|---|---|
| Pine | Inexpensive, but can dent or weather if left outside | You’ll store the kneeler indoors |
| Cedar | Lighter and more weather-resistant, but softer and usually pricier | You’ll carry it often or use it outdoors |
| Exterior plywood seat | Stable and efficient, but edges need sealing | You have a suitable offcut and want to reduce waste |
Cut list and layout
Cut four legs 17 inches long, with both ends angled 10 degrees so the feet sit flat when the frame opens. Cut four cross rails 8½ inches long. Each end frame uses two legs and two rails, with one rail near the top and the other about 3 inches above the feet. Cut the seat panel to 20 by 9½ inches, then cut two cleats to 8½ inches.
These dimensions are a starting point, not a universal fit. Before final assembly, dry-fit the frames and seat. If the seat touches the ground before the feet are stable, adjust the opening angle or reduce the seat width slightly. Mark matching parts together so left and right legs stay consistent.
Build the end frames
Lay out each pair of legs parallel, with the narrow face up. Position the upper rail flush with the leg tops and the lower rail 3 inches above the feet. Check that the rails sit square across the legs, then drill pilot holes to reduce splitting. Glue and screw each rail to both legs using two screws per joint. Keep screw heads flush and avoid placing them too close to an edge.
Measure diagonally across each frame. If the two measurements differ, shift the frame until they match before the glue sets. That quick check prevents a twisted kneeler. Leave the frames clamped until the glue label’s stated cure time, typically several hours.
Attach the seat and hinges
Center a cleat underneath each short end of the seat, flush with the end grain. Glue and screw the cleats in place; they give the hinges more material to bite into. Attach two hinges to each end of the seat, spacing them evenly across the width. Use screws short enough not to break through the top—usually ¾-inch screws for a ¾-inch seat.
Set the end frames beneath the seat with the upper rails against the cleats. Attach the other hinge leaves to the rails. Open the kneeler to its intended stance and check that both frames move freely without binding. Add a wood stop block inside each frame so the legs cannot spread farther than the stable position you tested. Drill a ¼-inch hole through each frame and fit the bolts with washers and wing nuts as locking pins. The pins should be easy to remove for folding but snug enough that they don’t rattle out.
Test, finish and maintain
Sand sharp corners and splinters, especially around the handhold rails. Apply two thin coats of exterior oil or water-based outdoor finish, following the label between coats. For a padded seat, wrap foam in outdoor fabric and staple it to the underside; keep staples clear of the hinge and cleat areas. A water-resistant outdoor wood finish is worthwhile if the kneeler will see damp weather, but it won’t make the wood maintenance-free.
Test on level ground before gardening. First press down on the seat with your hands, then apply weight gradually while standing beside it. Check that the feet don’t slide, the frame stops engage evenly and the locking pins remain in place. Don’t use it if a hinge shifts, a screw loosens or a leg rocks; fix the cause before putting your full weight on it. Recheck fasteners each spring, and store the kneeler dry with the pins removed so it folds flat.