What's inside
- What to Look For in Budget Workshop Lighting
- Best Budget Shop Lighting by Workshop Situation
- Head-to-Head: The Main Budget Lighting Choices
- Coverage and Layout: Put Light Where Shadows Form
- Glare, Shadows, and Task Lighting
- Energy Use and Running Cost
- Installation and Ownership Details That Matter
- Bottom Line
- What to Look For in Budget Workshop Lighting
- Best Budget Shop Lighting by Workshop Situation
- Head-to-Head: The Main Budget Lighting Choices
- Coverage and Layout: Put Light Where Shadows Form
- Glare, Shadows, and Task Lighting
- Energy Use and Running Cost
- Installation and Ownership Details That Matter
- Bottom Line
As an Amazon Associate I earn from qualifying purchases. This post may contain affiliate links at no extra cost to you.
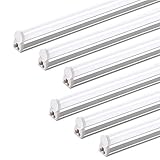
The best budget shop lighting for most woodworkers is a 4-foot, 5,000K LED strip or wraparound fixture delivering roughly 4,000–5,000 lumens, with a CRI of 80 or higher, mounted in evenly spaced rows across the ceiling.
That recommendation balances brightness, color accuracy, energy use, glare, and installation cost better than a single powerful fixture or bare LED tubes. For detailed finish work, add a high-CRI task light at the bench rather than trying to make the entire shop excessively bright.
As an Amazon Associate we earn from qualifying purchases at no extra cost to you.



Contents
- What to Look For in Budget Workshop Lighting
- Best Budget Shop Lighting by Workshop Situation
- Head-to-Head: The Main Budget Lighting Choices
- Coverage and Layout: Put Light Where Shadows Form
- Glare, Shadows, and Task Lighting
- Energy Use and Running Cost
- Installation and Ownership Details That Matter
- Bottom Line
What to Look For in Budget Workshop Lighting
Brightness: buy lumens, not watts
LED wattage describes energy consumption, not how much useful light reaches your work. Lumens are the relevant specification. A practical target for woodworking is:
- General shop areas: 30–50 lumens per square foot
- Assembly and hand-tool benches: 50–75 lumens per square foot
- Detailed joinery, carving, or finishing: 75–100 lumens per square foot at the task surface
For example, a 12-by-20-foot shop has 240 square feet. At 50 lumens per square foot, it needs about 12,000 delivered lumens. Three 4-foot fixtures producing 4,000 lumens each would meet that target on paper, although four fixtures may produce more even coverage and fewer shadows.
Do not count every lumen on the box as usable light. A dirty diffuser, high ceiling, dark walls, and poor fixture spacing reduce light at the bench. A light meter app can provide a rough comparison, but a dedicated lux meter is more dependable.
Color temperature and CRI
Color temperature affects the appearance of the shop. Around 4,000K gives a neutral white that is comfortable for long sessions. Around 5,000K provides a cooler daylight appearance and makes fine edges, pencil lines, and dust easier to see. Color temperatures above 6,000K can look harsh and blue in a small workshop.
For most woodworking, choose 4,000K or 5,000K. If you regularly match stains, select paint colors, or inspect finish defects, prioritize a fixture rated at CRI 90 or higher. An inexpensive CRI 80 light is adequate for sawing, planing, and assembly, but it may make subtle wood and finish colors look less accurate.
| Lighting type | Typical size | Typical output | Typical power | Best use |
|---|---|---|---|---|
| 4-foot LED strip | 48 inches | 3,500–5,000 lumens | 35–45W | General ceiling lighting and low-cost row layouts |
| 4-foot LED wraparound | 48 inches | 4,000–5,500 lumens | 40–50W | Broader side illumination with less bare-diode glare |
| LED shop-light tube fixture | 48 inches | 3,000–4,800 lumens | 30–40W | Replacing older fluorescent fixtures |
| High-CRI task light | 18–30 inches | 800–1,500 lumens | 8–15W | Detail work, finishing, and inspection |
| LED panel | 2-by-4 feet | 4,000–6,000 lumens | 35–50W | Very even light in a finished or enclosed ceiling |
Best Budget Shop Lighting by Workshop Situation
| Your situation | Best choice | Why |
|---|---|---|
| Small garage shop under 150 square feet | Two or three 4-foot LED fixtures | Low installation cost and enough output for flexible layouts |
| Long, narrow shop | One row of fixtures along the center, plus task lighting | Uses fewer fixtures while keeping the work path bright |
| Frequent furniture building | 4,000–5,000K fixtures with CRI 90 task lights | Balances general visibility with finish-color accuracy |
| Beginning woodworker on a tight budget | Linkable 4-foot LED strips, installed in stages | Start with essential coverage and expand later |
| Low ceiling or glare-sensitive workspace | Diffused wraparound fixtures or LED panels | Spreads light more broadly and hides bright diode points |
| Unheated or dusty outbuilding | Enclosed LED fixtures rated for the environment | Better protection from dust, moisture, and temperature changes |
Head-to-Head: The Main Budget Lighting Choices
LED strips and linkable shop lights
These are usually the best value for a woodshop. They are inexpensive, easy to surface-mount, and available in rows that can be switched together. Many connect with short jumper cables or end-to-end connectors, reducing the amount of fixed wiring.
The main weakness is glare. Some low-cost strips expose individual LED points behind a thin lens. Viewed from a low angle, they can be uncomfortable and produce sharp reflections on freshly finished boards. Look for a frosted diffuser, a wide beam, and a reputable electrical safety certification. Avoid daisy-chaining more fixtures than the manufacturer permits.
LED wraparound fixtures
A wraparound fixture sends light sideways as well as downward. That helps illuminate the faces of cabinets, machines, and lumber racks rather than creating a bright circle directly below the fixture. It is often the better choice when the ceiling is low or when bare strips cause eye-level glare.
Wraparounds generally cost more than basic strips, but the price difference is modest in a small shop. Their broad diffuser can also conceal dust accumulation better than exposed LED boards, though it still needs cleaning.
LED panels
Panels produce very even, shadow-reduced light and are excellent for a finished ceiling. They are less convenient in a rough garage because installation may require cutting the ceiling, installing a surface-mount frame, or adding a junction box. Panels are a good upgrade when appearance and uniformity matter more than the lowest initial cost.
Replacing fluorescent fixtures
LED replacement tubes can make sense when you already have sound fluorescent housings. Direct-wire tubes often eliminate old ballasts, improving reliability, but they require careful wiring and compatibility checks. If the existing housing is rusty, damaged, or filled with sawdust, replacing the entire fixture is usually safer and simpler.
Coverage and Layout: Put Light Where Shadows Form
A common mistake is placing every fixture down the center of the room. Your body then blocks light while you work, especially at a bench or table saw. Instead, arrange fixtures in rows that run parallel to the main work surfaces.
- Position the first row roughly 2–4 feet from a wall-mounted bench.
- Space parallel rows about 6–8 feet apart in a typical 8–10-foot ceiling.
- Place a fixture over or slightly in front of the table saw, planer infeed, and assembly table.
- Use cross-lighting at the workbench: one overhead row and one adjustable task light.
- Keep fixtures clear of garage-door tracks, dust-collection pipes, and tall lumber storage.
For a 12-by-20-foot shop, four 4-foot fixtures in two parallel rows is a practical starting layout. At 4,000 lumens per fixture, the nominal output is 16,000 lumens, or about 67 lumens per square foot before losses. A separate 1,000-lumen high-CRI task light at the bench can then handle close inspection without making the whole room uncomfortably bright.
Glare, Shadows, and Task Lighting
Brightness does not compensate for bad contrast. Glare can hide a pencil line or make a glossy finish difficult to inspect. Diffusers, matte surfaces, and multiple light directions help more than simply installing higher-output fixtures.
Use an adjustable arm light or clamp light at the bench with a broad shade and a frosted bulb or diffuser. Mount it above eye level and slightly to the side of your dominant hand. This reduces the chance that your hand or tool will cast a shadow directly across the cut line. For finish inspection, a high-CRI light aimed across the surface reveals uneven sheen and scratches better than a ceiling light aimed straight down.
Energy Use and Running Cost
LED lighting is inexpensive to operate, but the savings depend on total wattage. Four 40-watt fixtures consume 160 watts. Used for 1,000 hours per year, they consume 160 kilowatt-hours. At an electricity rate of $0.18 per kWh, that is about $29 per year, before adding a task light.
Replacing one 160-watt fluorescent system with four 40-watt LED fixtures would not reduce wattage, but replacing an older 320-watt fluorescent setup would save about 160 kWh per 1,000 hours. Separate switches for each row prevent you from lighting an empty part of the shop.
Installation and Ownership Details That Matter
Surface-mounted fixtures are usually the most practical budget option. Use the supplied clips or appropriate hardware, anchor into framing where possible, and keep cords away from sharp edges and moving machinery. Permanent hardwiring should comply with local electrical rules; hire a qualified electrician if you are not comfortable working inside junction boxes.
Dust is the first maintenance issue in a woodworking shop. Every few months, switch off the circuit, allow fixtures to cool, and clean lenses with a dry or slightly damp microfiber cloth. Do not spray cleaner into vents or electrical seams. A clogged diffuser can reduce usable light enough to create the impression that more fixtures are needed.
Low-cost fixtures most often fail at the driver, connector, switch, or brittle cord rather than at the LED emitters themselves. Keep purchase records and choose products with a stated warranty, replaceable power cords where available, and standard connectors. Avoid mixing incompatible linkable systems simply because their plugs look similar.
Bottom Line
Choose 4-foot LED strips or wraparound fixtures in the 4,000–5,000K range, target at least 30–50 lumens per square foot, and favor CRI 80 or better for general work. Spend extra on CRI 90 lighting only where you inspect wood color or finishes. Install multiple rows instead of one bright central fixture, use separate switches, and add a movable high-CRI task light at the bench. That combination delivers more useful light, less glare, and better value than buying the brightest single fixture available.