What's inside
As an Amazon Associate I earn from qualifying purchases. This post may contain affiliate links at no extra cost to you.
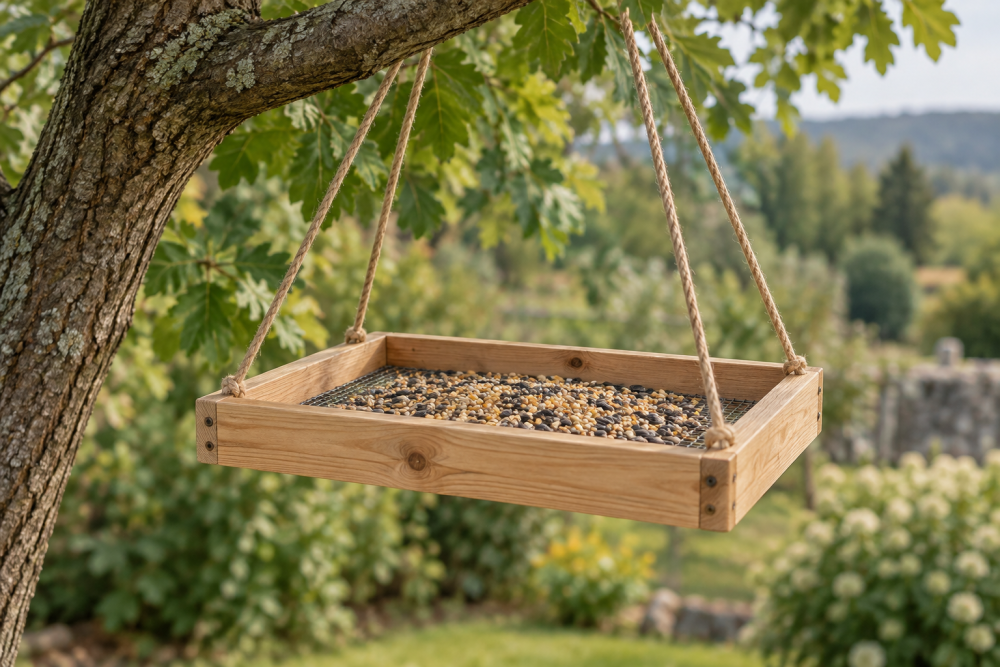
A simple tray feeder is a good first spring woodworking project: it needs only a few straight cuts, uses inexpensive lumber, and gives birds an open place to land. The design below measures 8 by 10 inches, has a shallow rim to hold seed, and hangs from a single hook. Build it from untreated cedar or pine, and plan on about an hour of hands-on work, plus time for glue to dry.
Contents
Materials and tools
Use a 1-by-8 board at least 24 inches long for the tray and rim. “1-by” lumber is actually about ¾ inch thick, which is sturdy enough here. Cedar resists rot naturally; untreated pine costs less and works fine if the feeder is kept under an eave or you accept replacing it sooner. Avoid pressure-treated wood, painted scraps of unknown age, and plywood with exposed glue layers where birds may peck.
You’ll also need exterior-rated wood glue, four 1¼-inch exterior screws, sandpaper, and a hanging eye screw. A cedar 1-by-8 board is a practical choice if the feeder will sit in the weather. For tools, use a saw, drill, tape measure, square, and a ⅛-inch drill bit for pilot holes. A handsaw is enough; a circular saw makes the cuts faster but isn’t necessary.
Choosing a simple design
This open tray feeder is easy to build and clean, but it does not keep seed dry in heavy rain. The comparison below can help decide whether to build this version or choose a more enclosed style.
| Style | Best for | Main trade-off |
|---|---|---|
| Open tray | Easy building and cleaning; mixed seed | Seed gets wet and may need frequent replacement |
| Covered tray | Rain protection and longer-lasting seed | More parts and cuts; roof can make cleaning awkward |
| Tube feeder | Small seeds and less exposed food | Usually bought rather than built from basic boards |
For a first project, the open tray is a sensible choice if you can check it regularly. If you want a roof, add one only after you’ve built and used the tray; a poorly fitted cover can trap moisture rather than keep it out.
Cut list and layout
Cut one tray base to 8 by 10 inches. From the remaining board, cut two 10-inch pieces for the long sides and two 6½-inch pieces for the short sides. These make a rim about ¾ inch high. The short pieces fit between the long ones, so the assembled outside dimensions are 8 by 10 inches.
Check the actual board width before cutting: nominal 1-by-8 boards vary slightly. Dry-fit the four rim pieces around the base. If your board is wider or narrower than 7½ inches, adjust the base width so the rim sits flush at its edges. A square and pencil are enough to mark the cuts accurately.
Build the feeder
1. Cut the base and four rim pieces. Sand the cut edges and corners with 120-grit paper so there are no splinters. Don’t round the edges heavily; a small chamfer is enough.
2. Place the base flat on a work surface. Spread a thin line of exterior wood glue along one long edge, set a long rim piece against it, and check that it is square to the base. Clamp it if you have a clamp. Drill two pilot holes through the rim into the base, then drive in 1¼-inch exterior screws. Repeat on the opposite long side, then fit the short sides between them.
3. Keep the rim level with the base’s bottom face, not centered on its edge. This leaves a shallow tray floor with a rim above it. Wipe away squeezed-out glue with a damp cloth before it hardens.
4. Drill four or five ⅛-inch drainage holes through the base, spaced about 2 inches apart. Skip this step and rainwater can pool under the seed, encouraging mold. Keep the holes small enough that most seed won’t fall through.
5. Mark the center of the underside and drill a pilot hole for the eye screw. Choose an eye screw with a shank long enough to bite securely into the ¾-inch base, but do not drill through the top. For a heavier feeder or a location with wind, use two screw eyes and a short length of chain rather than relying on one small hook.
Finish and hang it
Leave the inside unfinished. A clear exterior finish may extend the wood’s life, but it can wear off and should not be applied where birds can peck at it. If you finish the outside, use a product labeled for exterior use, keep it off the tray surface, and let it cure completely according to the label before filling the feeder.
Hang the feeder 5 to 6 feet above the ground, away from spots where cats can hide. Place it near shrubs or a tree for quick cover, but leave roughly 10 feet between the feeder and dense branches if squirrels are a problem. A hanging feeder hook can make positioning easier; a sturdy existing branch works just as well if it can support the load.
Seed, cleaning, and common problems
Start with a small amount of seed so you can see how quickly birds use it. Black-oil sunflower seed attracts many common backyard birds; a mixed seed blend costs less but often leaves hulls or filler on the ground. Buy only what you expect to use soon, because damp seed can spoil. A small bag of black-oil sunflower seed is a straightforward first choice.
Check the tray every few days in wet spring weather. Remove clumped, moldy, or foul-smelling seed, and scrub the feeder when it is dirty. Let it dry before refilling. If seed repeatedly gets soaked, move the feeder to a more sheltered spot or consider rebuilding it with a roof. If the tray wobbles, check the hanging screw and the rim joints before adding more seed; a loose joint is easier to fix while the feeder is empty.