What's inside
As an Amazon Associate I earn from qualifying purchases. This post may contain affiliate links at no extra cost to you.
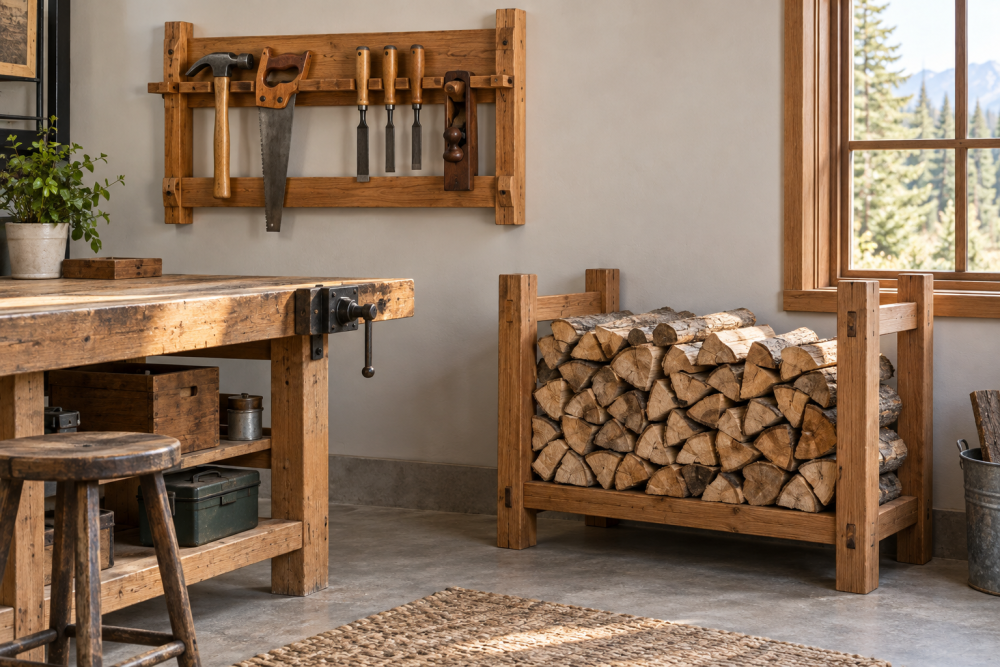
A compact indoor wood rack keeps a small supply of firewood off the floor and within reach of the stove. This beginner-friendly project uses common lumber, basic cuts, and a screwed-together frame. The finished rack measures about 24 inches wide, 16 inches deep, and 20 inches high—large enough for a short stack without taking over a room.
Contents
Plan the rack and choose the wood
These dimensions suit short splits roughly 14 to 16 inches long. Measure your firewood and the spot beside your stove before cutting; leave the clearances required by your stove manufacturer and local fire code. A wood rack is storage, not a hearth or heat shield. Keep it well away from hot surfaces and never let wood touch a stove or flue.
Use construction-grade 2×2 lumber for the frame and 1×3 boards for the slats. Select straight pieces without loose knots or deep cracks, especially for the legs and long rails. The rack is intentionally open, which helps air circulate and makes bark and debris easy to see and sweep up. If your floor is uneven, add adjustable feet or fit the legs to the floor rather than forcing the frame to sit flat.
Materials and tools
Buy two 8-foot 2×2 boards and two 8-foot 1×3 boards. You’ll also need about 20 2½-inch structural or wood screws, wood glue, sandpaper, and a finish if desired. A handsaw and drill are enough; a miter saw speeds up repeated cuts but isn’t necessary. A combination square helps keep cuts and screw locations consistent.
Cut four 2×2 legs to 20 inches. Cut two 2×2 long rails to 21 inches and two short rails to 13 inches. These rail lengths fit between the legs: with the legs at the corners, the outside dimensions come to about 24 by 16 inches. Cut three 1×3 slats to 24 inches for the bottom. Measure actual lumber before cutting; nominal 2×2 and 1×3 boards are usually smaller than their stated sizes.
Wear eye protection, clamp work before sawing or drilling, and keep hands clear of the blade. A basic drill/driver is fine for this job. A cordless model is more convenient, but extra power won’t compensate for a crooked assembly or screws driven too close to a board’s edge.
Choosing a wood and finish
| Option | Advantages | Trade-offs |
|---|---|---|
| Construction-grade pine | Inexpensive, easy to cut and screw | Often bowed or knotty; inspect each board |
| Clear hardwood | More consistent appearance and fewer defects | Costs more and is unnecessary for a utility rack |
| Unfinished rack | Fastest and cheapest; easy to repair | Shows dirt and may absorb moisture or sap |
| Water-based clear finish | Low odor and easy cleanup | Requires drying time; doesn’t make the rack waterproof |
For a rack used indoors, straight pine is usually the sensible choice. Skip premium hardwood unless the rack is meant to be furniture. If you apply a finish, do it away from the stove and let it cure fully according to the label before bringing the rack indoors. Avoid finishing surfaces that will remain damp from wet logs; no household coating fixes poor airflow or standing moisture.
Assemble the frame
Mark the rail positions on the legs. For a 20-inch rack, place the top edges of the side rails about 3 inches above the floor. That leaves a small gap beneath the bottom slats for debris and airflow. Clamp one long rail between two legs, check that the rail is square to the legs, and drill pilot holes through the legs into the rail. Use two screws at each joint, spaced apart vertically. Add a little glue to clean mating surfaces if you want a firmer joint; screws alone are adequate for a light-duty rack.
Repeat with the other long rail, then connect the two sides with the short rails. Check the frame on a flat floor before tightening every screw. Measure diagonally from corner to corner in both directions: the two measurements should match. If they don’t, push the longer diagonal inward until the frame squares up. Skipping this check can leave the rack twisted, so one corner rocks even on a reasonably flat floor.
Drill pilot holes rather than driving screws straight into the 2×2 ends. Without pilots, a screw can split the leg, particularly near its edge. If a joint opens while tightening, back the screw out, realign the parts, and redrill; forcing it tighter may strip the hole or worsen the split.
Fit the bottom slats
Lay the three 24-inch slats across the short rails, evenly spaced, with roughly 1½-inch gaps between them. Keep the ends flush with the outside faces of the legs. Drill pilot holes and drive one screw into each rail at both ends of every slat. The slats support the wood; the open gaps let dust fall through and air move beneath the stack.
Sand sharp edges and splinters, then test the empty rack for rocking. Check each joint for movement before loading it. Start with a modest stack and add wood gradually; if the rack shifts, creaks, or bows, unload it and inspect the frame. Don’t use it as a seat or lean on it.
Use and maintain the rack
Store only dry, seasoned firewood indoors, and bring in a manageable amount rather than filling the rack with damp logs. Wet wood can raise indoor moisture and leave stains or mold behind the stack. Keep bark, insects, and loose debris contained with a mat that can be lifted for cleaning. Inspect the rack every few months for loose screws, split legs, and signs of moisture on the floor.
If you need more capacity, extend the width only after considering the load: longer unsupported rails can bow under heavy logs. For a larger rack, add a center support or use thicker rails. For this compact version, the cheaper pine build is sufficient when the lumber is sound, the joints are square, and the rack is kept dry.