What's inside
- Why Winter Projects Are Different
- 1. Edge-Grain Cutting Board (Beginner, 1 Weekend)
- 2. Floating Shelves With Hidden Brackets (Beginner to Intermediate, One Afternoon Each)
- 3. Dovetailed Keepsake Box (Intermediate, 2-3 Evenings)
- 4. Shaker-Style Step Stool (Intermediate, One Weekend)
- Comparison: Which Project Fits Your Shop?
- Making Indoor Work Tolerable in Winter
- Why Winter Projects Are Different
- 1. Edge-Grain Cutting Board (Beginner, 1 Weekend)
- 2. Floating Shelves With Hidden Brackets (Beginner to Intermediate, One Afternoon Each)
- 3. Dovetailed Keepsake Box (Intermediate, 2-3 Evenings)
- 4. Shaker-Style Step Stool (Intermediate, One Weekend)
- Comparison: Which Project Fits Your Shop?
- Making Indoor Work Tolerable in Winter
As an Amazon Associate I earn from qualifying purchases. This post may contain affiliate links at no extra cost to you.
Contents
- Why Winter Projects Are Different
- 1. Edge-Grain Cutting Board (Beginner, 1 Weekend)
- 2. Floating Shelves With Hidden Brackets (Beginner to Intermediate, One Afternoon Each)
- 3. Dovetailed Keepsake Box (Intermediate, 2-3 Evenings)
- 4. Shaker-Style Step Stool (Intermediate, One Weekend)
- Comparison: Which Project Fits Your Shop?
- Making Indoor Work Tolerable in Winter
Why Winter Projects Are Different
Short winter days change how you work. You get 6-8 hours of usable natural light, your garage or basement shop is probably 45-60°F, and ventilation is limited because you can’t open doors without freezing. That rules out anything that needs large sheet goods, strong solvents, or all-day glue-ups. The best indoor winter builds share three traits: they fit on a workbench or small assembly table, they create manageable dust, and they can be finished in 2-4 hour blocks so you can start and stop without leaving parts clamped overnight in the cold.
Temperature also affects finishing. Water-based polyurethane needs at least 55°F to cure properly and oil-based finishes double their dry time below 60°F. If your shop is cold, expect 24 hours between coats instead of 4-6. Plan for that, or build projects that use oil/wax finishes you can apply indoors with little odor.
As an Amazon Associate we earn from qualifying purchases at no extra cost to you.


1. Edge-Grain Cutting Board (Beginner, 1 Weekend)
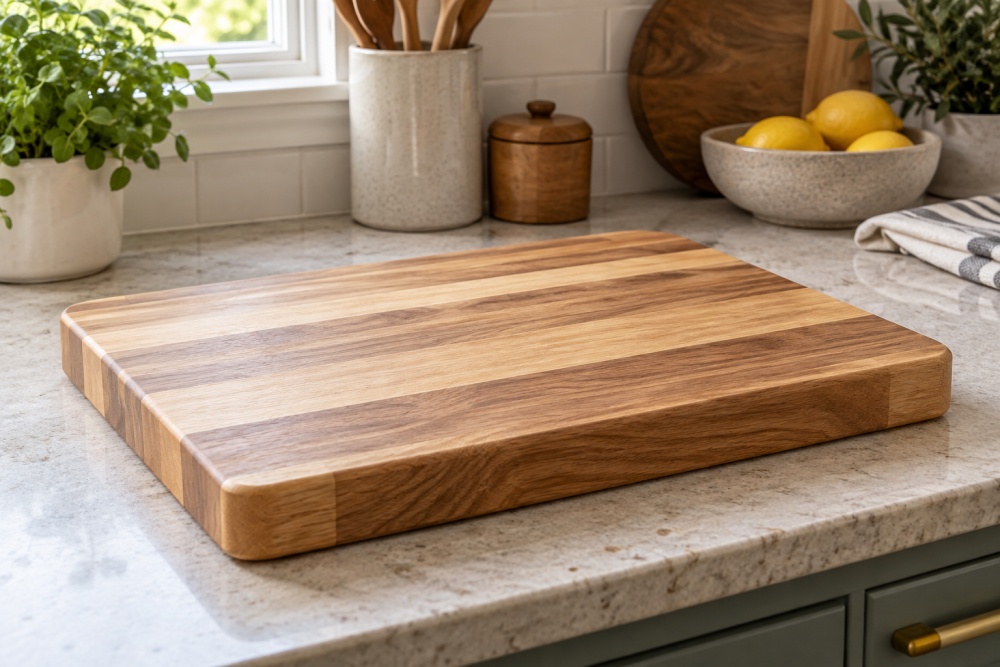
This is the classic winter starter for a reason. You need 4-6 board feet of hard maple, walnut, or cherry – all stable, closed-grain woods that hold up to knives and don’t require heavy milling. You can buy them pre-surfaced (S4S) at 3/4″ thick and rip to 1-1/2″ strips on a table saw or with a circular saw and straight-edge guide.
Glue-up is the failure point. Don’t over-clamp – 100-150 psi is enough. Over-tightening squeezes out too much glue and starves the joint. Use three clamps underneath and two on top to keep the panel flat, and check for flat with a straightedge before the glue sets. Titebond III gives you 10 minutes of open time at 70°F but only about 6 minutes at 55°F, so dry-fit first.
You don’t need a drum sander. A random orbit sander 5 inch with 80, 120, and 180 grit will flatten a 12″ x 18″ board in about 20 minutes. Finish with food-grade mineral oil and board wax – no curing issues, no fumes, and you can apply it at the kitchen table. Total cost: $40-$70 in lumber if you buy S4S locally. A planer helps but isn’t required if you start with surfaced stock, which is why this is honest beginner work.
2. Floating Shelves With Hidden Brackets (Beginner to Intermediate, One Afternoon Each)
A pair of 24″ to 36″ floating shelves teaches you straight drilling, edge banding, and wall mounting without eating a full sheet of plywood. Build them as hollow torsion boxes: 1/2″ MDF or Baltic birch top and bottom with a 3/4″ solid wood front edge and internal blocking where the bracket rods go.
The critical number is bracket depth. For a 10″ deep shelf, the steel bracket needs at least 7″ of rod inside the shelf and must hit two studs. Cheap single-rod brackets flex. Use a welded 2-rod bracket rated for 75 lbs per stud pair. Drill the rod holes with a drill press or a drilling jig for straight holes – 1/2 degree of error over 7″ means the shelf won’t slide on. If you don’t have a press, clamp a square block as a guide and bore in 1″ increments, clearing chips each time.
MDF makes the lightest, flattest shelves and paints well, but it creates ultra-fine dust that hangs in the air for hours. Wear a P100 respirator and run an air filter or box fan with a furnace filter. If dust control is poor in your space, use prefinished birch plywood instead – more expensive, but almost no sanding.
3. Dovetailed Keepsake Box (Intermediate, 2-3 Evenings)
A small box – roughly 12″ x 8″ x 5″ – is the best way to practice hand-cut dovetails without committing to a dresser. You need about 3 board feet of 1/2″ hardwood. Poplar is cheap and forgiving for practice; walnut and maple look better but show every gap.
Cut tails first, then transfer to pin boards. A 14 TPI dovetail saw and a narrow chisel set (1/4″, 3/8″, 1/2″) is enough. Mark with a wheel gauge, not a pencil – you need a 0.3mm line. The most common failure is splitting the tail when chopping waste. Don’t lever the chisel. Pare halfway from each face and keep the back of the chisel flat to the baseline. If you prefer power tools, a compact trim router with a dovetail jig cuts a box in under an hour, but you’ll spend that time saved dialing in the jig’s depth and offset on scrap.
For a winter-friendly finish, use shellac or hardwax oil. Both dry in 1-2 hours at 60°F and don’t stink up the house like oil-based poly. Add a simple tray inside with 1/4″ bottom and small finger notches – it hides any out-of-square in the main box.
4. Shaker-Style Step Stool (Intermediate, One Weekend)
More useful than a box and still bench-top friendly. A classic three-step design uses three 1×10 poplar or pine boards, about 8 linear feet total. Legs splay 5 degrees, steps are housed in 1/4″ deep dadoes, and everything is glued and pinned with 1-1/4″ brads.
Strength comes from grain direction. Cut steps so grain runs side-to-side, not front-to-back, or the step will split under weight. Dadoes should be cut with a router and straight edge or a table saw with a dado stack – a single pass with a standard blade leaves a sloppy fit. Aim for a fit you can push together by hand with light friction. If you have to hammer it, it’s too tight and will split when humidity changes.
This project justifies buying or borrowing a pocket-hole jig if you want to avoid dadoes, but pocket screws alone will rack under lateral load. If you go that route, add glue and a 3/16″ hardwood dowel through each joint for shear strength. Sand to 150 grit and paint with acrylic enamel – it cures in cold better than oil paint.
Comparison: Which Project Fits Your Shop?
| Project | Time Blocks | Skill Level | Core Tools | Approx. Material Cost | Dust / Noise |
|---|---|---|---|---|---|
| Edge-Grain Cutting Board | 2 blocks x 3 hrs | Beginner | Circular or table saw, 3-5 clamps, random orbit sander | $40-$70 | Low / Moderate |
| Floating Shelves (pair) | 1 block x 4 hrs per shelf | Beginner+ | Drill press or jig, circular saw, sander | $50-$90 | High if MDF |
| Dovetailed Keepsake Box | 3 blocks x 2-3 hrs | Intermediate | Dovetail saw, chisels, marking gauge or trim router + jig | $30-$60 | Very Low (hand tools) |
| Shaker Step Stool | 2 blocks x 4-5 hrs | Intermediate | Router or table saw, drill, sander | $35-$55 | Moderate |
If you have neighbors below you or a shared wall and can only work after 6 PM, the keepsake box wins – you can do 90% of it with hand tools at 65 decibels. If you want something done in a single short Saturday, build the shelves. If you want a skill that transfers to every future project, the cutting board teaches milling and glue-up discipline you’ll use forever.
Making Indoor Work Tolerable in Winter
Dust collection matters more indoors than any tool upgrade. A shop vacuum with a HEPA filter plus a $30 box fan taped to a 20×20 MERV 13 filter cuts airborne fines by about 80% in a 150 sq ft room. Work in bursts: 45 minutes of cutting or sanding, then let the filter run for 15 while you layout or sharpen.
Light is the other bottleneck. A 4000K LED shop light at 4000 lumens over the bench changes accuracy more than a new saw. Shadows hide your marking lines. Two cheap strip lights angled at 45 degrees eliminate shadow on dovetail baselines.
Finally, keep finishes simple. Unless your shop stays above 65°F, avoid film finishes that need multiple coats a day apart. An oil-and-wax blend you can buff out in 20 minutes gets the project out of the shop and into the house, which is the whole point of a short winter build – finish something usable before the light is gone.