What's inside
As an Amazon Associate I earn from qualifying purchases. This post may contain affiliate links at no extra cost to you.
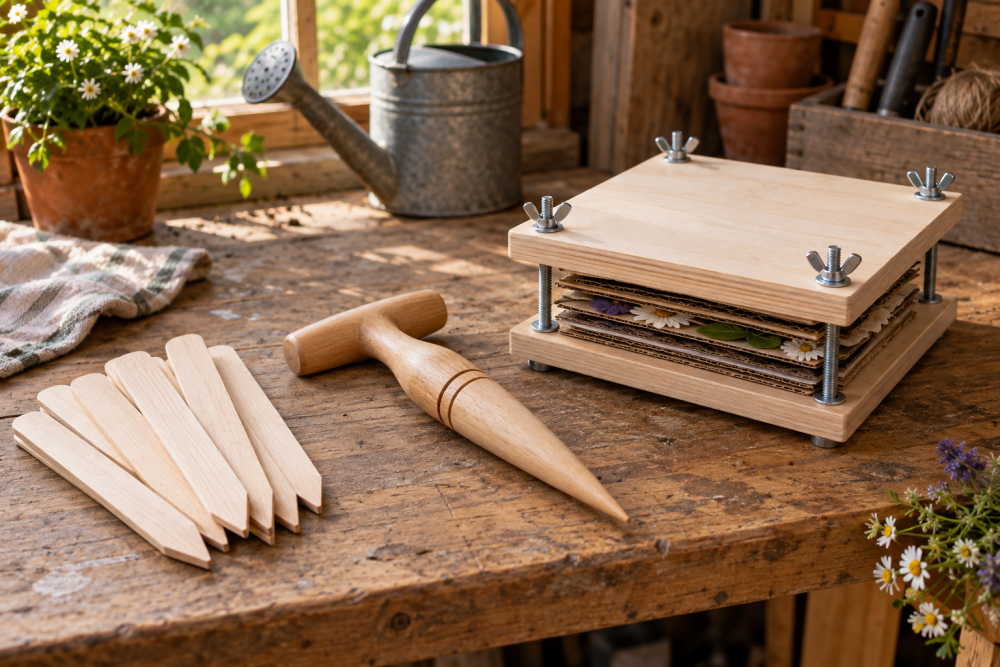
A flower press is a simple spring project, but even pressure matters more than fancy materials. This design uses two layered boards, four bolts and wing nuts, and cardboard-and-paper layers to hold flowers flat while they dry. The screws are adjustable, so you can tighten the press as the plant material shrinks.
Contents
Materials and size
The press measures about 9 by 12 inches, a useful size for common flowers and leaves. The boards should be flat and stiff; warped boards can leave some specimens damp while others are crushed. Use two pieces of 3/4-inch plywood, each 9 by 12 inches. Cabinet-grade plywood is a good choice, but inexpensive sanded plywood works if its faces are reasonably smooth and its edges are not splintered.
You will also need four 1/4-inch-diameter, 3-inch-long carriage bolts, four washers, and four wing nuts. The bolts pass through the corners, so check that their length accommodates both boards and the layers inside. For pressing layers, cut corrugated cardboard and absorbent paper to about 8 by 10 inches. Watercolor paper or unprinted newsprint works; glossy magazine paper does not absorb moisture well.
For drilling, use a 1/4-inch drill bit. A handheld drill is sufficient if you clamp the boards together and drill slowly. A drill press makes perpendicular holes more consistent, but it is not worth buying solely for this project.
Tools and board options
Gather a saw, drill, clamps, ruler, pencil, sandpaper, and eye protection. A jigsaw or circular saw can cut the panels; have a lumberyard make the cuts if you do not own a suitable saw. Sand the edges to remove splinters, especially around the bolt holes.
| Board material | Cost and effort | Trade-off |
|---|---|---|
| 3/4-inch plywood | Usually the best balance | Stable and easy to drill; exposed plies need sanding. |
| Solid pine | Often inexpensive | Fine if flat, but can warp or split near holes. |
| Hardwood panel | Higher cost | Durable, but heavier than this project needs. |
For a first press, plywood is the practical option. A hardwood board does not improve drying if the pressure and paper layers are already even.
Cut and drill the boards
Cut two matching panels to 9 by 12 inches. Mark a hole center 1 inch from each edge at all four corners. This leaves enough wood around each hole while keeping the bolts clear of most of the pressing area. Stack and clamp the boards, align their edges, and drill through both at once. This helps the holes line up. Put scrap wood underneath to reduce tear-out as the bit exits.
Test each bolt in its hole. If the fit is tight, ease the hole with a round file or a slightly larger bit; forcing a carriage bolt can split a plywood face. Sand the board faces and edges, but do not apply a wet finish. A fresh finish can transfer odor or residue to paper and plants. If you want to seal the boards, finish them well before use and let them cure fully.
Assemble the adjustable press
Place one washer and wing nut on each bolt, then insert the bolts through one board from the outside so their heads sit against its outer face. The square shoulder under a carriage bolt’s head may bite into plywood; if it spins, hold the head firmly while starting the wing nut. Add the other board over the protruding bolts, with its smooth face toward the layers. The second board can slide up and down as the stack changes thickness.
Arrange flowers between sheets of absorbent paper, with corrugated cardboard between paper packets to let moisture escape. Keep stems and petals inside the edges of the paper. Start with a thin stack; a very tall load may bind on the bolts before the boards can apply even pressure. Put the top board on, add washers and wing nuts, and tighten each corner a little at a time in a diagonal pattern. Stop when the stack is held firmly and the boards sit parallel. Cranking the nuts hard can bruise delicate petals or bow a board.
Use and adjust the press
Check the press after several hours, then daily. If the paper feels damp, replace it with dry sheets and retighten the wing nuts evenly. The adjustable hardware is useful here: as flowers lose moisture and the stack gets thinner, the upper board can move down without the press going slack. Do not rely on extra-tight pressure to compensate for wet paper. Trapped moisture can cause brown patches or mold.
Small, thin flowers may dry in about one to two weeks; thick blooms and fleshy leaves can take longer. Drying time varies with humidity and the plant’s thickness. Keep the press in a dry, ventilated spot away from direct sun. Once a specimen is brittle and dry rather than cool or soft to the touch, remove it carefully with tweezers or a blunt knife.
Common problems and fixes
If one side dries faster, check that the boards are parallel and that the paper and cardboard layers cover the specimen evenly. If a flower comes out flattened beyond recognition, loosen the press slightly on the next batch and use fewer layers. If the bolts loosen in use, add a second nut at each corner as a lock nut, or replace the wing nuts with hand knobs. A nut that repeatedly strips is usually a hardware problem; do not force it.
Store the press dry with the wing nuts loosened. Before the next spring batch, inspect the plywood for swelling and check that the holes have not become loose. Replacing damp paper and tightening gradually are the two habits that matter most; the press itself needs little maintenance.