What's inside
As an Amazon Associate I earn from qualifying purchases. This post may contain affiliate links at no extra cost to you.
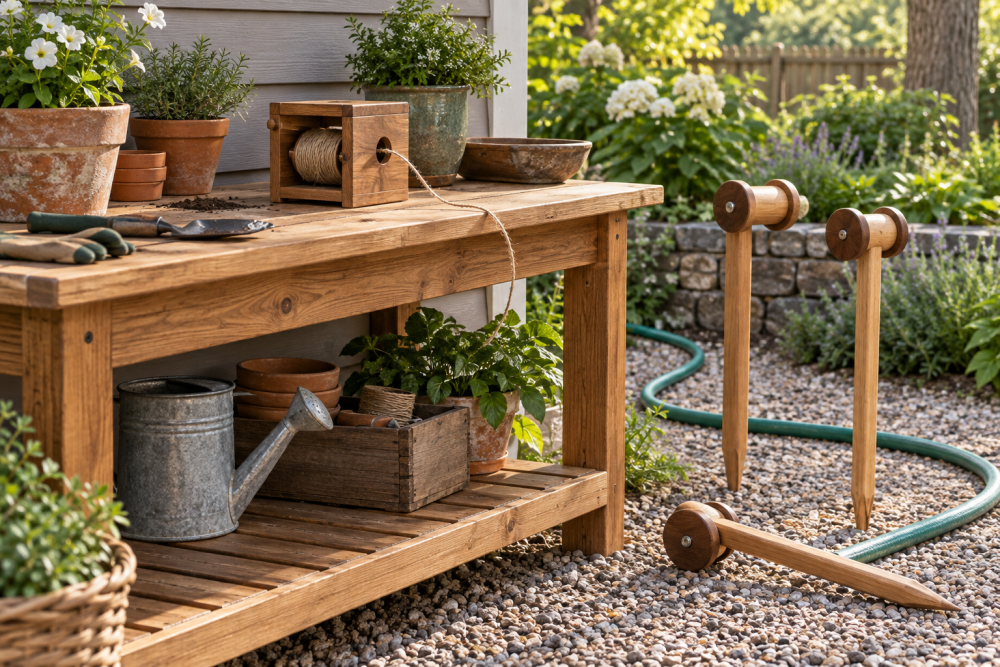
A garden twine dispenser keeps a ball of string from rolling through potting soil and lets you pull out a useful length with one hand. This small wooden version has a lidded box, a removable spindle and a metal outlet that helps prevent the twine from snagging on a rough hole. It suits scrap hardwood or exterior-grade plywood and takes an afternoon to build, plus time for glue and finish to dry.
Contents
Plan and dimensions
The finished box is about 6 inches wide, 6 inches deep and 5 inches tall, sized for a typical ball of garden twine. Measure your twine ball before cutting: leave at least ½ inch of clearance on every side so the ball can unwind without rubbing. For a larger ball, increase the inside dimensions rather than forcing it into the box.
Use ½-inch plywood for the sides and bottom, and ¾-inch stock for the lid and spindle supports. Exterior-grade plywood is a practical choice if the dispenser will live in a shed or covered potting area. Solid wood works too, but seasonal movement can make a tight lid bind. A lid that sits on the box rather than fitting into a deep groove is easier to build and less fussy in damp weather.
Materials and tools
You’ll need plywood or solid wood, waterproof wood glue, a short piece of ¼-inch dowel, a ¼-inch bolt or rod for the spindle, two washers, and an eyelet or smooth metal grommet for the twine outlet. A screw-on or press-fit eyelet is safer for string than a raw drilled hole, which can fray the twine over time. Choose a size with an opening of roughly ⅜ to ½ inch.
Useful tools include a saw, drill, square, clamps, and sandpaper. A drill press helps make aligned holes, but a hand drill and careful marking are adequate. If you need a basic set of bits for the outlet and spindle holes, compare wood drill bit sets by the sizes included; there’s no need for an expensive set for this project.
Cut list and layout
For a box with outside dimensions near 6 by 6 by 5 inches, cut two side panels at 6 by 5 inches and two end panels at 5 by 5 inches. Cut a bottom panel at 6 by 6 inches if you’re assembling the walls around it; adjust those dimensions to suit your chosen joint and material thickness. Cut the lid about 6¼ by 6¼ inches so it overhangs slightly and is easy to lift.
Mark the outlet on one end panel, centered left to right and about 1 inch below the top edge. Mark the spindle supports near the lower third of the box, high enough to keep the twine ball off the floor but low enough that the lid clears it. Dry-fit the panels before gluing. A small error in panel dimensions can leave the lid crooked or create a gap that catches string.
Choose a simple box joint
The best joint depends on the tools you have and how much abuse the box will take. For a dispenser kept indoors, glued butt joints are usually strong enough. Add small screws if you want extra security, but drill pilot holes to avoid splitting the plywood edges.
| Joint | Difficulty | Trade-off |
|---|---|---|
| Butt joint with glue | Low | Fast and adequate for light use; exposed edges need careful sanding. |
| Rabbets | Moderate | More alignment help and glue area; requires a router, table saw or suitable hand tool. |
| Finger joints | High | Strong and decorative, but unnecessary unless you want the joint to be a feature. |
Assemble the box
Sand the inside faces before assembly, especially around the outlet area. Apply a thin, even coat of waterproof glue to the panel edges, square the walls around the bottom, and clamp the box. Check both diagonals; if they differ by more than about ⅛ inch, adjust the clamps before the glue sets. Wipe away squeeze-out inside the box, where dried glue can snag twine.
Once the glue has cured according to its label, drill the outlet hole through the marked panel. Use a backing board behind the work to reduce tear-out. Fit the eyelet or grommet and check for a sharp lip with a fingertip and a scrap of twine. If the string catches, smooth the edge or replace the fitting. Do not rely on finish to cover a rough opening.
Make the spindle and lid
Cut a spindle rod a little shorter than the box’s inside width. It should rest in two supports and lift out easily, but not slide sideways enough to fall from its seats. A simple support is a pair of ¾-inch-thick blocks with shallow U-shaped notches. Screw or glue them to opposite interior walls, keeping the notches level. A bolt with washers can also serve as the spindle, though the washers should not pinch the twine ball.
Slide the twine ball onto the spindle, feed its free end through the outlet, then set the spindle into the supports. Pull several feet of string to confirm the ball unwinds freely. If it jumps or binds, widen the box clearance or lower the spindle slightly. Use the lid as a loose cover rather than fastening it shut; you’ll need to replace the ball without dismantling the dispenser.
Sand and finish
Ease the outside edges with 120-grit sandpaper, then finish with 180 grit. Round the lid corners enough to prevent splinters, but keep the box edges square where the lid rests. A thin coat of water-based polyurethane or exterior oil helps resist damp hands and light splashes. Let the finish cure fully before loading twine, and keep it off the inside of the grommet.
For a dispenser stored in a dry shed, an unfinished box is acceptable and cheaper. It may pick up dirt or swell slightly with humidity, but that rarely stops it working. If it will sit outdoors, no wood finish makes an open-lidded box weatherproof; store it under cover instead. A basic water-based polyurethane finish is a sensible choice for covered storage, while a more durable exterior coating is worthwhile only if the box regularly gets wet.
Test and troubleshoot
Load the twine and pull it slowly, then tug briskly as you might while tying a plant. If the ball spins too freely and spills string, add a light washer or felt pad at one spindle end to introduce gentle drag. If it takes two hands to pull twine, check that the ball is not wedged against the sides and that the outlet is smooth. A dispenser should guide the string, not clamp it.
After a week of use, inspect the outlet and spindle supports for wear. Replace a sharp or loose grommet, and sand any splintered edge before it frays the next ball. Keep the lid loose and the box dry, and the simple design should be easy to refill and repair.