What's inside
As an Amazon Associate I earn from qualifying purchases. This post may contain affiliate links at no extra cost to you.
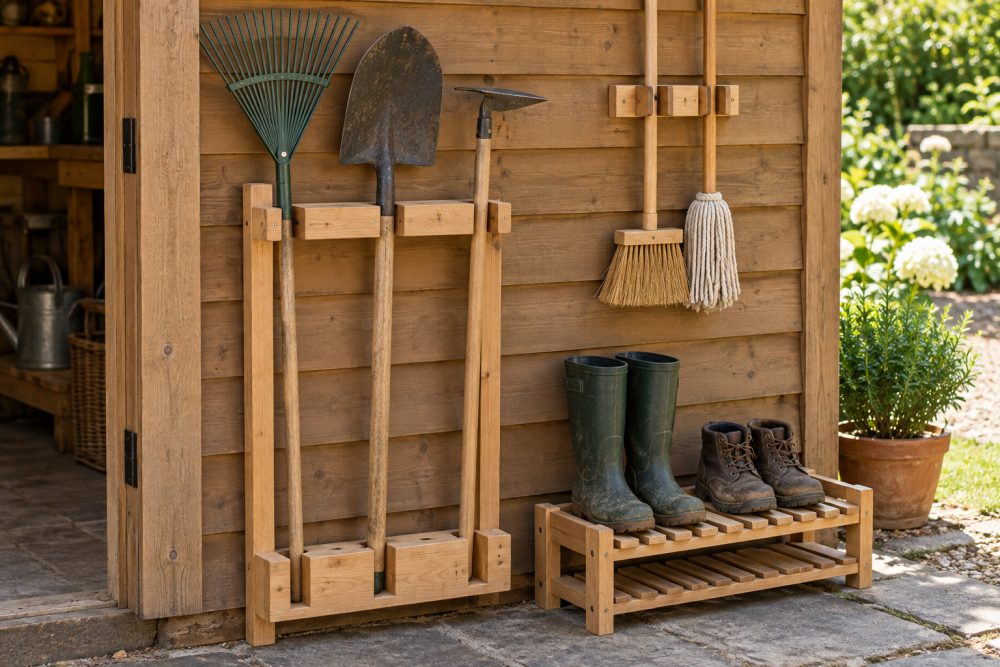
A wall-mounted wooden tool holder is a useful weekend project, but the details matter. Long-handled shovels, rakes, hoes, and brooms put more leverage on the rack than small hand tools do. This plan uses a simple 1×8 backboard, separate support blocks, and angled slots that keep handles upright without requiring complicated joinery.
Contents
Plan the holder and gather materials
Build the rack about 36 inches wide and 8 inches tall. That gives room for five or six long-handled tools while keeping the holder narrow enough for a shed wall. Mount it 48 to 60 inches above the floor, depending on the users and the length of the tools.
| Material or tool | Recommended choice | Why it matters |
|---|---|---|
| Backboard | 1×8 pine, cedar, or exterior plywood | Provides a rigid mounting surface |
| Slot supports | 3/4-inch plywood or 1×3 lumber | Creates the openings that hold handles |
| Fasteners | 3-inch exterior screws for studs; 1 1/4-inch screws for wood parts | Prevents the rack from pulling loose |
| Finish | Exterior paint, spar urethane, or penetrating oil | Slows moisture damage in a shed or porch |
You will also need a tape measure, square, pencil, drill, countersink bit, jigsaw, and sandpaper. A stud finder is useful if the rack will hang on finished drywall. For cutting the slots, a jigsaw is cheaper and more practical than a router for this project.
Use straight, dry stock. Avoid boards with large knots directly beside a screw hole. A cheap pine board is fine for a dry shed, but cedar or exterior plywood is a better choice for an open-sided garden shelter.
Measure the tools and mark the layout
Lay your tools on the floor and measure the handle diameters. Most garden handles are between 1 and 1 1/2 inches wide. Make each slot 1/4 inch wider than the handle it will carry. A 1 1/2-inch handle therefore needs a 1 3/4-inch slot. Oversize slots make tools rattle and can allow a handle to slip through.
Mark six slot centers on the backboard at 6-inch intervals. For a 36-inch board, place the centers at 3, 9, 15, 21, 27, and 33 inches. If your tools have unusually broad heads or bulky grips, use five slots at 7 inches apart instead.
Decide whether the tools will hang by their handles or rest on their heads. This plan supports the handles and lets the tool heads sit on the floor. Leave at least 2 inches of unused board beyond the outer slots so the ends do not split during mounting.
Cut the slot supports
Cut two support strips from 3/4-inch plywood or 1×3 lumber. Make each strip 36 inches long and 3 inches wide. These strips will be mounted one above the other on the backboard, with the slots aligned vertically.
On the lower strip, mark the six slot centers. At each mark, draw a U-shaped opening: two parallel lines the width of the slot, extending 1 1/2 inches up from the bottom edge, with a rounded top. The opening should stop about 1/2 inch from the top edge. Repeat the layout on the upper strip, but start each opening 1 1/2 inches down from the top edge and cut toward the bottom.
Cut the openings with a jigsaw. Drill a 3/8-inch hole at each rounded end before sawing; the hole makes a clean radius and reduces splitting. Keep the cuts slightly inside your lines, then widen them with a file or sandpaper until each handle slides in without force.
Do not make a fully open notch that reaches the outside edge of the support strip unless you plan to add a retaining bar. Open notches let tools fall out when the rack is bumped.
Assemble the holder
Sand every cut edge, especially the inside of the slots. A sharp plywood edge can scrape a wooden handle and make insertion difficult. Ease the outside corners with two or three sanding passes.
Position the lower support strip 1 inch above the bottom edge of the backboard. Set the upper strip 4 inches above it. The two supports should line up exactly, with the slots forming a vertical path. Apply a thin bead of exterior wood glue, clamp the pieces, and drive 1 1/4-inch screws every 8 to 10 inches.
Pre-drill the screw holes near the ends. Without pilot holes, pine and plywood can split, particularly where a slot has removed much of the surrounding material. Wipe away glue squeeze-out before it hardens.
Test the rack with the heaviest tool you own. If the handle can move more than about 1/2 inch sideways, add a third support strip or reduce the slot width. A third strip is worthwhile for heavy digging bars, mattocks, or tools with metal shafts.
Finish and mount it securely
Apply two coats of exterior finish, sanding lightly between coats. Paint hides mismatched wood and gives the best moisture protection. Spar urethane shows the wood but usually costs more and still needs renewal. For an indoor garage, one coat of paint or a simple oil finish is sufficient.
Locate two wall studs and transfer their positions to the backboard. Drive 3-inch exterior screws through the backboard into the studs, using at least four screws. If the stud spacing does not match the rack, add a separate 1×4 mounting cleat across the back and screw the cleat to the studs.
Do not rely on drywall anchors for a rack carrying several metal-headed tools. Anchors can be acceptable for a very light broom holder, but the repeated loading and unloading of garden tools gradually loosens them. If studs are unavailable, mount the rack to a sheet of 3/4-inch plywood that is itself fastened across multiple studs.
Make seasonal adjustments and inspect it
In spring, check every screw and remove soil from the tool handles before hanging them. Damp soil trapped against the wood encourages rot and can make a handle swell until it jams in a slot. In autumn, inspect the bottom edges of the supports, where water tends to sit.
If the rack is exposed to weather, leave about 1/8 inch of clearance around the handle rather than forcing a tight fit. Wood expands with humidity. If a slot becomes loose, glue a thin wooden shim to one side instead of rebuilding the entire rack.
For a small collection, five slots and inexpensive pine are enough. Spend more on cedar, exterior plywood, or a third support only when the holder will live outdoors, carry heavy tools, or remain in service for many seasons. The strength comes mainly from proper spacing, sound mounting, and rounded slot edges—not from expensive lumber.