What's inside
As an Amazon Associate I earn from qualifying purchases. This post may contain affiliate links at no extra cost to you.
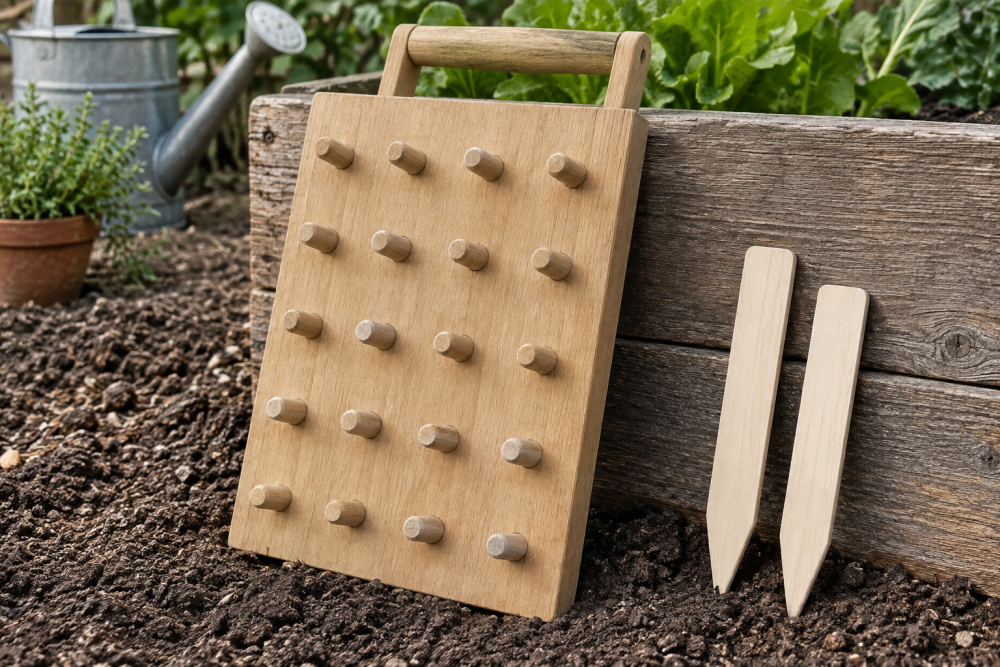
A cedar dibble board makes repeatable planting holes in a seed tray or prepared bed. It is a simple project: a flat board with evenly spaced pegs on one face. Press the pegs into loose, level soil, lift the board, and plant seeds or seedlings in the resulting pattern.
This version is sized for a small tray or a section of garden bed. Its 1-inch spacing suits many nursery seedlings, but you can change the spacing to match your crop and available space. Cedar resists rot, though any straight-grained scrap wood will work if the board is kept dry between uses.
Contents
Plan the layout
Choose a board that fits the area you need to plant. A 12-by-6-inch board with 1-inch-thick stock is manageable by hand and fits many seed-starting trays. For a larger bed, make a wider board or build two smaller ones; a smaller tool is easier to align and press evenly.
Mark the peg pattern before cutting. For a simple grid, place peg centers 1 inch apart in both directions, keeping the outermost pegs at least ½ inch from the board edges. That gives room around each peg and helps prevent edge splits. A 12-by-6-inch board can hold roughly 10 columns and 5 rows, depending on the final edge margins.
Spacing is not a universal rule. Small seedlings may need closer spacing in a tray, while crops that grow large need more room. Check the seed packet or transplant spacing for the plants you are growing. If you want rows rather than a grid, leave a larger gap between rows.
Materials and tools
Use a flat cedar board about 1 inch thick, plus straight cedar offcuts for the pegs. Pegs around ⅜ inch in diameter and 1½ inches long are a useful starting point. For larger plugs or softer soil, use wider pegs; for fine seeds, use narrower ones. The tips should be rounded rather than sharp, so they make clean holes without tearing tray cells.
You will also need a drill, a bit sized to the peg stock, a saw, a ruler or tape, a pencil, sandpaper, and waterproof wood glue. A drill press is helpful for straight holes but not essential; a hand drill and a square can do the job. If you need to buy a drill bit set, a basic wood drill bit set is enough for this project.
| Choice | Best for | Trade-off |
|---|---|---|
| Cedar pegs | Outdoor or damp use | Can split if too narrow or driven hard |
| Hardwood dowels | Consistent peg diameter | May be harder to find in the exact size |
| Scrap wood pegs | Low-cost builds | Uneven sizes make holes less uniform |
Cut and drill the board
Cut the board to your planned size and check that it lies flat on a bench. Sand off splinters, especially along the edges that will touch your hands. Use a straightedge to draw the grid, then mark each peg center where the lines cross. Recheck the spacing before drilling; a ⅛-inch layout error becomes obvious across a full row.
Drill a hole at each mark, deep enough to hold about ¾ inch of peg. Keep the bit perpendicular to the board. A simple drilling guide or square beside the drill helps. If holes lean, the pegs will lean too, and the board may resist lifting out of compacted soil.
Test the fit with one peg before drilling all the holes. The peg should enter snugly without splitting the board. If it wobbles, use a slightly larger peg or adjust the hole size; if it needs heavy force, enlarge the hole a little. Cedar is soft, so avoid forcing a tight fit.
Make and install the pegs
Cut the pegs to equal lengths, aiming for 1½ inches. Sand each end smooth and round the working tip slightly. Uniform length matters: pegs that differ by more than about ⅛ inch can make holes at inconsistent depths, especially in a firm tray.
Dry-fit the pegs first. Then apply a small amount of waterproof wood glue inside each hole and press the pegs in until they seat evenly. Wipe away squeezed-out glue and let it cure according to the label before using the board. A peg that loosens during use can stay in the soil, so do not skip the fit check.
Finish and test
Sand the face and edges until they feel smooth. You can leave the cedar unfinished, which avoids any coating contacting soil. If you want a finish for easier cleaning, use a fully cured, food-safe oil or a coating suitable for garden tools. Do not use the board until the finish has cured completely.
Test the tool in a tray of damp, loose potting mix. Level the surface, press the board down with steady pressure, and lift it straight up. If the holes collapse, the mix may be too dry or too loose; adjust moisture and press more gently. If the board sticks, shorten the pegs slightly or round their tips more. For a larger planting area, a ready-made wooden dibble board may save time, but a homemade board is easy to size for a specific tray.
Use and maintain it
For even spacing, align the board with the tray edges or mark a reference line on the bed. Press down evenly rather than rocking from one side to the other. A rocking motion widens some holes and leaves others shallow. In a bed, remove stones and break up hard clods first; a dibble board is not a substitute for preparing compacted soil.
Brush soil from the pegs after each use and let the board dry before storing it. Check the pegs periodically for looseness or cracks. Cedar can weather and soften over time, but for occasional planting a basic, unfinished board should last through many seasons.