What's inside
As an Amazon Associate I earn from qualifying purchases. This post may contain affiliate links at no extra cost to you.
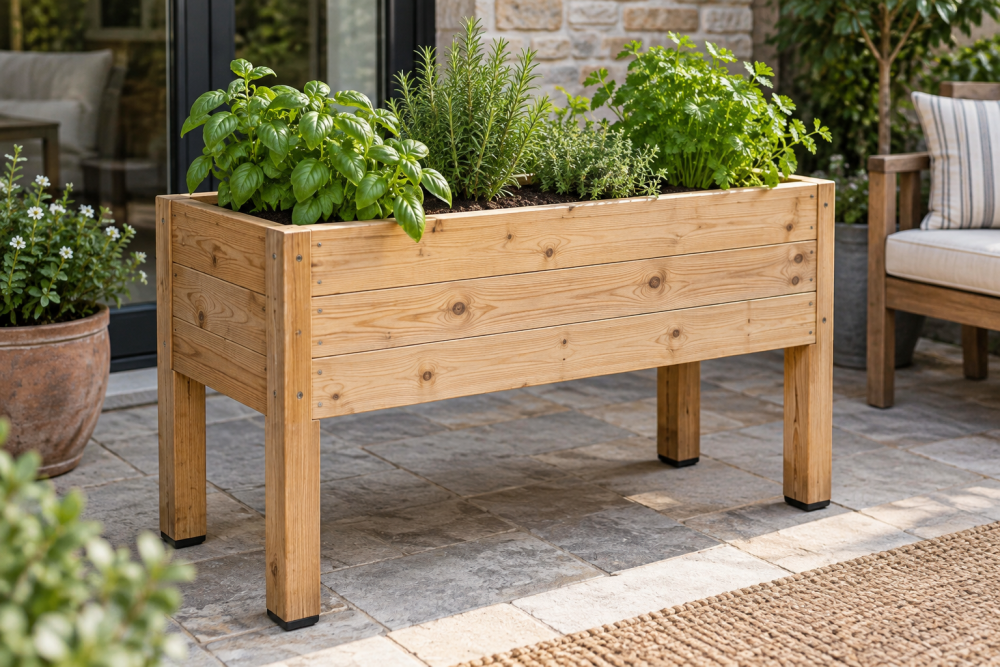
A patio planter with removable legs can sit at working height in spring and come apart for storage or repair later. The practical design is a rectangular cedar box resting on a separate leg frame. The box lifts off; four bolts hold the frame together. This keeps seasonal movement from splitting fixed joints and lets you replace the legs without rebuilding the planter.
Contents
Dimensions and materials
These plans make a planter about 30 inches long, 14 inches wide and 32 inches high, including a 16-inch-tall box. Adjust the length to suit your space, but keep the box no wider than you can comfortably reach across. Soil is heavy: a filled planter of this size can weigh well over 100 pounds, so place it before filling.
Use untreated cedar or another naturally rot-resistant outdoor lumber. For the box, buy 1-by-6 boards; actual dimensions are usually about ¾ by 5½ inches. For the legs and rails, use straight 2-by-2 stock, about 1½ inches square. Pressure-treated lumber is a lower-cost alternative for the frame, but avoid it for the box if you prefer not to have treated wood in direct contact with the growing medium. No wood choice makes a planter last indefinitely in wet soil.
| Part | Quantity and cut size | Notes |
|---|---|---|
| Long box walls | 6 boards, 30 inches | Three courses per side |
| End walls | 6 boards, 12½ inches | Fit between long walls |
| Legs | 4 pieces, 30 inches | Cut from 2-by-2 stock |
| Frame rails | 4 pieces, 11½ inches | Two at each end, inside the legs |
| Floor slats | 4 pieces, about 12½ inches | Leave drainage gaps |
Also gather exterior-rated screws, four ¼-inch bolts with washers and nuts, landscape fabric, and a drill with a countersink bit. A box of exterior-rated screws is worth buying; ordinary interior screws can rust or snap when exposed to moisture.
Tools and layout
A circular saw, drill, tape measure, square and clamps are sufficient. A miter saw speeds up repeated cuts, but it is not necessary. Measure actual board widths before cutting: lumber sold as 1-by-6 can vary slightly, and the end pieces need to fit between the long walls. Mark square cut lines and label each part as you go.
Wear eye and hearing protection while cutting. Support long boards so the offcut cannot pinch the blade, and keep hands clear of the cut path. If you do not own a saw, have the lumberyard cut the boards to length; confirm the measurements first, since a few inaccurate cuts can make the box rack out of square.
Build the box
Lay two long boards on edge and position an end board between them at each end. Check that the corners are square. Drill pilot holes, then drive two exterior screws through each long wall into each end board. Repeat with the next two courses, keeping the board ends flush and staggering the screws where possible. Pilot holes matter in cedar: screws driven too close to an edge can split it.
Cut four floor slats to fit inside the box. Space them evenly with roughly ¼-inch gaps for drainage, then screw them to the lowest wall course or to small support cleats fastened inside the box. Do not seal the drainage gaps with caulk. Staple landscape fabric over the floor and a few inches up the walls to hold soil while letting water escape. If water cannot drain, roots suffocate and the box’s bottom deteriorates faster.
Assemble the removable leg frame
Set the legs upright in pairs and place two short rails between each pair, one near the top and one about 8 inches below it. The upper rail should sit just below the box floor so the planter rests on the frame rather than hanging from bolts. Drill pilot holes and fasten each rail into both legs with two exterior screws at each end. Keep the legs flush with the rail ends for a clean, stable frame.
Join the two end assemblies with the planter box in position. Drill a ¼-inch hole through each leg and the adjacent box end, about 2 inches below the top edge. Fit a bolt, washer and nut at each corner. Tighten until secure, not until the wood crushes. These bolts stop the box shifting sideways; the frame rails carry its weight. To remove the legs, empty the planter, undo the four nuts and lift the box off.
For a faster, cheaper build, exterior screws can attach the box permanently to the frame. That is fine if you will leave it in place year-round. The trade-off is harder storage and more awkward repairs; screws may also loosen after repeated wet-and-dry cycles. Bolts cost a little more and take longer to fit, but suit a genuinely removable design.
Finish and place
Sand sharp corners and splinters, especially along the top rim. Leave the interior untreated or use a finish explicitly suitable for garden beds; avoid applying an unknown coating where it will contact soil. An outdoor penetrating oil can slow surface weathering on the outside, but it will not prevent rot where water sits. Reapply according to the product label and inspect the bottom each spring.
Set the planter on firm, level paving. Uneven ground can twist the frame, loosen bolts and make the box unstable. If the patio surface is delicate, add plastic or rubber feet under the legs. A set of adjustable leveling feet can help on slightly uneven paving, though simple rubber pads are cheaper and adequate on level ground.
Checks and troubleshooting
Before adding soil, push gently on each corner. If the frame wobbles, check that all four legs touch the ground and the end frames are square. Tighten loose fasteners; if a screw spins in its hole, move it slightly and drill a new pilot hole rather than forcing it tighter. Check the box diagonals as well: if they differ, loosen a corner, square the box and retighten.
Fill gradually and watch for bowing along the long walls. A 30-inch wall built from three ¾-inch boards is suitable for ordinary patio planting, but very wet soil puts more pressure on it. If the middle bows, add a vertical support at the center of each long wall, fastened to the wall boards and floor. Keep drainage openings clear, and do not move the planter by pulling on its legs while it is full.