What's inside
As an Amazon Associate I earn from qualifying purchases. This post may contain affiliate links at no extra cost to you.
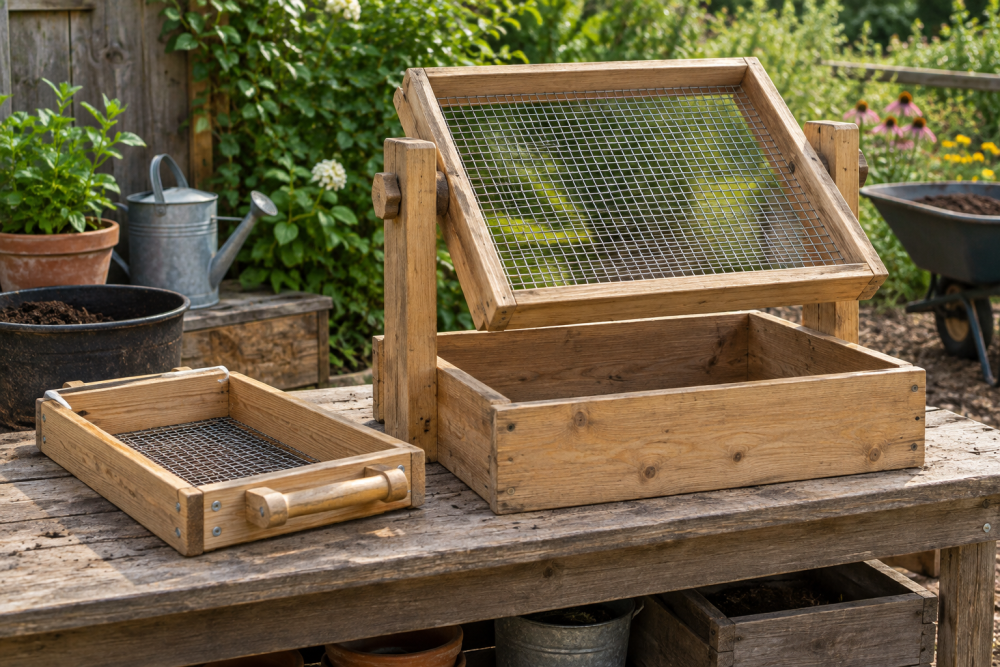
A small compost sifter is a quick scrap-wood project that makes it easier to separate finished compost from sticks, stones, and clumps. This design has a 12-by-18-inch screening area, a shallow wooden frame, and handles on the ends. It is light enough to shake by hand and small enough to rest over a wheelbarrow or garden tub.
Contents
Size and design
The screen uses a 1-by-3 frame with 1/2-inch hardware cloth stapled underneath. The finished outside dimensions are about 15 by 21 inches. That gives you a useful sifting area without making a loaded screen awkward to lift. Use 1/4-inch mesh if you want finer compost for seed starting, but expect slower sifting and more frequent cleaning. Half-inch mesh is a practical general-purpose choice.
This is a hand-shaken screen, not a heavy-duty trommel or a screen for separating wet clay. If your compost is damp, break up large clumps with a fork first. For large batches, a wider screen saves repeated trips but gets heavy quickly.
Materials and tools
Gather two 1-by-3 boards, each at least 8 feet long; a piece of galvanized 1/2-inch hardware cloth about 16 by 22 inches; exterior-rated wood screws; 3/4-inch poultry-netting staples or fencing staples; and two short pieces of scrap wood for handles. A 1-by-2, cut to roughly 6 inches per handle, works well. Choose galvanized mesh rather than lightweight plastic garden netting: plastic can sag, stretch, or tear under compost.
You’ll also need a saw, drill and driver, tape measure, square, wire cutters, and a staple gun or hammer. A roll of 1/2-inch galvanized hardware cloth is useful for this and other garden repairs, though a small offcut from a local supplier is cheaper if available. Wear gloves when cutting mesh; the edges are sharp.
Choosing the mesh
| Mesh opening | Best for | Trade-off |
|---|---|---|
| 1/4 inch | Fine compost and potting mixes | Clogs more readily; slower to sift |
| 1/2 inch | General garden compost | Lets small sticks and coarse bits through |
| 1 inch | Quickly removing large debris | Leaves a coarser finished product |
Hardware cloth is stiffer and lasts longer than plastic mesh, but it costs more and needs careful handling. If you only sift a few buckets of compost each year, a leftover piece of sound plastic mesh can be adequate; check it for holes and sag before building around it.
Cut and assemble the frame
Cut two long rails to 21 inches and two end rails to 12 inches. These dimensions assume the ends fit between the long rails. Set the pieces on a flat surface in a rectangle, check the corners with a square, and drill pilot holes to reduce splitting. Use two 2-inch exterior screws at each corner. If the lumber is rough or likely to stay damp, round sharp edges and brush on an exterior finish before assembly; keep finish off the mesh-contact area if it could interfere with staples.
Measure both diagonals. If they match within about 1/8 inch, the frame is square enough for this job. If they differ, loosen one corner and nudge the frame before tightening the screws. A twisted or out-of-square frame makes the mesh harder to fit and can rock on a wheelbarrow.
Fit the mesh
Lay the frame upside down on a stable surface. Cut the hardware cloth so it overlaps the frame opening by about 1/2 inch on all four sides. Center it, then fold or press the cut edges flat against the underside of the rails. Staple one long side every 2 inches, pulling the mesh snug as you work. Add staples along the opposite side, then secure the ends. Keep the mesh taut but don’t stretch it hard enough to bow the frame.
For a secure fit, use fencing staples or a heavy-duty staple gun with staples that penetrate the wood at least 3/8 inch. A few narrow crown staples may hold initially but can pull out when a load catches on the mesh. Check the underside for sharp wire ends. Fold down any points or cover the perimeter with thin wood strips screwed over the mesh edges. That takes extra time but helps protect hands and prevents compost from catching on exposed wire.
Add handles and test
Center one 6-inch handle piece on the outside of each short end. Predrill and fasten each with two 1 1/4-inch screws, keeping the screws clear of the mesh and frame corners. Leave enough room to grip the handle comfortably; a gap of roughly 1 1/2 inches between the handle and frame is a useful target if you’re making raised handles from blocks. The simpler option is to screw short grip pieces flat to the ends, though they’re less comfortable with gloves.
Set the screen across a wheelbarrow or garden tub and add a few shovelfuls of compost. Shake it gently from side to side. If the frame flexes, add a cross brace under the mesh opening or shorten the span in your next version. If compost spills over the rim, reduce the load per pass. The screen should carry a manageable layer, not a mound packed against the handles.
Use and maintain the screen
Work with small loads and a steady rocking motion rather than striking the frame against the wheelbarrow. Knocking it hard can loosen staples, split the rails, or bend the mesh. Scrape off wet material after use and store the screen under cover when possible. Compost acids and rain will eventually wear the wood and fasteners; inspect the corners and mesh attachment at the start of each season.
If the mesh loosens, remove any protruding staples and refasten it with new ones into sound wood. Don’t simply add staples beside loose, rusted ones if the rail is already split. Replacing a damaged rail is straightforward: remove the screws, fit a new board of the same length, and reattach the mesh securely.