What's inside
As an Amazon Associate I earn from qualifying purchases. This post may contain affiliate links at no extra cost to you.
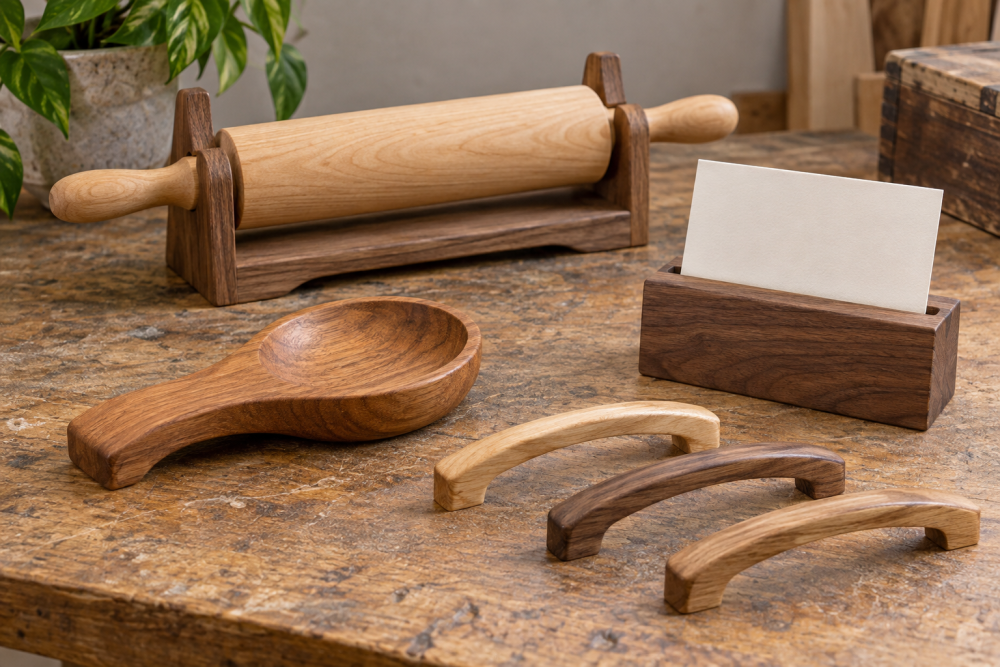
Making your own hardwood drawer pulls is one of the best small projects for building hand-tool control. You use very little material, you can batch out six or eight pulls in an afternoon, and you learn shaping, grain direction, and drilling accuracy on a piece where mistakes are cheap. A basic rectangular or bar-style pull takes about 20 to 30 minutes once you have a method down. More sculpted shapes take longer, but the process is the same.
Contents
Choosing Hardwood for Drawer Pulls
Not every hardwood is a good pull wood. You want tight grain, moderate hardness, and good resistance to splitting when you drill for screws. Very soft hardwoods like poplar will dent quickly on a dresser or kitchen drawer that gets used daily. Extremely hard woods like white oak or hickory are durable but harder to shape with hand tools and more likely to dull your edges mid-project.
For your first set, buy 3/4-inch thick stock, 4 to 6 inches wide, and at least 24 inches long. That gives you enough to make 6 pulls with room for mistakes. Look for straight grain with no knots in the section you will cut. Curly or highly figured grain looks great but tears out easily when you shape with a rasp or spokeshave.
| Species | Janka Hardness | Workability by Hand | Cost | Best For |
|---|---|---|---|---|
| Walnut | 1,010 lbf | Excellent, cuts cleanly | $$ | Beginners, dark pulls with simple oil finish |
| Cherry | 950 lbf | Excellent, sands very smooth | $$ | Beginners, warm color that darkens with age |
| Hard Maple | 1,450 lbf | Moderate, burns if tools are dull | $$ | Light-colored pulls, high durability |
| White Oak | 1,360 lbf | Moderate, splinters on edges | $$ | Traditional style, needs grain filler for gloss finish |
| Poplar | 540 lbf | Very easy | $ | Practice or painted pulls, dents easily |
Walnut and cherry are the most forgiving if you are shaping mostly with a wood rasp set and sandpaper. If you only have access to poplar, use it for practice and expect to replace pulls sooner in heavy-use drawers.
Tools and Materials You Actually Need
You do not need a lathe or a router table for a simple bar pull. The core kit is: a miter saw or hand saw, a drill press or hand drill, a 3/16-inch and a 3/8-inch drill bit, a rasp or spokeshave, and sandpaper from 80 to 220 grit. A small block plane helps but is optional.
For hardware, plan on 8-32 x 1-1/2 inch machine screws with washers if your drawer front is 3/4 inch thick plus a 3/4 inch pull. Measure your drawer front. The screw should pass through the drawer and thread at least 3/8 inch into the pull. If you make pulls thinner than 5/8 inch, switch to a shorter screw or you will punch through the front.
A drill press makes centered, perpendicular holes much easier. If you are drilling by hand, use a drilling jig for drawer pulls or clamp a scrap block with a pre-drilled guide hole on top of your workpiece. Without a guide, hand-drilled holes wander and leave you with a crooked pull that will not sit flat.
Dimensions and Layout
A good beginner size is 3-1/2 to 4 inches long, 3/4 to 1 inch wide, and 3/4 inch thick. That size fits three fingers comfortably and leaves enough meat for screws without splitting. Cut your blanks to length first, then mark the centerline on the back.
Standard drawer pull spacing is 3 inches on center (96mm is the modern equivalent if you are matching IKEA or other Euro hardware). Mark two hole locations 3 inches apart, centered on the blank. Use an awl to dimple the marks so the bit does not walk. If you are replacing existing pulls, measure the existing holes instead of assuming 3 inches. A 1/16-inch error will show.
Leave the blank square until after drilling. It is much easier to hold and clamp a square block than a shaped, rounded one. Drill first, shape second.
Shaping the Pull
Clamp the drilled blank in a vise with soft jaws or between scrap pine so you do not dent it. For a simple bar pull, round over the top edges and the two ends. Work with the grain, not against it. If your rasp starts to catch and lift fibers, you are going the wrong direction. Flip the piece end-for-end.
Remove material in stages. Knock the sharp 90-degree corners off at 45 degrees first, then blend those facets into a soft radius. Take off about 1/8 inch per pass. If you try to hog off 1/4 inch at once with a coarse rasp, you will get tearout that takes twice as long to sand out.
Check the feel often. A pull that looks good but has a flat spot or a ridge under your fingers will feel cheap every time you use it. Close your eyes and run your hand over it. Any bump you feel will be magnified once finish is on.
Failure mode to watch: shaping too thin where the screws go. Leave at least 1/2 inch of thickness at the screw holes. If you scallop the back too aggressively for finger clearance, you can break through to the screw hole or leave so little wood that the screw splits the pull when tightened. A 3/16-inch deep recess on the back is plenty for grip.
Drilling and Mounting Without Splitting
Drill the mounting holes from the back of the pull, not the front. Use a 3/16-inch through hole for an 8-32 screw. Back the blank with scrap when you drill to prevent blowout on exit. If you want the screw head to sit flush inside the drawer, counterbore the drawer side with a 3/8-inch forstner bit set about 1/8 inch deep, but do not counterbore the pull itself unless you plan to plug it.
Dry-fit the pull to the drawer before finishing. Hold it in place and drive the screws by hand. If the pull rocks, your back is not flat. Sand the back on a flat surface with 120 grit taped to a piece of MDF until it sits solid with no wobble. A rocking pull will eventually crack the finish and loosen.
Do not over-torque. Hardwood splits when you lean on a machine screw. Snug plus one-eighth turn with a hand screwdriver is enough. If the screw keeps spinning, you drilled the hole too large. Fill it with a hardwood dowel and wood glue, let it cure, and re-drill with a smaller bit.
Sanding and Finishing for Daily Use
Sand through the grits: 80, 120, 180, then 220. Do not skip more than one grit size or you will leave deep scratches that the next grit cannot remove. Vacuum between grits. On walnut and cherry, 220 is smooth enough. Going to 320 or 400 before finish actually hurts adhesion for some film finishes.
For a pull that gets touched with sweaty or oily hands, you need a finish that resists handling. Boiled linseed oil or Danish oil looks great and is easy to apply, but it is the least protective and will darken and show finger grime in a kitchen. A better trade-off is two coats of wipe-on polyurethane or a hardwax oil. Both are thin enough to apply with a rag, dry in 4 to 6 hours, and give real abrasion resistance.
Apply finish before you mount the pulls, including the back. Bare wood on the back traps moisture against the drawer front and can leave a dark line over time. Let the final coat cure 24 hours before you install. If the pull feels tacky or soft, it is not cured. Mounting too early leaves permanent fingerprints in the finish. Between coats, scuff lightly with 320 grit or a synthetic pad, remove all dust, then recoat.
Cheaper is fine here: you do not need expensive spray equipment. A $12 can of wipe-on poly and a bag of lint-free rags will coat 20 pulls. Save your money for good drill bits and sharp rasps, where quality actually changes the result.