What's inside
As an Amazon Associate I earn from qualifying purchases. This post may contain affiliate links at no extra cost to you.
A simple garden hose guide keeps a coiled hose from spreading across a path or flower bed. This beginner build uses a short stake with rounded wooden arms to hold the hose off the ground. It needs only straight cuts and a few drilled holes, so it suits a first outdoor woodworking project. Plan on about two hours of shop work, plus time for any finish to dry.
Contents
What you’re building
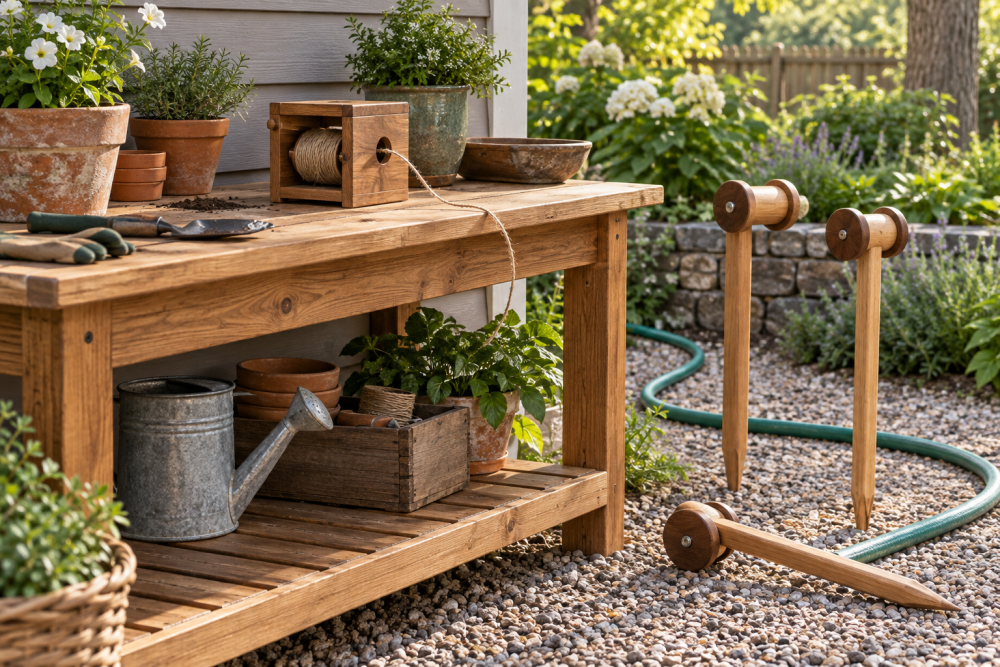
The guide is a treated-wood stake driven into the ground, with two rounded crosspieces that form a shallow cradle for the hose. The example below stands about 30 inches above ground and holds a garden hose near a faucet or along the edge of a path. It is not a reel: it guides a loose coil or keeps a hose from wandering, but you still need to wind and store the hose yourself.
Use rot-resistant lumber and corrosion-resistant fasteners. Cedar is easy to work and naturally durable, while pressure-treated lumber is usually cheaper and widely available. Treated stock can be rough or damp, so inspect it for splits and let it dry before applying any coating.
Materials and tools
Buy one 2-by-2-by-8-foot cedar or pressure-treated post for the main stake, and a 1-by-3-inch board for the rounded arms. You’ll also need two exterior-rated screws, exterior wood glue, sandpaper, a drill with a bit sized for the screw shanks, and a saw. A jigsaw makes the arm ends easy to shape, but a handsaw and rasp will work. A tape measure, square, and pencil are enough for layout.
Choose cedar boards if you want lighter wood that is easier to cut and naturally suited to outdoor use. For a low-cost build, pressure-treated 2-by-2 lumber is fine; avoid pieces with deep cracks or badly twisted grain. If the site is very hard or rocky, a manual digging bar can help loosen soil, but it isn’t needed for ordinary garden beds.
Choose your layout
Cut the stake to 42 inches. About 12 inches will go into the ground, leaving 30 inches exposed. Cut two arms, each 10 inches long, from the 1-by-3. Mount them on opposite sides of the stake, one above the other, with roughly 6 inches between their centers. This creates a cradle about 10 inches wide. Round the arm ends so they don’t snag the hose.
| Option | Good for | Trade-off |
|---|---|---|
| 10-inch arms, 6-inch spacing | Most standard garden hoses and compact storage | Can feel narrow with a thick, stiff hose |
| 12-inch arms, 7-inch spacing | Large coils or a heavier hose | Uses more lumber and catches more easily near walkways |
| One arm only | A basic guide beside a faucet | Does little to contain a loose coil |
Measure your hose coil before cutting if it is unusually bulky. Wider arms provide more support, but they do not make the stake stronger; a tall, wide cradle can twist in soft soil.
Cut and round the parts
Mark the stake and arms with a square so the cuts are perpendicular. Cut the two arms to equal length. On each arm, mark a half-circle at both ends using a cup or small can as a template, then cut just outside the line and sand to the mark. Round over the edges that will touch the hose with 80-grit sandpaper, followed by 120-grit. A smooth edge matters more than a perfect curve: sharp corners can abrade the hose jacket as it moves.
Keep the lower end of the stake square for driving. If the end is badly splintered, trim it cleanly rather than making a sharp point that may split when struck. Wear eye protection while sawing and sanding. If using pressure-treated wood, work outdoors or with good dust extraction, and wash up afterward.
Assemble the guide
Lay the stake flat and mark the arm centers at 8 and 14 inches down from the top. Center each arm across the stake, so about 5 inches projects on either side. Drill a pilot hole through each arm and into the stake; a pilot hole reduces the chance of splitting, especially near rounded ends. Apply a thin layer of exterior wood glue at each joint, then fasten the arms with exterior screws. Use two screws per arm if the arm is wide enough to keep them well apart; otherwise, one centered screw and glue is adequate for this light-duty guide.
Check that the arms are level and aligned before tightening the screws. A crooked cradle won’t usually fail, but it can let a hose coil slide off. Wipe away squeezed-out glue and leave the assembly flat until the glue sets, following the product label.
Install and test
Set the stake near the faucet, leaving enough room to lift the hose coil on and off. Push it into soft soil by hand until about 12 inches are buried. In firm soil, make a narrow pilot hole with a steel rod or digging bar, then press the stake into place. Don’t hammer directly on the top of the assembled guide: the impact can loosen the arm joints. If it needs a mallet, protect the top with a scrap block and drive the stake before attaching the arms.
Load the hose gently and tug it in the direction it will normally be pulled. If the stake leans, move it to firmer ground or bury it deeper. If an arm flexes, check the screw joint and add a second screw where the wood allows. A guide installed in loose, wet soil may need to be moved after heavy rain.
Finish and seasonal care
Untreated cedar can weather naturally to gray; sanding and finishing are optional. A penetrating exterior oil is easy to refresh, while paint gives more color but can peel if applied to damp or dirty wood. Follow the finish label and let the wood dry fully before coating. Avoid finishing the buried end with a film-forming product that may trap moisture at the soil line.
At the end of the watering season, remove the hose and check for loose screws, split arms, or soil movement. In freezing climates, pull the stake out if it sits in saturated ground or obstructs winter yard work. Otherwise, leave it in place and inspect it in spring. Replace a cracked arm rather than trusting a repaired split to support a heavy hose.