What's inside
As an Amazon Associate I earn from qualifying purchases. This post may contain affiliate links at no extra cost to you.
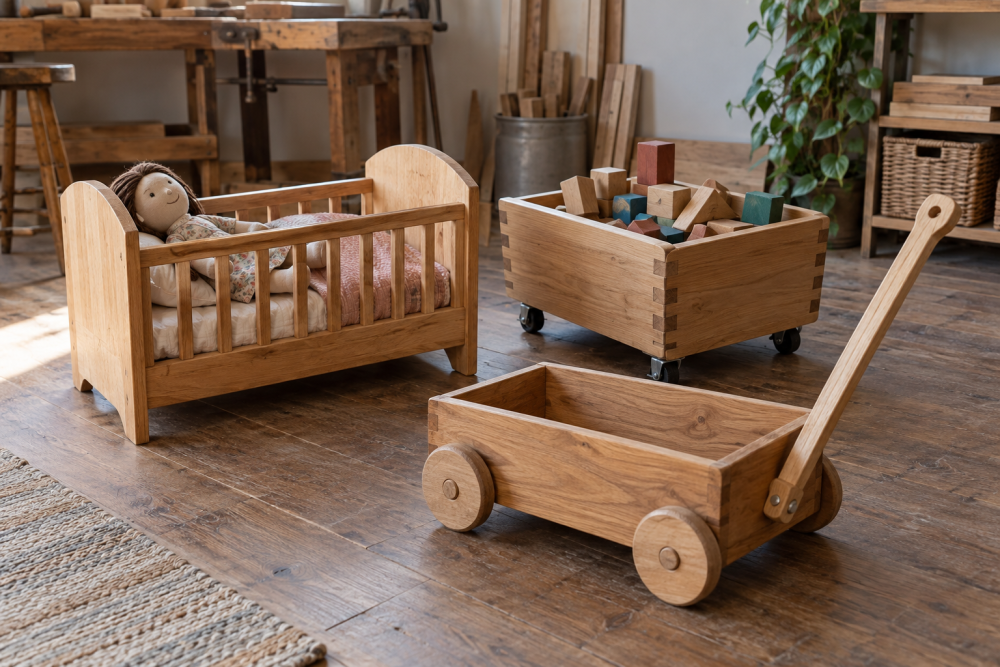
A wooden doll bed is a useful first furniture project: it needs only a few parts, introduces simple joinery, and can be sized to fit a particular doll. Slatted sides add a classic look, but they also make spacing and assembly worth planning carefully. This beginner plan uses a plywood base, solid-wood rails, and glued dowel joints. It’s designed for a doll about 18 inches long; adjust the inside length and width to suit yours.
Contents
Plan and dimensions
The finished bed measures about 21 inches long, 11 inches wide, and 9 inches high to the top of the side rails. The mattress area is 19 by 9 inches. These dimensions leave a little room around an 18-inch doll without making the bed bulky. Measure the doll lying down before cutting; a robe, bonnet, or stiff shoes can add more length than expected.
Use ¾-inch-thick stock for the headboard, footboard, and side rails, and ¼-inch plywood for the base. Each side rail is 19 inches long and 2 inches high. The headboard and footboard are 11 inches wide and 8 inches high. For each side, cut five slats about 6½ inches long and ¾ inch wide. With five slats and four equal gaps, the openings will be roughly 1¼ inches high. Dry-lay the parts and check the spacing before drilling.
Choose straight, dry pine or poplar with few knots. Pine is inexpensive and easy to work, though soft enough to dent. Poplar costs more but tends to hold a cleaner edge. For stock and basic consumables, compare pine boards for small woodworking projects with what’s available at a local lumberyard; straight boards from either source matter more than species.
Materials and tools
Gather two ¾-inch boards for the ends, two side rails, ten slats, a ¼-inch plywood base, wood glue, sandpaper in 120- and 180-grit, and a finish suitable for a toy. For joinery, use ¼-inch dowels. You’ll also need a drill, a ¼-inch bit, a square, clamps, a saw, and a way to cut the base. A miter saw is convenient, but a handsaw and careful marking are adequate.
A dowel jig helps keep holes centered and aligned, especially if you haven’t drilled many joints. A simple dowel center set is a cheaper option and can work for this small bed if you clamp parts securely and drill slowly. Compare ¼-inch dowel jigs before buying; avoid relying on eye alignment for a row of slats, since even a small angle error makes assembly frustrating.
Choose your joinery
| Method | Best for | Trade-off |
|---|---|---|
| Dowels and glue | A sturdy bed with hidden joints | Requires careful hole alignment |
| Screws and glue | Fast assembly with common tools | Screw heads need plugs or countersinks |
| Glue alone | Very small decorative parts | Not dependable for loaded rail joints |
For the plan below, use two dowels at each rail-to-end joint and one at each slat end. Glue-only joints can pull apart when the bed is picked up by a rail. Screws are a reasonable alternative: predrill to prevent splitting, countersink the heads, and cover them with wood plugs if you want a clean appearance.
Cut and mark the parts
Cut the headboard and footboard to size, then trim the rails, slats, and plywood base. Mark the bed’s inside face on every piece so you don’t reverse a part during drilling. On each side rail, draw a baseline ½ inch up from the bottom. Mark five slat positions evenly along the rail, leaving about ½ inch at each end. Use a spacer block to repeat the gaps rather than measuring every opening separately.
On the headboard and footboard, mark matching slat positions. The slats should sit between the ends and the rails, with their bottom edges aligned to the side-rail baseline. Check that the ends are square and the two rails match in length. A ⅛-inch mismatch can twist the assembled bed or leave the base poorly supported.
Drill and assemble
Drill ¼-inch holes about ⅜ inch deep at the slat marks in the rails and end boards. Keep the bit square to the surface and use a stop collar or tape flag to control depth. For each rail-to-end connection, drill two matching holes in the rail end and end board. Test one joint dry before drilling the rest; if the dowel bottoms out, the parts won’t close fully.
Apply a small amount of glue inside each hole and on the dowels. Assemble one long side at a time, then attach the second side and the end panels. Clamp gently and check diagonals: measure from opposite corners of the bed frame. If the measurements differ, nudge the frame square before the glue sets. Wipe away squeeze-out with a damp cloth, but don’t soak the wood.
Set the plywood base on cleats or ledges glued to the inside faces of the side rails, about ½ inch above their bottom edges. Cut the base to fit with a little clearance; a tight panel can bind if the frame is slightly out of square. You can leave it loose for easy removal or secure it with a few small screws from underneath.
Sand, finish, and check
Sand edges and corners to remove splinters, starting at 120 grit and finishing at 180. Ease sharp corners with several light passes rather than rounding them heavily. Fill small gaps only after checking that the joints are sound; filler hides a seam, not a loose connection.
Use a water-based clear finish or paint labeled for toy or furniture use, and follow its cure time before giving the bed to a child. A finish that feels dry may still be curing. Check for loose slats, exposed fasteners, sharp edges, and peeling coating. If the bed is for a young child’s playroom, make sure openings are appropriate for the intended use and keep the finished piece out of a crib or other sleep space. Add a thin foam mattress cut to the inside dimensions, but avoid a mattress so thick that it covers most of the slats.