What's inside
As an Amazon Associate I earn from qualifying purchases. This post may contain affiliate links at no extra cost to you.
A wooden sock-blocking board gives wet knitted socks a firm shape while they dry. The adjustable pegs let you use one board for different sizes, ankle heights, and toe shapes. This is a straightforward weekend project: the most important work is laying out the peg holes accurately and sanding every edge that could snag wool.
Contents
What You’re Building
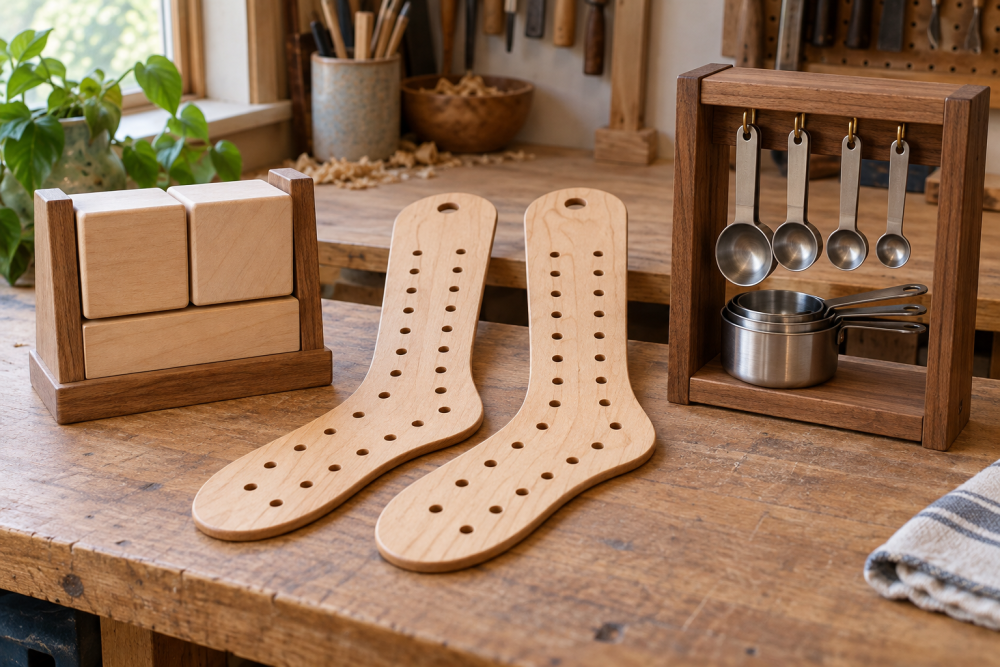
The board is a flat hardwood or plywood shape roughly 13 inches long and 5 inches wide, with rows of holes down the foot and several holes up the ankle. Removable pegs fit into those holes. To block a sock, place the sock over the board, stretch it to the desired dimensions, and add pegs along the sides to hold the fabric in place.
Make two boards if you regularly block a pair at once. One board works, but you will have to dry the socks separately. A pair of boards also makes it easier to compare left and right socks for matching gauge and length.
| Material | Advantages | Drawbacks | Best use |
|---|---|---|---|
| 12 mm (1/2-inch) hardwood plywood | Stable, inexpensive, easy to cut | Edges need careful sealing and sanding | Most home workshops |
| 18 mm (3/4-inch) plywood | Stiffer and more durable | Heavier; costs more | Frequent use or large socks |
| Solid maple or beech | Excellent feel and wear resistance | More expensive; may move with humidity | A long-lasting gift or shop tool |
Materials and Tools
Use a piece of 1/2-inch hardwood plywood at least 14 by 8 inches. Avoid construction plywood with voids; a peg hole may break through a missing layer. A scrap of maple, beech, or dowel stock will make the pegs. You need a jigsaw or bandsaw, drill, 3/8-inch or 1/2-inch drill bit, compass, ruler, pencil, clamps, and sandpaper from 80 through 220 grit.
For the simplest pegs, buy 3/8-inch wood dowels. Cut them into 2-inch lengths. A 3/8-inch dowel fits a 3/8-inch hole snugly in many materials, but test on scrap first. If the fit is tight, sand the peg slightly. If it is loose, the peg will lean when the sock is stretched.
Useful extras include a 3/8-inch brad-point drill bit, a small round file, waterproof wood glue, and a non-toxic finish such as water-based polyurethane. You do not need a router, although a round-over bit can make the board more comfortable to handle.
Lay Out and Cut the Board
Draw a centerline lengthwise down the plywood. Mark a foot shape 12 inches long and 4 1/2 inches wide at the ball. Use a compass or a jar to round the toe. Taper the heel to about 2 1/2 inches wide, then extend the ankle section another 5 inches. The exact outline is not critical; the board should fit inside a wet sock without forcing the knit fabric over a sharp corner.
For an adult sock, mark the peg-hole grid before cutting the outline. Along each side of the foot, mark holes every 1 inch, staying at least 3/8 inch from the edge. Add a center row of holes down the foot, offset from the side rows. In the ankle, mark two columns of holes 1 1/4 inches apart, with holes every 1 inch. This gives useful adjustment without weakening the board.
Keep at least 3/8 inch of wood between a hole and the edge, and at least 1/2 inch between neighboring holes. Crowded holes can break out when the peg is pushed in. If you want smaller children’s socks, add a second set of holes closer to the center rather than making every hole part of one oversized grid.
Cut the outline with a jigsaw, supporting the plywood so the narrow ankle does not vibrate. Leave the pencil line during cutting, then trim to it with a second pass. Round the corners generously. A pointed toe can poke through a fine-gauge sock and will not block the fabric evenly.
Drill the Holes and Make the Pegs
Clamp the board to a scrap backer and drill straight through each marked location. A drill press gives more consistent holes, but a hand drill works if you use a small square or an inexpensive drill guide. Blow or brush away chips frequently. A tilted hole makes a peg lean outward, reducing the usable width of the board.
Lightly countersink or chamfer both sides of every hole with a larger drill bit turned by hand. This removes the sharp rim that catches yarn. Sand the board faces and edges, progressing through 120, 180, and 220 grit. Do not leave coarse scratches; wet wool can catch in them.
Cut 16 to 24 pegs, each 2 inches long. Round the top ends with sandpaper. If you want more holding power, make a few pegs 2 1/2 inches long for the ankle, but longer pegs are easier to knock over. Mark one set of pegs with a pencil line at 1/2 inch from the bottom. The line helps you insert each peg to a similar depth.
Finish and Test the Board
Apply two thin coats of water-based polyurethane, sanding lightly with 220 grit between coats. Keep finish out of the holes or chase them with the drill bit while the finish is still soft. Allow the board to cure fully according to the finish instructions. Uncured finish can transfer odor or tackiness to damp wool.
Test the peg fit before using the board on a favorite garment. A peg should enter with firm hand pressure and pull out without tools. If the hole is too tight, enlarge it by twisting the drill bit by hand. Do not force a peg into a tight hole; plywood layers can split. If holes are too loose, use slightly thicker dowel or glue thin paper around the lower part of a peg as a temporary repair.
How to Use the Sock Blocker
Wash the socks according to their fiber care instructions, squeeze out water in a towel, and slide each sock over the board while it is damp rather than dripping. Align the heel and toe with the board. Insert pegs along the sides, starting near the toe and working toward the ankle. Stretch the sock smoothly, but do not pull hard enough to distort the stitch pattern or lengthen the cuff.
Use fewer pegs for thick wool and more for fine lace-knit socks. Let the socks dry completely, usually 12 to 24 hours depending on humidity and ventilation. Remove the pegs before pulling the sock off. If the board leaves sharp ridges or the sock dries too wide, move the pegs inward on the next use; adjustable holes are useful because different yarns respond differently to tension.