What's inside
As an Amazon Associate I earn from qualifying purchases. This post may contain affiliate links at no extra cost to you.
Contents
A Simple Routed Spoon Rest for a First Project
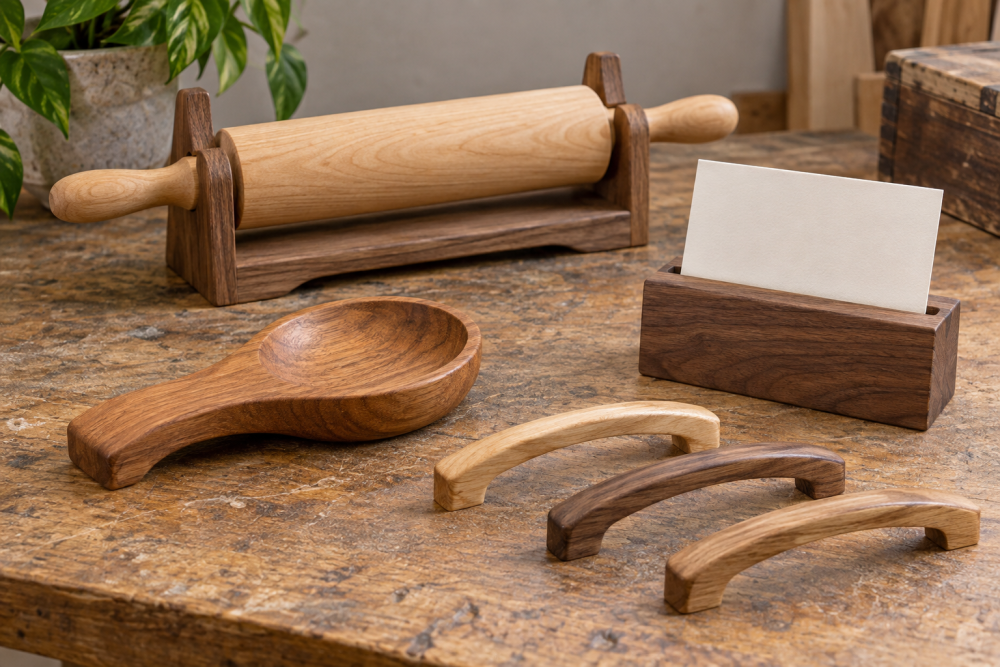
A wooden spoon rest is a useful beginner project because it teaches several core skills without requiring a large build: laying out a shape, routing a shallow recess, sanding end grain, and applying a food-contact finish. The finished rest should be large enough to catch drips but small enough to sit beside a cooktop without getting in the way.
This plan makes a spoon rest approximately 6 inches long, 4 inches wide, and 3/4 inch thick. You can make it from a hardwood offcut, but avoid soft construction lumber. Pine dents easily, contains knots, and can leave a rough, fuzzy surface around the routed dish.
Materials and Tools
Use a dry, straight-grained board with no cracks. Maple, beech, cherry, walnut, and oak all work. Maple and beech are good first choices because they are hard, relatively stable, and easy to finish. A board at least 8 by 5 inches gives you room to cut the blank safely.
- 3/4-inch-thick hardwood, at least 8 by 5 inches
- Trim router or plunge router
- 1/4-inch or 3/8-inch round-nose bit
- Jigsaw or bandsaw
- Drill and 3/8-inch bit for a hanging hole, if desired
- Clamps and a flat work surface
- 120-, 180-, and 220-grit sandpaper
- Ruler, pencil, compass, and combination square
- Food-safe drying oil or a product specifically labeled for cutting boards and kitchen utensils
A trim router is easier to control for this small project than a large router, although a plunge router works well if you already own one. If you need a router, compare compact trim routers by grip, speed control, and the quality of their edge guide. A cheaper model is fine for occasional shallow work, provided the base is flat and the collet holds the bit securely.
| Choice | Best for | Trade-off |
|---|---|---|
| 1/4-inch round-nose bit | Smaller spoon rest with a defined dish | Requires more overlapping passes |
| 3/8-inch round-nose bit | Faster routing and a wider dish | Leaves a broader, less crisp edge |
| Maple or beech | Durable, light-colored kitchenware | Can show machining marks clearly |
| Cherry or walnut | More decorative appearance | Costs more and darkens or changes color with age |
Make and Shape the Blank
Mark a 6-by-4-inch rectangle on the board. Check that the grain runs along the long direction of the spoon rest. Cross-grain cracks are more likely if the dish is made narrow across the grain, especially near the ends.
Cut the blank oversize by about 1/8 inch using a jigsaw or bandsaw. Attach a full-size paper template with double-sided tape, or mark the final rounded outline directly on the wood. A simple shape has two rounded ends and slightly eased corners. Use a compass or a round object about 2 inches in diameter to draw the end curves.
Cut to the line, keeping the blade just outside the mark. Sand the edge until the outline is smooth and symmetrical. Do not try to correct a badly uneven cut with the router; a bearing-guided trim bit can copy the edge, but it does not fix an inaccurate shape.
Lay Out the Routed Dish
Draw a centered oval or rounded rectangle inside the blank, leaving a rim about 1/2 inch wide on all sides. For this size rest, make the dish roughly 5 inches long and 3 inches wide. The exact shape is not critical, but the rim must remain consistent enough to support a spoon without creating a tipping point.
Mark a maximum depth of 1/8 inch. This is enough to catch cooking drips while keeping the project forgiving. A deeper dish removes more material and can weaken the rim, especially if the blank contains a knot or short grain.
Clamp the workpiece to a solid bench or router mat. Keep the clamps outside the cutting area. Before routing, confirm that the bit is tight, the router base is clear, and the cord cannot enter the bit path. Wear eye protection and hearing protection, and use dust collection or a dust mask rated for fine wood dust.
Route the Recess in Shallow Passes
Set the router for a cut of about 1/16 inch on the first pass. Start near the center of the layout and work outward in overlapping oval passes. Keep the router moving steadily; stopping in one place can burn the wood or create a deep spot.
Make a second pass to reach the final depth. If the bit is 1/4 inch wide, overlap each path by roughly half the bit width. Do not plunge directly to full depth. Multiple shallow passes are slower but give you better control and reduce tear-out.
Keep the router base flat. Tilting it at the edge is a common failure mode and produces a gouge in the rim. Stop before the bit reaches the layout line, then make a final light pass around the perimeter. If the dish is slightly uneven, sand it by hand with 120-grit paper wrapped around a small foam pad or rounded block.
Sand, Ease, and Finish
Sand the outside edges with 120 grit, then 180 and 220 grit. Break every sharp edge with a few light strokes. Inside the dish, sand with the grain where possible, then remove dust with a vacuum and a clean, slightly damp cloth. Do not flood the recessed area with water; raised grain can make the dish rough again.
Apply a thin coat of a food-safe wood finish for cutting boards. Drying oils are simple and inexpensive, but they need time to cure and may require several coats. Follow the label rather than assuming “natural” means food-safe. Avoid ordinary furniture varnish unless the manufacturer specifically approves it for food-contact surfaces.
Wipe off excess finish after the time stated on the label. Let the spoon rest cure fully—often several days—before putting it near food or heat. If the surface feels dry after the first coat, apply another thin coat. A food-grade beeswax wood finish can be used as a top treatment over a compatible cured oil, but it is optional and will not repair a rough surface.
Use and Maintenance
Place the spoon rest on a level counter, not directly over a burner. Wash it by hand with warm water and mild dish soap, then dry it upright. Do not soak it, put it in a dishwasher, or leave it beside a sink. Water entering the end grain can cause swelling and small cracks.
When the wood looks pale or feels dry, clean it, let it dry completely, and apply another thin coat of the same finish. If the dish develops a deep crack, strong odor, or rough splintered area, retire it rather than trying to disguise the damage with more finish.