What's inside
As an Amazon Associate I earn from qualifying purchases. This post may contain affiliate links at no extra cost to you.
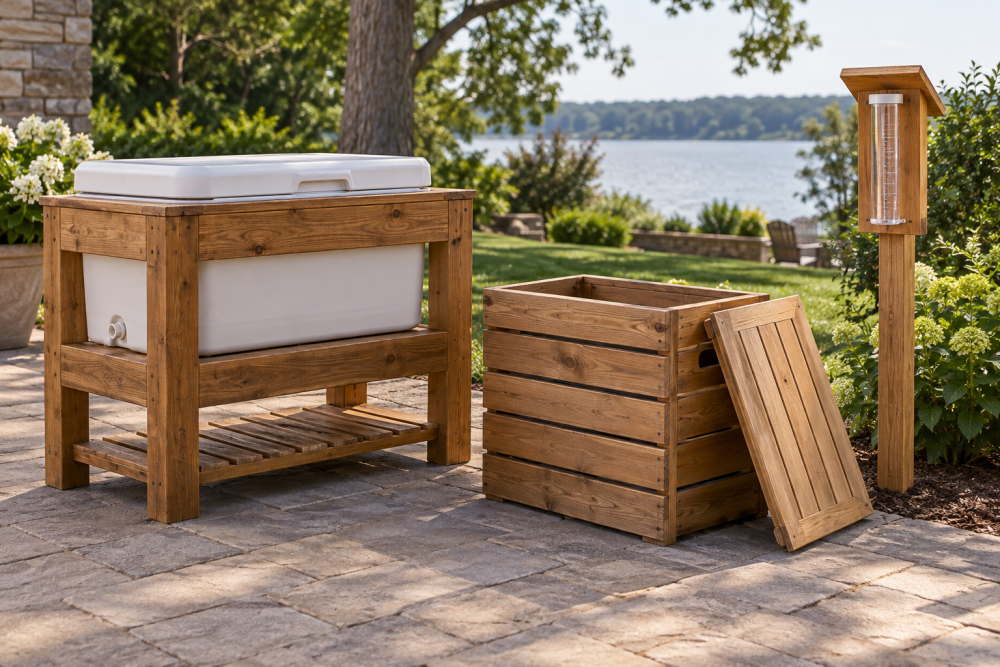
A wooden cooler stand keeps a heavy chest off the ground and puts its lid closer to waist height. The drain opening is the part that needs the most planning: it must line up with the cooler’s outlet, clear the stand’s frame and let you reach the plug without tipping a full cooler. Measure your cooler before cutting; dimensions vary even among chests with similar stated capacities.
Contents
Plan and measure
Use the cooler’s outside length and width to size the top, then check the drain location with the cooler sitting in its intended position. Measure from the cooler’s edges to the center of the outlet, and note how far the spigot or plug projects. A practical stand is often 2–4 inches wider and longer than the cooler, but leave enough room for its handles and lid to open.
For height, consider the cooler’s own height and the height of the people using it. A stand around 18–24 inches tall suits many patio setups, but a shorter stand is steadier and easier to load. A full cooler is heavy: estimate its loaded weight and avoid a tall, narrow base. If you expect it to hold 150 pounds or more, use sound structural lumber, strong corner joints and a broad footprint.
Materials and tools
For a basic stand, use rot-resistant lumber such as cedar, or ordinary construction lumber that you seal and keep out of standing water. A typical build uses 2-by-4 stock for the frame and legs, plus 1-by-4 boards for a slatted top. Choose straight boards without large loose knots near joints. You’ll also need exterior-rated screws, a drill, saw, tape measure, square and clamps. A box of exterior wood screws is preferable to interior drywall screws, which can corrode and snap outdoors.
Pick the drain-opening method before assembling the top. A hole saw makes a clean round opening, while a jigsaw can cut a larger notch or a shape that clears an awkward outlet. Check the cooler’s manual if the plug assembly is removable; do not assume it can be unscrewed without leaking.
Choose a top that suits the drain
| Top style | Advantages | Trade-offs |
|---|---|---|
| Slatted boards | Easy to build, drains rainwater, simple to repair | Small gaps can catch debris; boards need even support |
| One solid panel | Continuous support and a tidy surface | Water can pool; the drain opening needs accurate placement |
| Panel with a drain notch | Leaves room for a protruding spigot | Removes support near an edge; reinforce the cut area |
Slats are a good default for an outdoor stand. Space them about ¼ inch apart so rain can escape, and put a cross support beneath the cooler’s base. If using a solid panel, seal all faces and edges, including the inside of the drain cut, and give the surface a slight fall away from the house rather than toward it. A penetrating exterior wood sealer can slow water uptake, but it does not make untreated joints waterproof.
Build the frame
Cut two long rails and two end rails to form a rectangle sized to support the cooler. For example, if the cooler measures 30 by 18 inches, a top around 34 by 22 inches gives roughly 2 inches of margin on each side. Adjust for handles and the drain. Screw the rails together with two exterior screws at each corner, predrilling near board ends to reduce splitting. Check the frame for square by comparing its diagonal measurements; they should match.
Cut four legs to the chosen height. Fasten one inside each corner, with the legs bearing against both rails. Add a lower rectangular brace between the legs, about 4–6 inches above the ground. This keeps the stand from racking when someone leans on it. If the stand will sit on uneven patio stones, fit adjustable feet or trim the legs to the actual surface; rocking can loosen joints over time.
Cut the drainage opening
Set the cooler on the assembled frame and mark the outlet’s center on the top. Remove the cooler, then check beneath the mark: a rail or cross support must not block access. Mark the opening slightly larger than the outlet’s widest part—usually about ½ inch of clearance around a plug is enough. For a hole saw, secure the board and drill from the visible face until the pilot bit emerges, then finish from the other side to reduce tear-out. For a notch, drill rounded corners first and connect them with a jigsaw cut.
Do not cut through a structural rail just to reach the drain. Move the cooler slightly if its shape and handles allow, or use a top notch that preserves the frame. Sand the cut edges and test the fit before attaching the top. The drain should be reachable by hand, and any plug should turn or pull free without rubbing the wood. If water must drain into a bucket, leave enough room below the outlet for the bucket and a short hose.
Attach the top and test the stand
Fasten slats with two screws at each support, keeping the gaps consistent with small spacer scraps. Leave a little clearance at the ends for seasonal movement. Attach a solid panel with screws into the frame, not just the slats or trim. Set the cooler in place, fill it partway with water or other weight, and check for wobble, sagging and drain access before loading it fully. Tighten loose fasteners and add a brace if the frame shifts sideways.
Finish and maintain
Round sharp corners and sand splinters, especially around the opening where hands will reach. Apply an outdoor finish according to its label and let it cure fully before setting the cooler on it. Keep the stand on a firm, level surface, and empty water trapped beneath the cooler after use. Inspect the legs and joints each season; replace split boards rather than relying on extra screws to hold damaged wood together. For a covered patio and occasional use, basic sealed construction lumber is often sufficient. Cedar costs more but is a sensible choice if the stand will stay exposed to weather year-round.