What's inside
As an Amazon Associate I earn from qualifying purchases. This post may contain affiliate links at no extra cost to you.
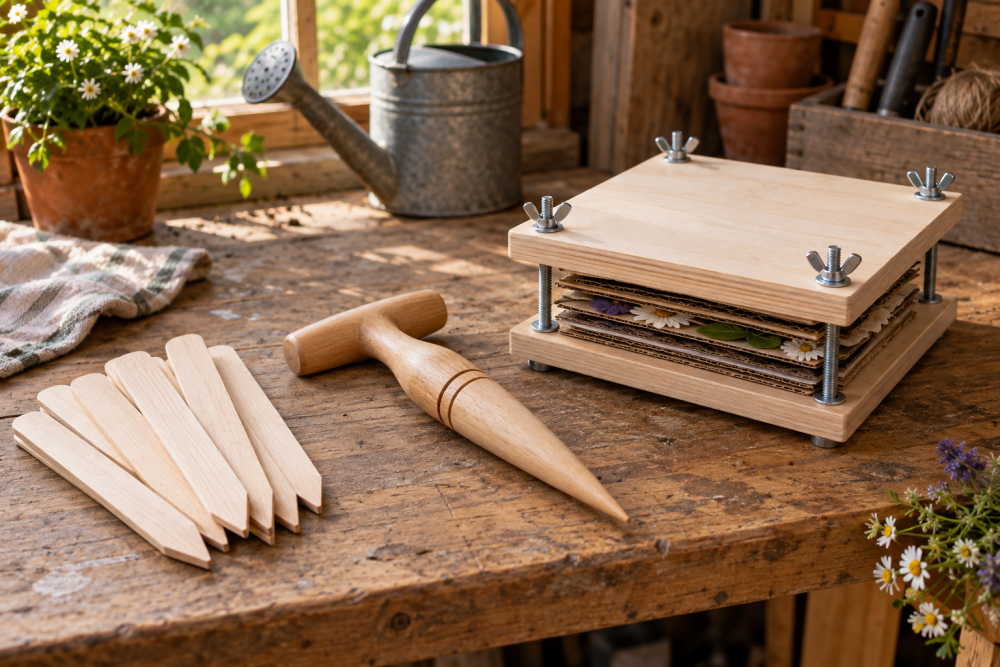
A wooden leaf press is a simple project: two flat plates, a stack of absorbent paper, and threaded rods that let you apply even pressure. The main challenge is keeping the plates parallel as you tighten the nuts. A press that racks or bows can leave leaves wrinkled at the edges or crush delicate specimens in the middle.
Contents
Materials and sizing
For a useful general-purpose press, make the plates about 12 × 12 inches from 3/4-inch plywood. This fits common paper sheets and most garden leaves while staying manageable to carry. Use exterior-grade or cabinet-grade plywood with flat faces; avoid thin underlayment, which can warp under pressure. Two layers of 1/2-inch plywood glued together are another option, but the extra glue-up is worthwhile only if you already have the material.
Buy four 3/8-inch-diameter threaded rods, each about 14 inches long, with matching nuts and washers. Four rods resist twisting better than two and leave room for a paper stack. Zinc-plated steel is adequate indoors; stainless steel costs more and is useful if the press will be stored somewhere damp. Search for 3/8-inch threaded rod by diameter and length, and confirm that the nuts match the rod thread.
You will also need absorbent sheets, such as blotter paper or plain uncoated paper, cut slightly smaller than the plates. Corrugated cardboard between paper layers improves airflow. Avoid glossy or coated paper, which holds moisture against the leaves.
Tools and material trade-offs
| Choice | Good for | Trade-off |
|---|---|---|
| 3/4-inch plywood plates | Most hobby use | Affordable and stable enough if flat; edges can splinter. |
| 1-inch plywood or laminated plates | Frequent use or larger press | Stiffer, but heavier and usually more expensive. |
| 3/8-inch rods | 12-inch plates | Plenty for hand-tightening; exposed threads can snag. |
| 1/2-inch rods | Oversized or heavily loaded press | More rigid, but bulkier and harder to adjust. |
A drill, square, tape measure, pencil, and wrench are enough for the build. A drill press helps make straight holes, but a hand drill works if you mark carefully and keep the bit square to the plate. A brad-point bit set can reduce wandering in plywood, though a standard sharp twist bit is fine for these clearance holes.
Cut and mark the plates
Cut two matching 12 × 12-inch squares. If you do not have a saw, most lumberyards can make straight cuts; check that both plates are the same size before drilling. Sand the faces and ease the corners, but keep the faces flat. Do not round over the working surface.
On each plate, mark four rod centers 1 inch in from each corner. Use a square and measure from the same edges on both plates. Drill 7/16-inch holes for 3/8-inch rods. The small clearance gives the rods room to pass through without making the plates sloppy. Clamp scrap plywood beneath each plate to limit tear-out as the bit exits. If you use a larger bit than necessary, the press may shift sideways when tightened.
Assemble the press
Test-fit the rods through both plates before loading the press. If a rod binds, clear the hole rather than forcing it; a rod under sideways stress can tilt the plates. Put a washer and nut on one end of each rod, then place the lower plate onto the rods. Add the paper stack and leaves, followed by the upper plate. Finish each rod with a washer and nut.
For easier tightening, use wing nuts, or use regular nuts with a wrench. Wing nuts are convenient for light, repeated adjustments but can be tiring under high pressure. A matching wing-nut and washer set is a practical choice if you want to adjust the press without tools. Washers spread the load and help prevent nuts from digging into the plywood.
Tighten the four corners gradually, alternating diagonally: a few turns at one corner, then the opposite corner, and repeat. Stop when the stack is held firmly and the plates remain parallel. Do not crank the nuts as hard as possible. Excess force can bow the plates, split plywood near a hole, or flatten a thick leaf into a dark, damaged patch.
Load and press leaves
Place each leaf between two sheets of absorbent paper, keeping the stem from pushing a sharp ridge into neighboring specimens. Put cardboard between paper packets to help moisture escape. Arrange leaves in a single layer with space around their edges; overlapping leaves dry unevenly and can stick together.
Check the press after the first day. Replace damp paper, then check daily or every couple of days depending on leaf thickness and humidity. Thin leaves may dry in several days; thick, fleshy leaves can take longer and are more prone to mold. If a specimen smells musty or shows fuzzy growth, remove it and change the damp materials. Do not seal the wet press in a plastic bag.
Store the press flat in a dry, ventilated place. Tighten it again after the first few hours if the stack compresses, but keep the plates level. A press is not a substitute for drying preparation: wipe off surface water and avoid pressing leaves that are already dirty or soaked.
Maintenance and adjustments
Inspect the plates occasionally for bowing, especially if you press thick stacks. A straightedge across the face will reveal a gap. If a plate flexes noticeably, reduce the stack height or replace it with thicker, flatter plywood. Sand rough hole edges so they do not catch paper, and keep the rods free of rust and debris.
If you need a larger press, increase plate size only when the material and rod layout support it. A 16-inch plate has a longer unsupported span and is more likely to bend; use thicker plates or add a stiffening frame rather than simply tightening harder. For a first build, 12-inch plates and four 3/8-inch rods are a sensible balance of cost, weight, and usable capacity.